1. Introduction
Welcome to SureLink AI! This guide gives you an overview of how to use SureLink AI. SureLink AI is a secure AI solution focusing on document search and creation. It is a great fit for businesses who value an AI tool that has an immediate return on investment.

2. Architecture
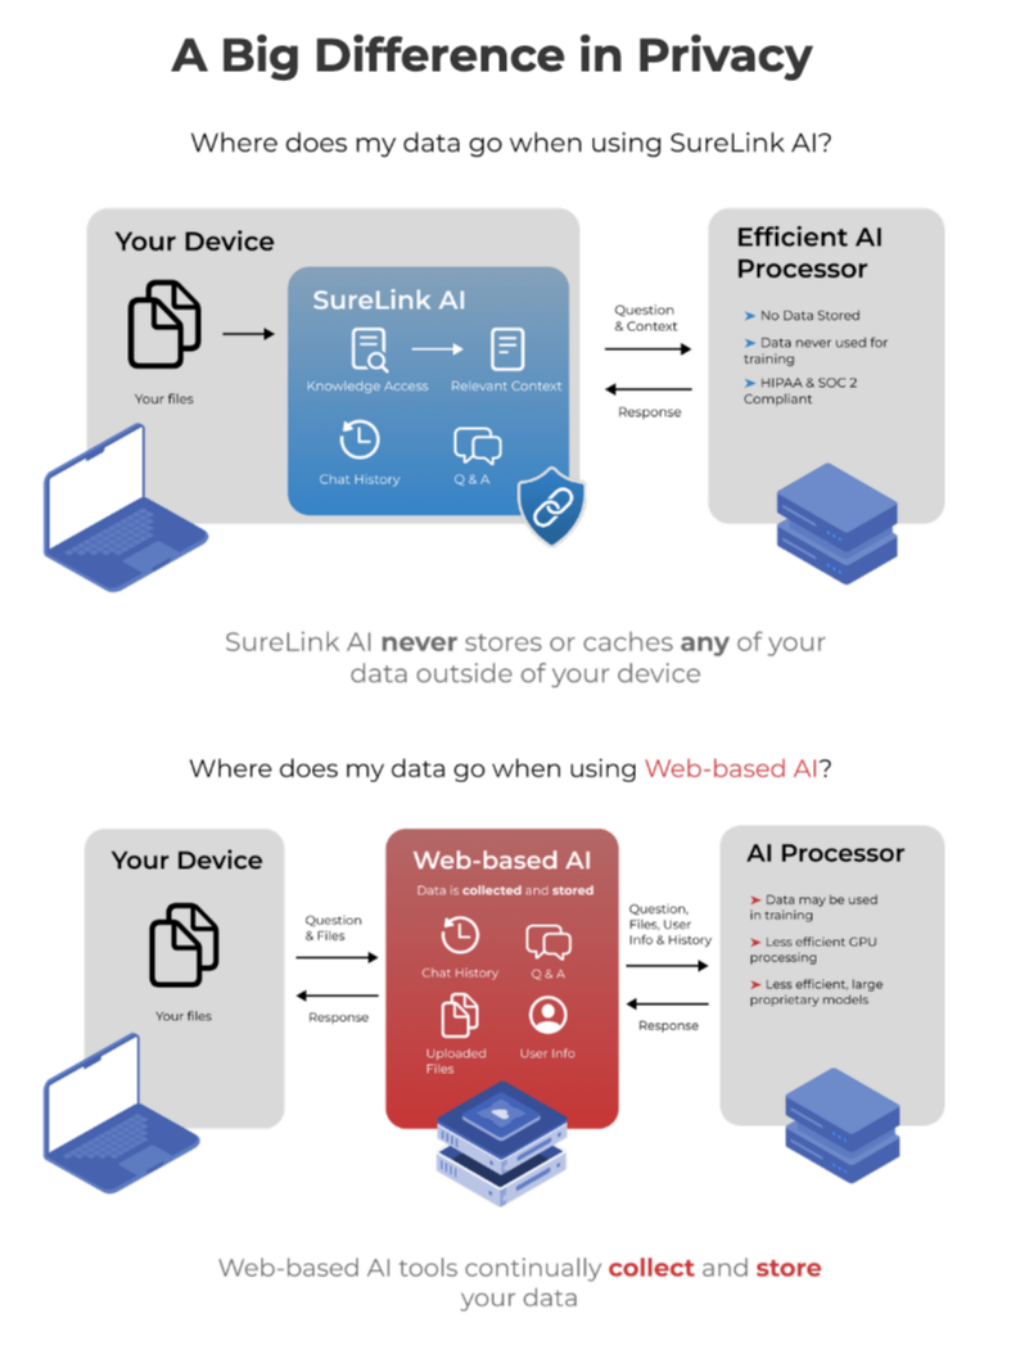
You may be asking yourself, "how is SureLink AI different from other tools?" Unlike other cloud solutions, SureLink keeps your data safe by syncing documents entirely on your device. A secure large language processor then encrypts requests in real time — never storing or retaining any data.
3. What is SureLink AI great at?
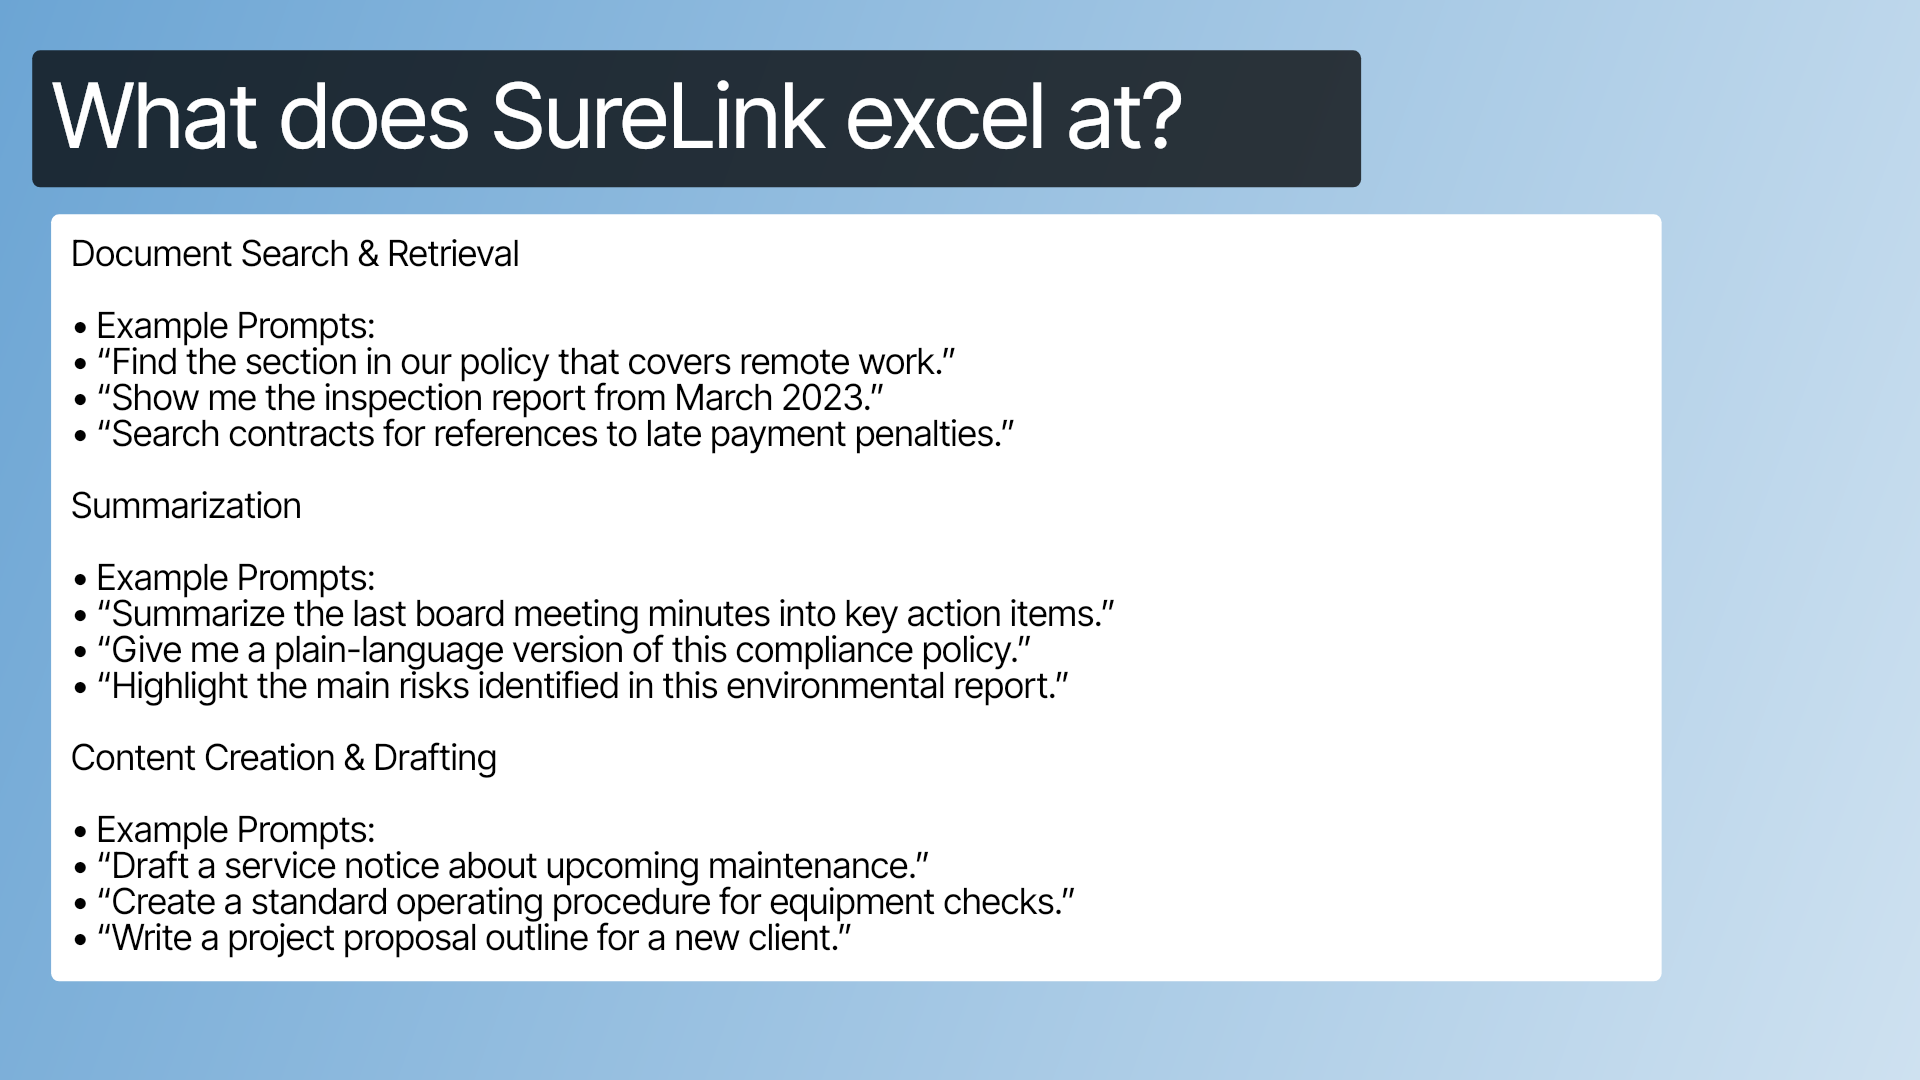
SureLink AI excels at document search, retrieval and creation. This is great for various business needs such as finding fragmented knowledge across network drives, shared folders, and inboxes or drafting repeatable documents such as contracts, engagement letters, and standard operating procedures.
4. How not to use SureLink AI
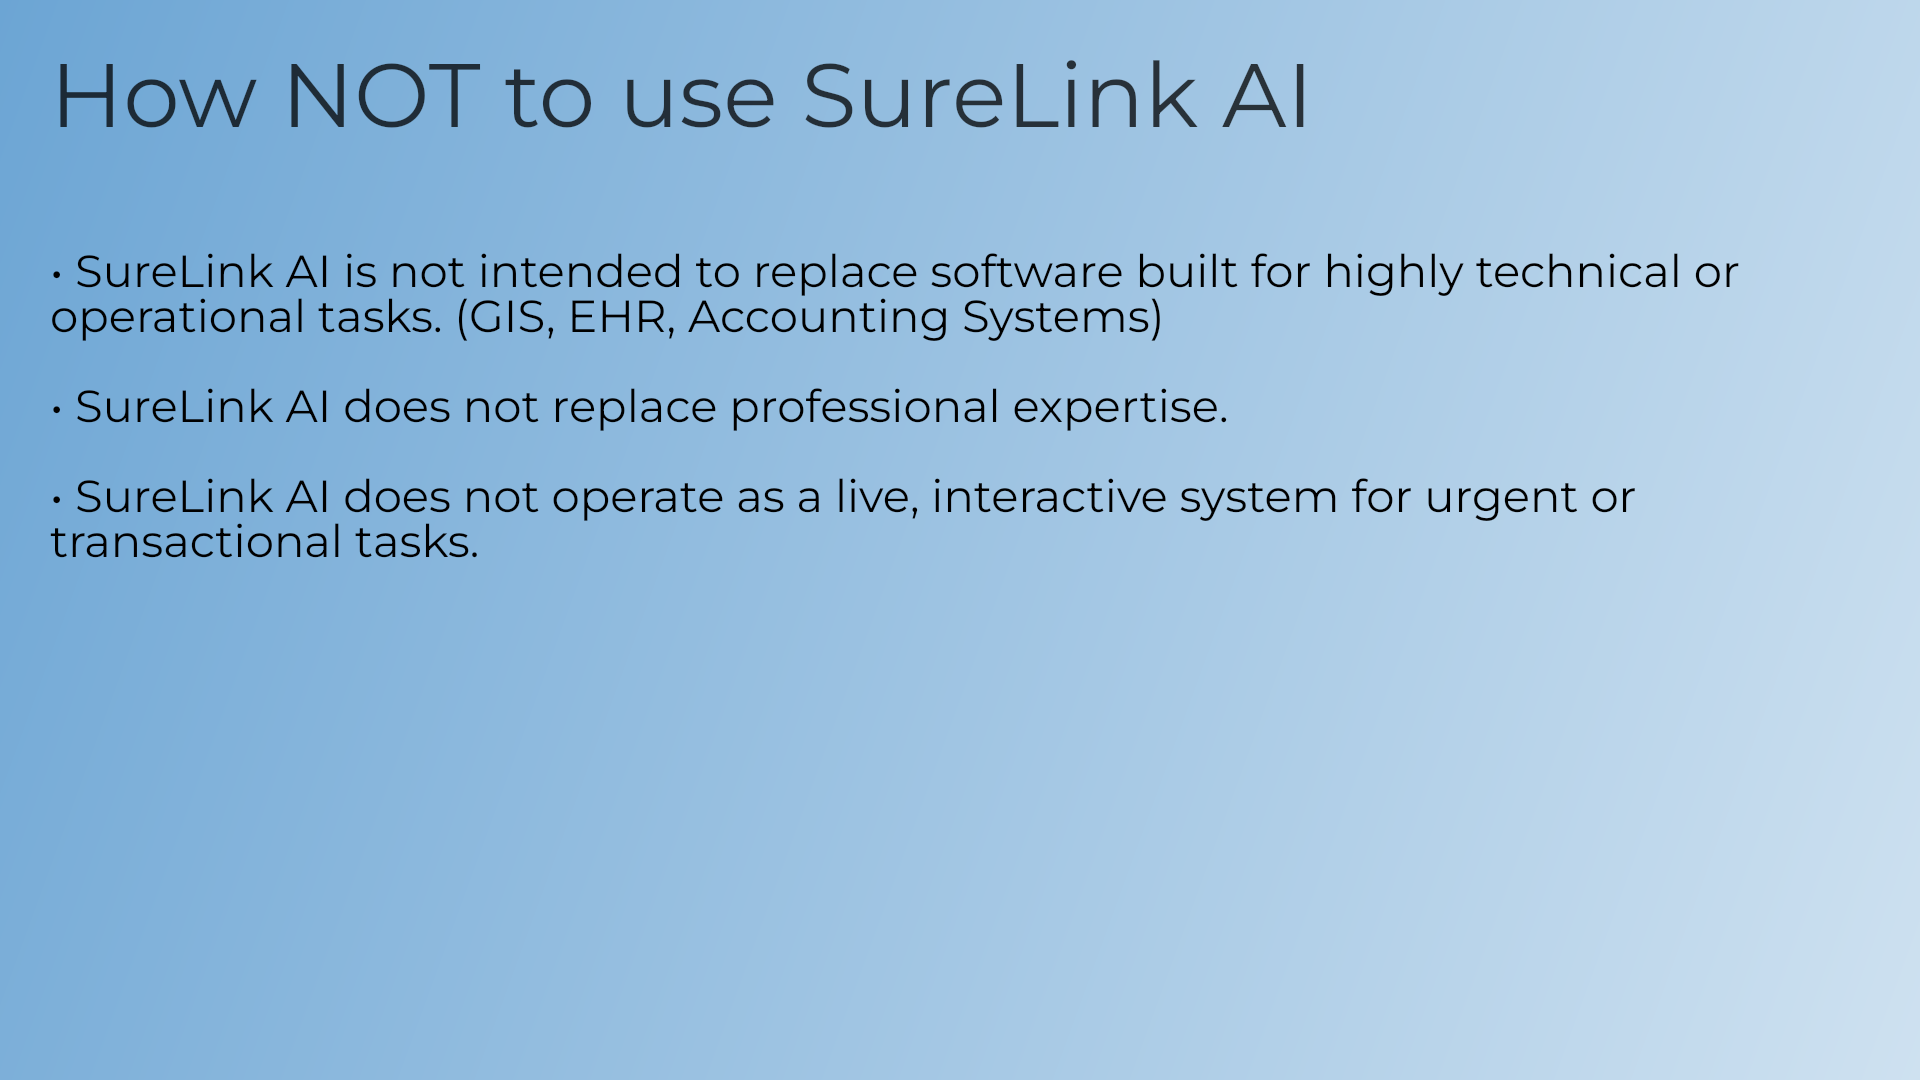
SureLink AI is not meant to solve every task. In fact, there are some workflows we would specifically recommend to not use SureLink for.
This includes replacing highly technical tools, professional expertise, and urgent transactional tasks.
5. Log in
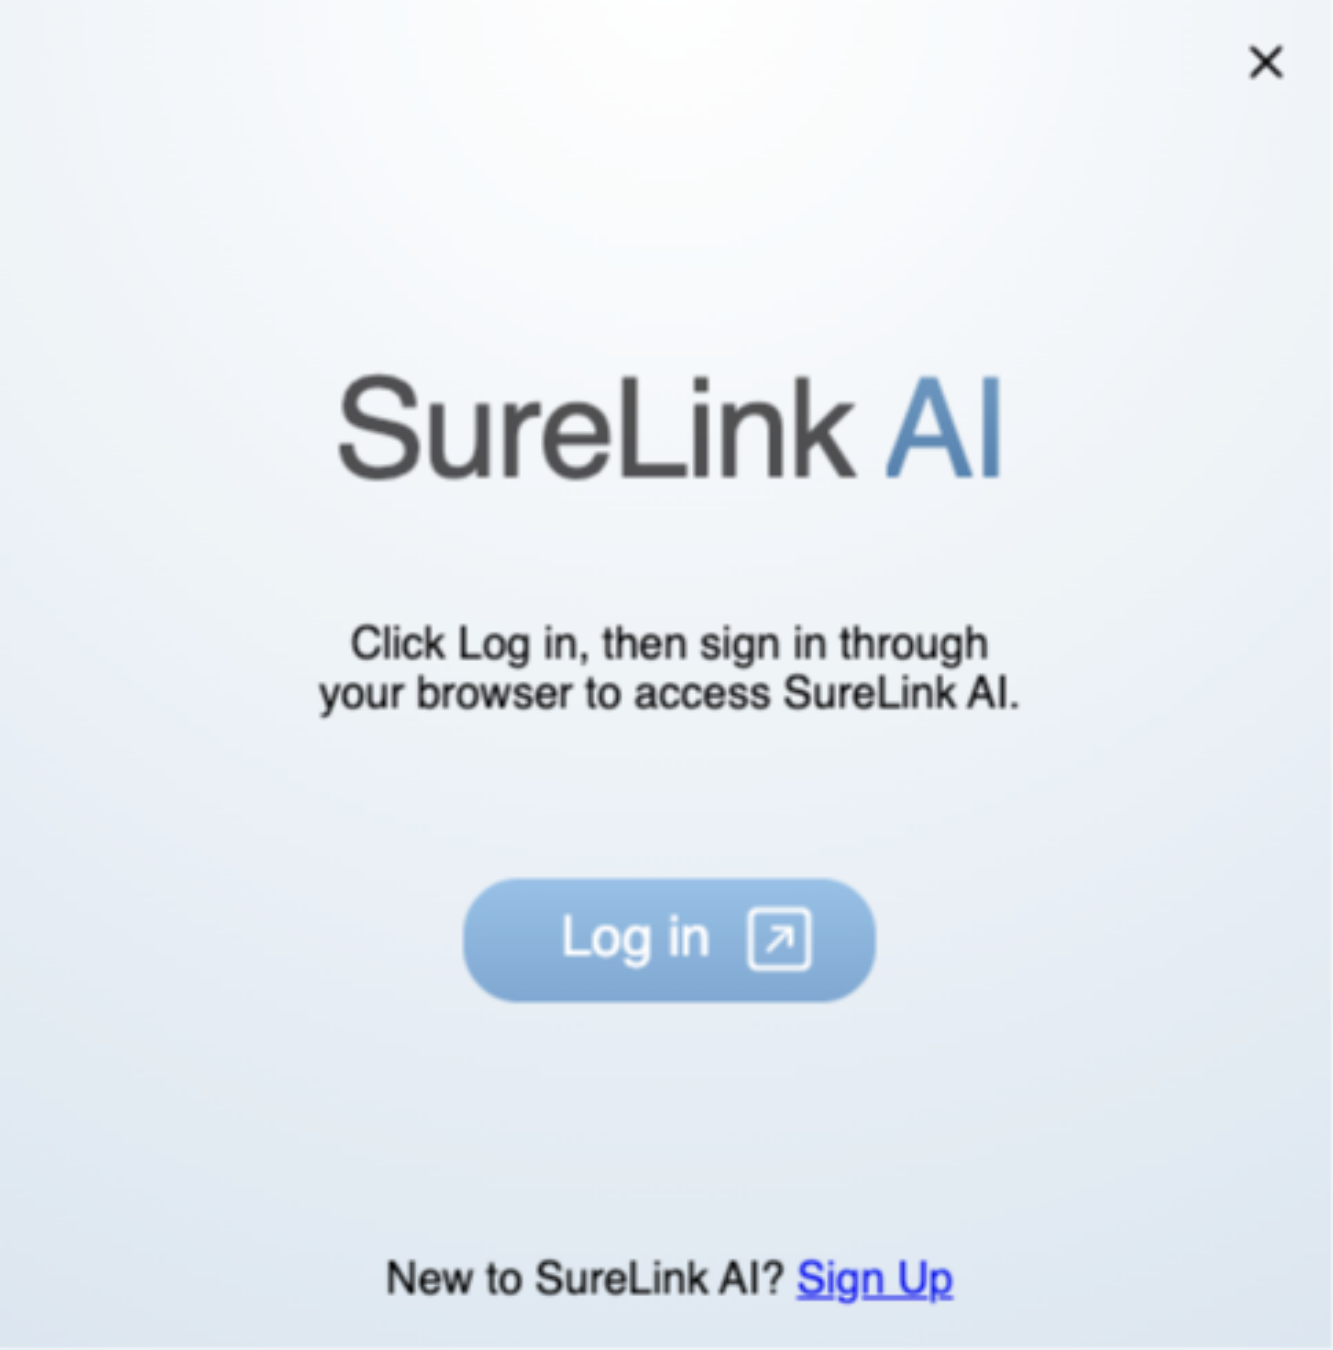
When first launching SureLink, you will need to Log in.
Select the Log in button, enter your credentials, and then follow the browser prompts to redirect back to the application.
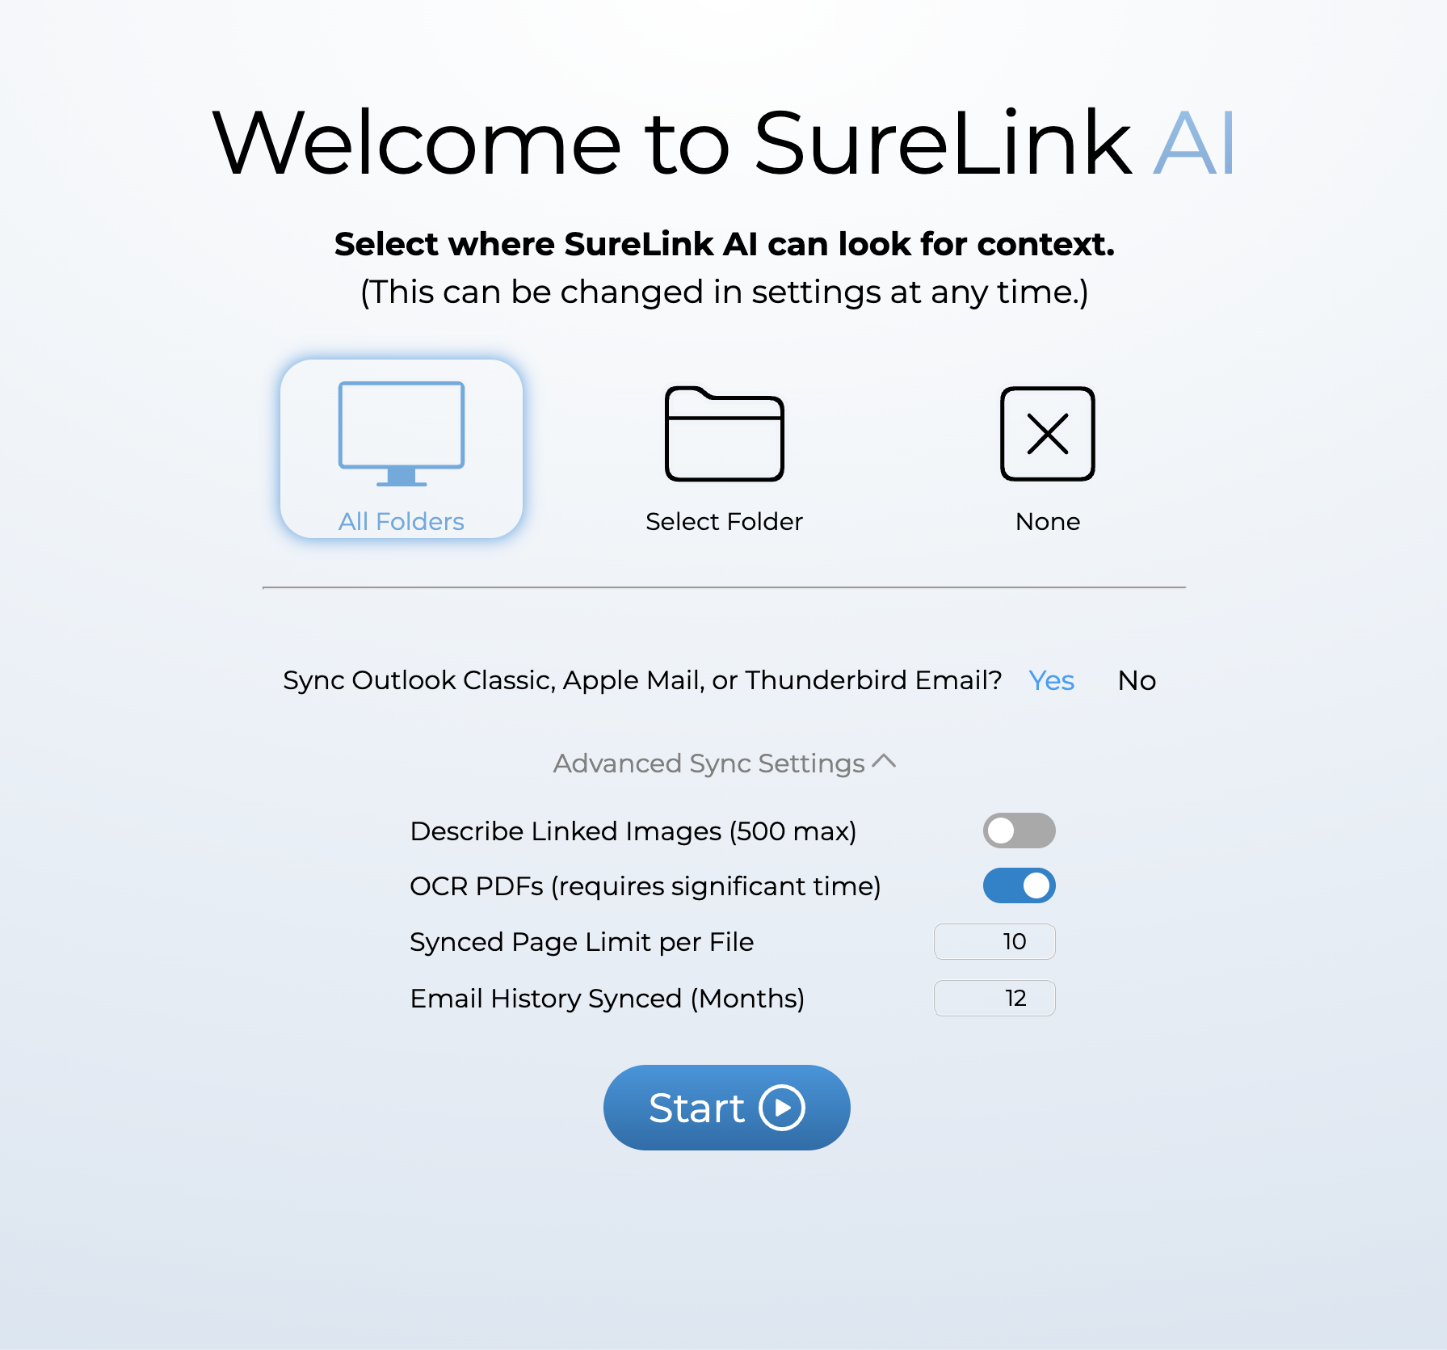
6. Sync
After logging in, the SureLink system will ask you which content it has access to. First select whether you want the system to have full access to all folders, just a select folder, or no folders. Then select if you want the system to access your email. SureLink AI currently supports Outlook Classic, Apple Mail, and Thunderbird. These email apps will need to be installed separately for the integration to work.
Each of these supported email apps can handle multiple inboxes. For example, if you use Apple Mail, you can sync your Google, Outlook, and Yahoo email accounts.
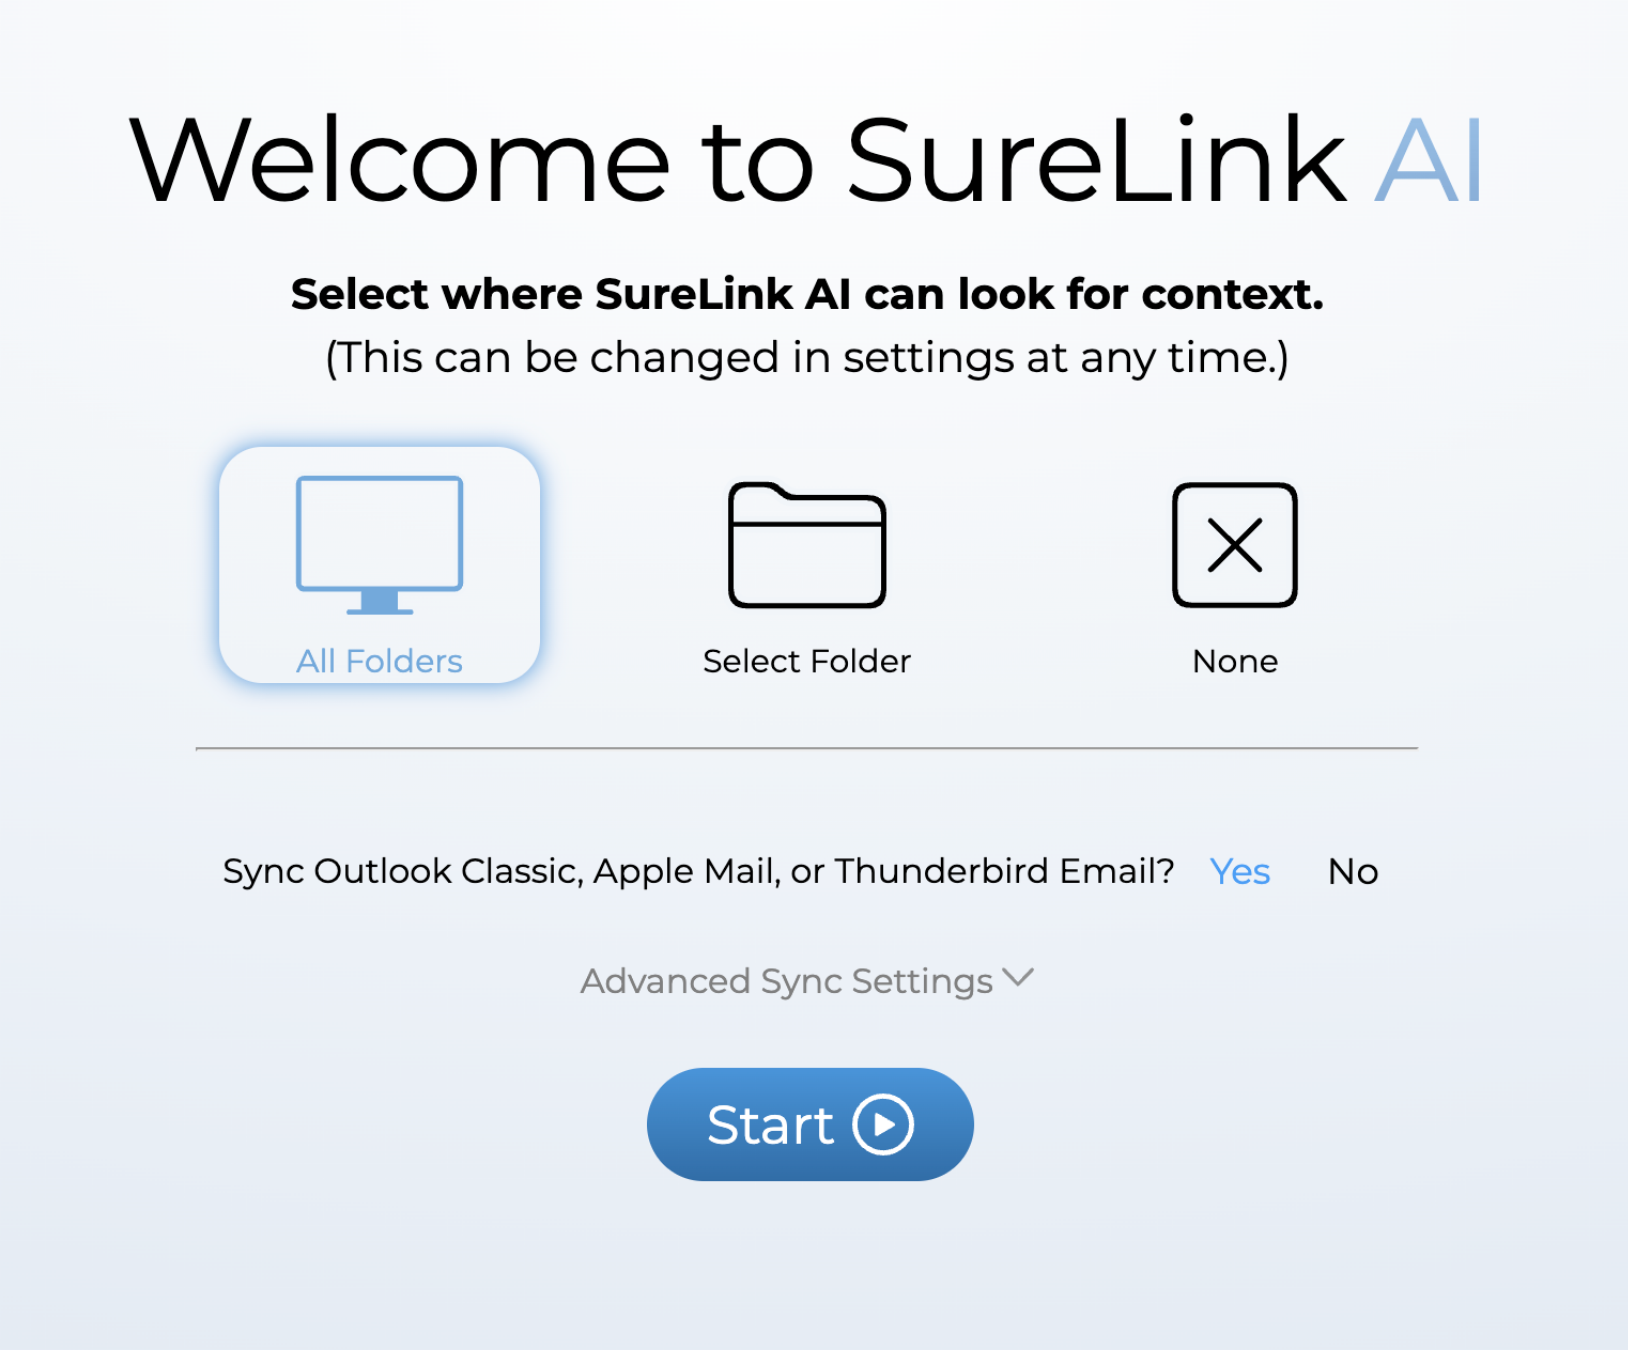
7. Advanced Sync Settings
Lastly, users have the option to access advanced settings. These settings control information such as Image Description, PDF scanning, page limits, and history thresholds. Once you are good with your selections, press Start to begin the syncing process.
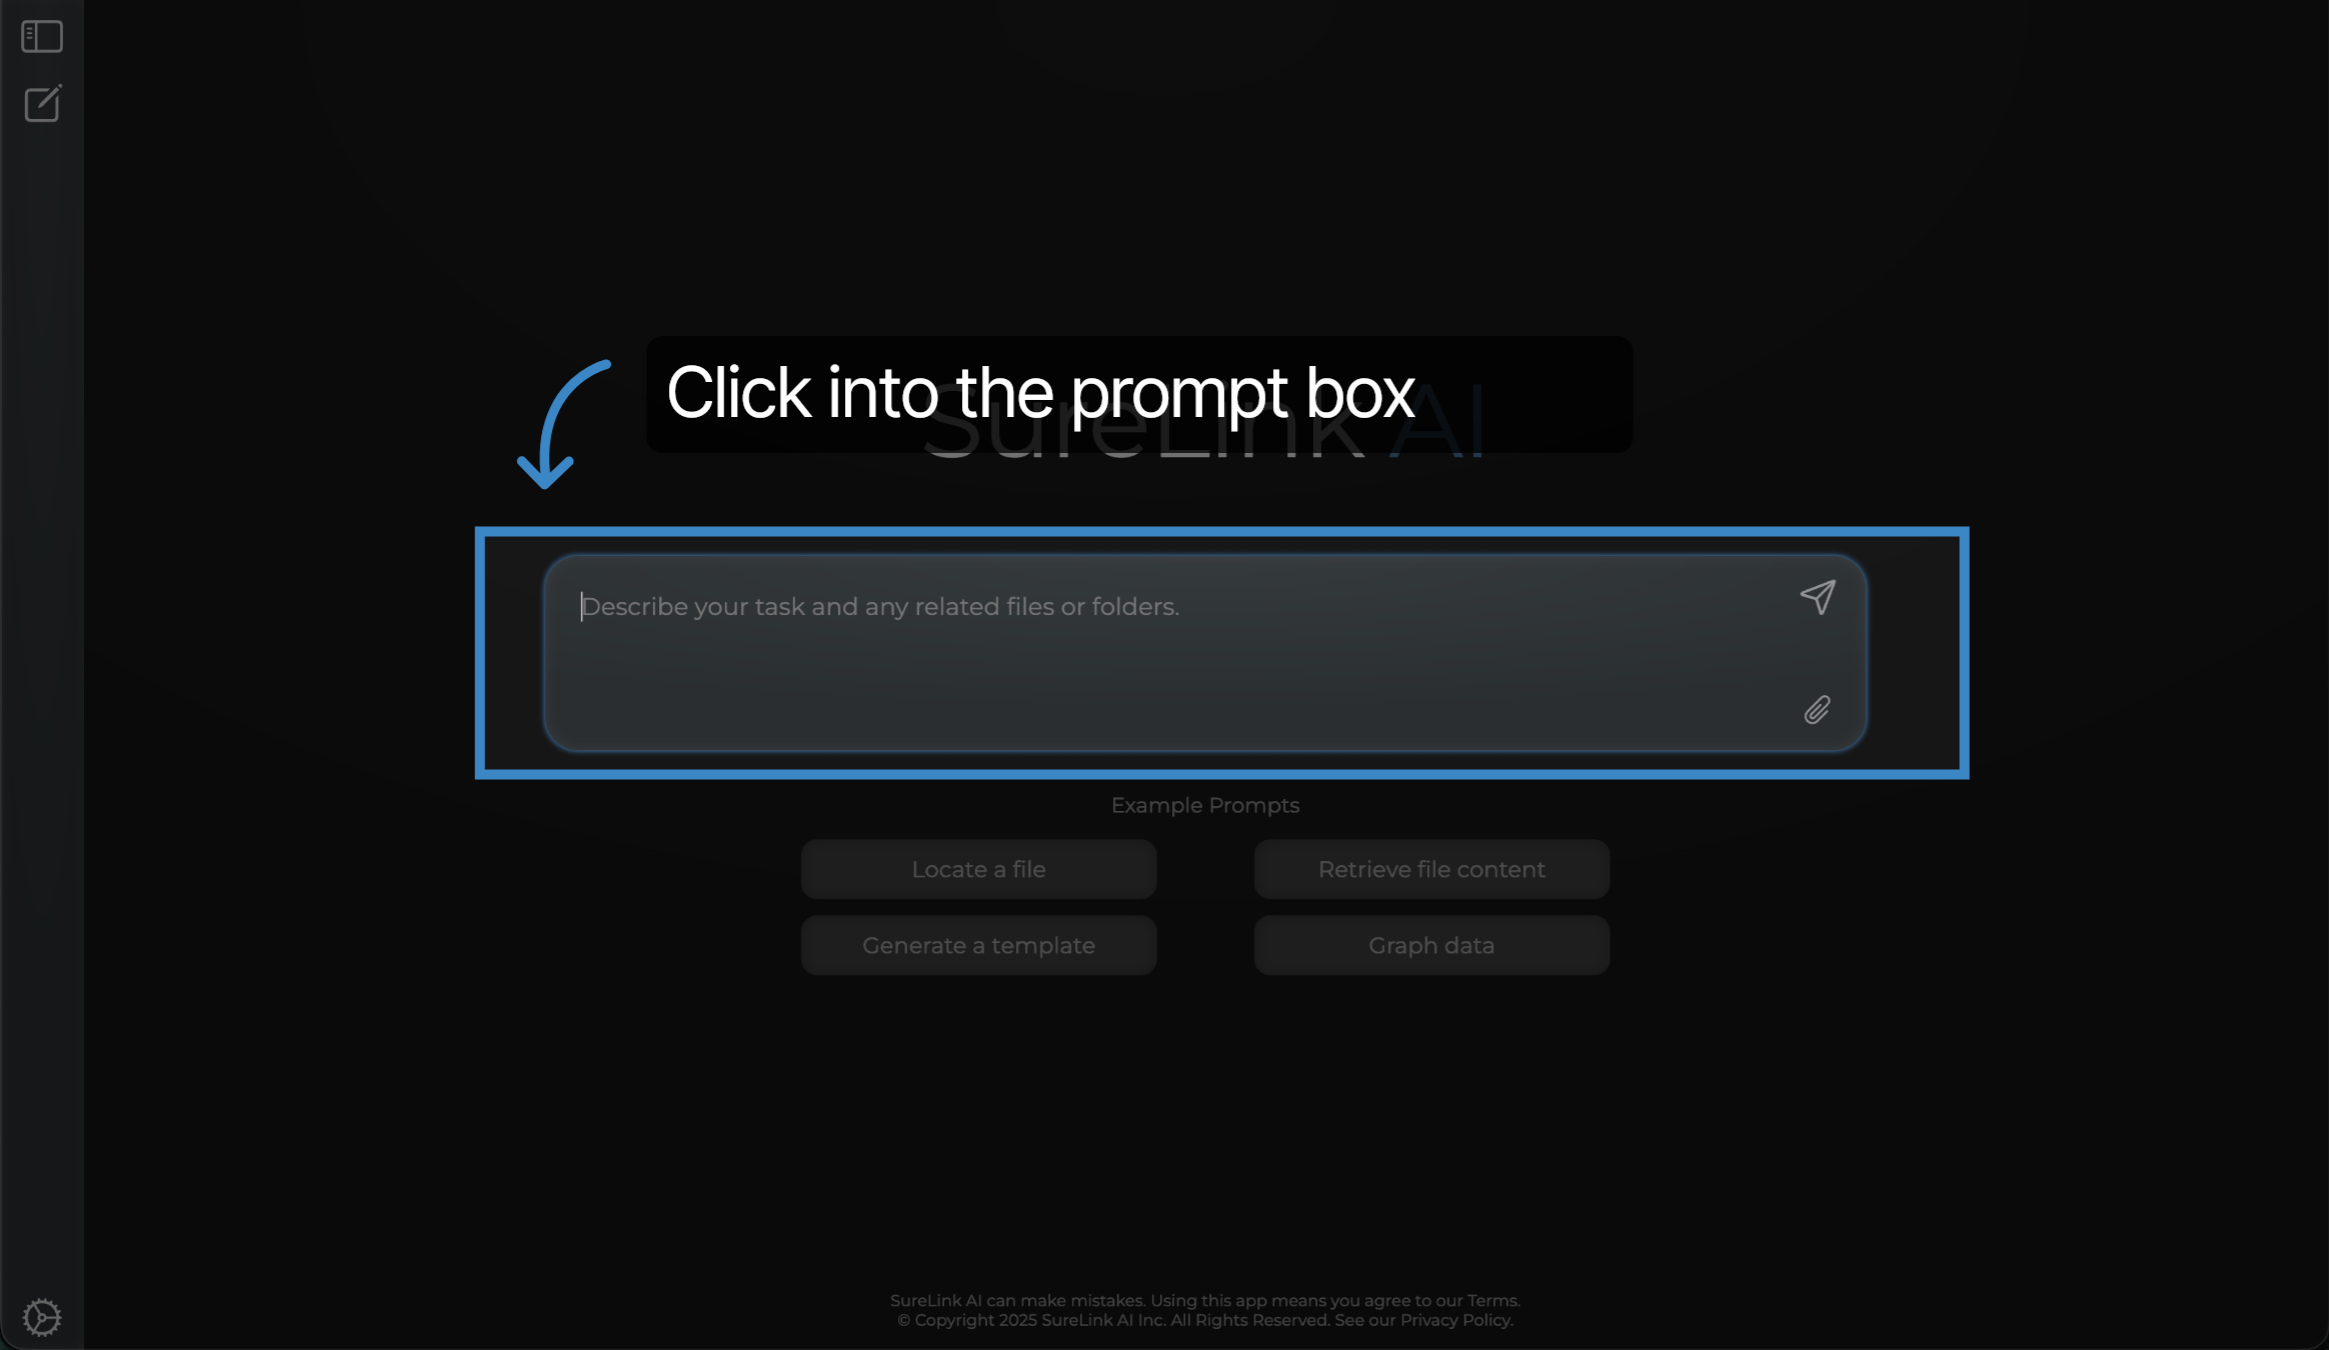
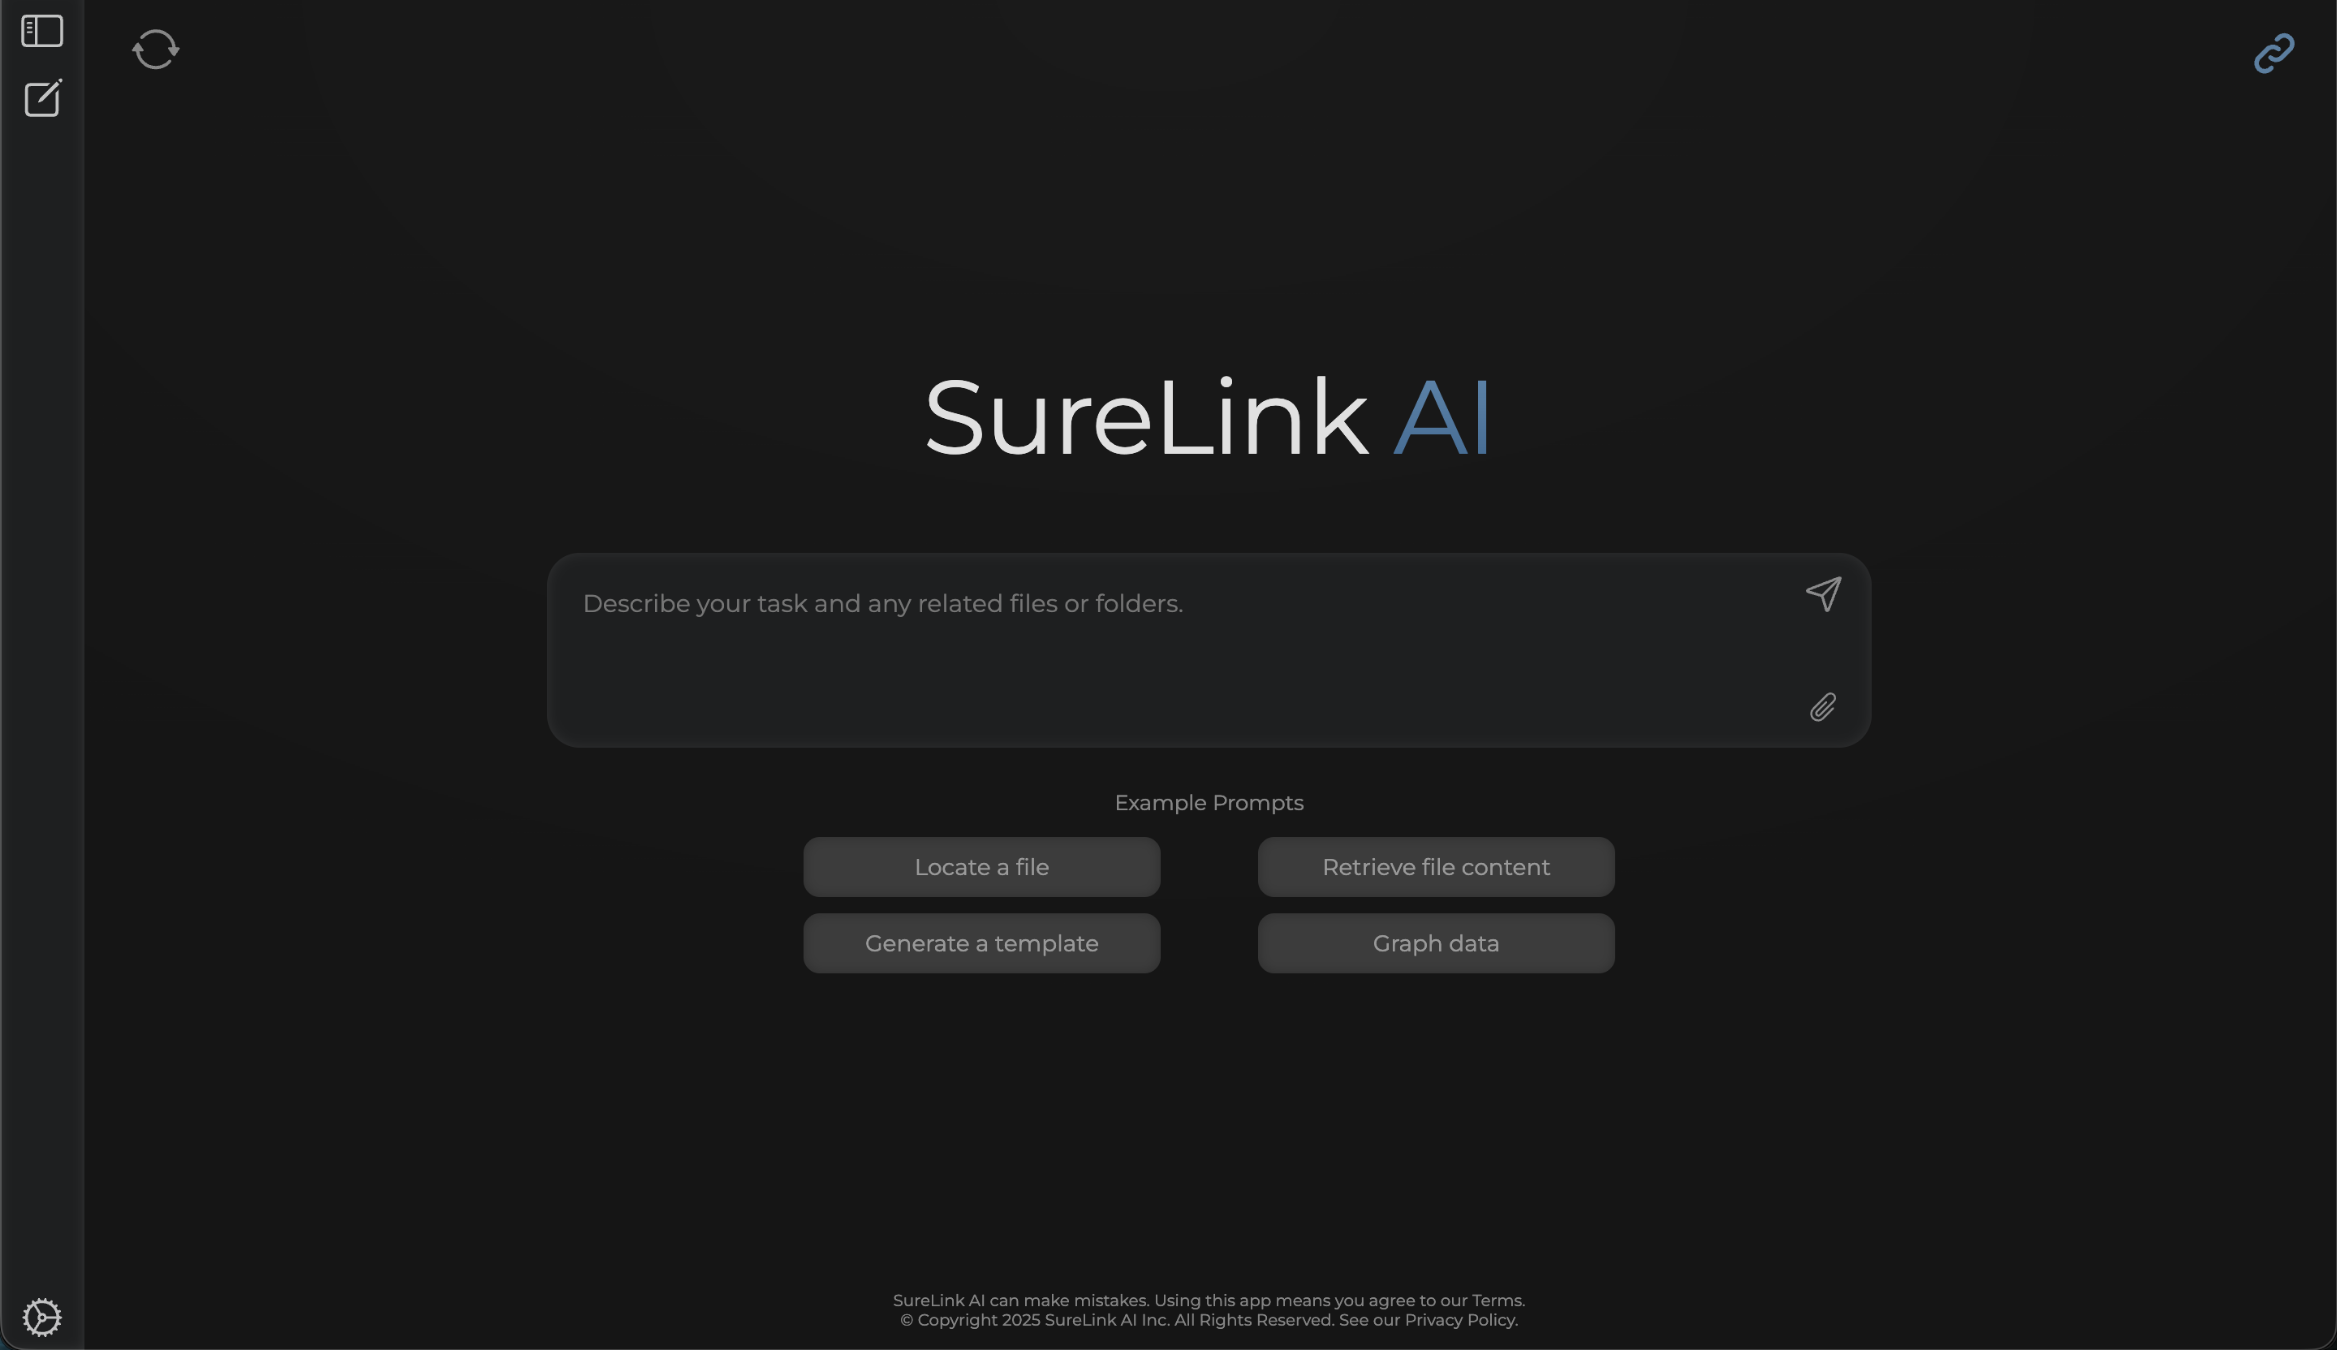
8. Click into the prompt box
Now that we have a good foundational understanding of SureLink's benefits, downloaded the app, and began our sync, let's use the tool by reviewing SureLink's help resources. You can select the prompt box to get started.
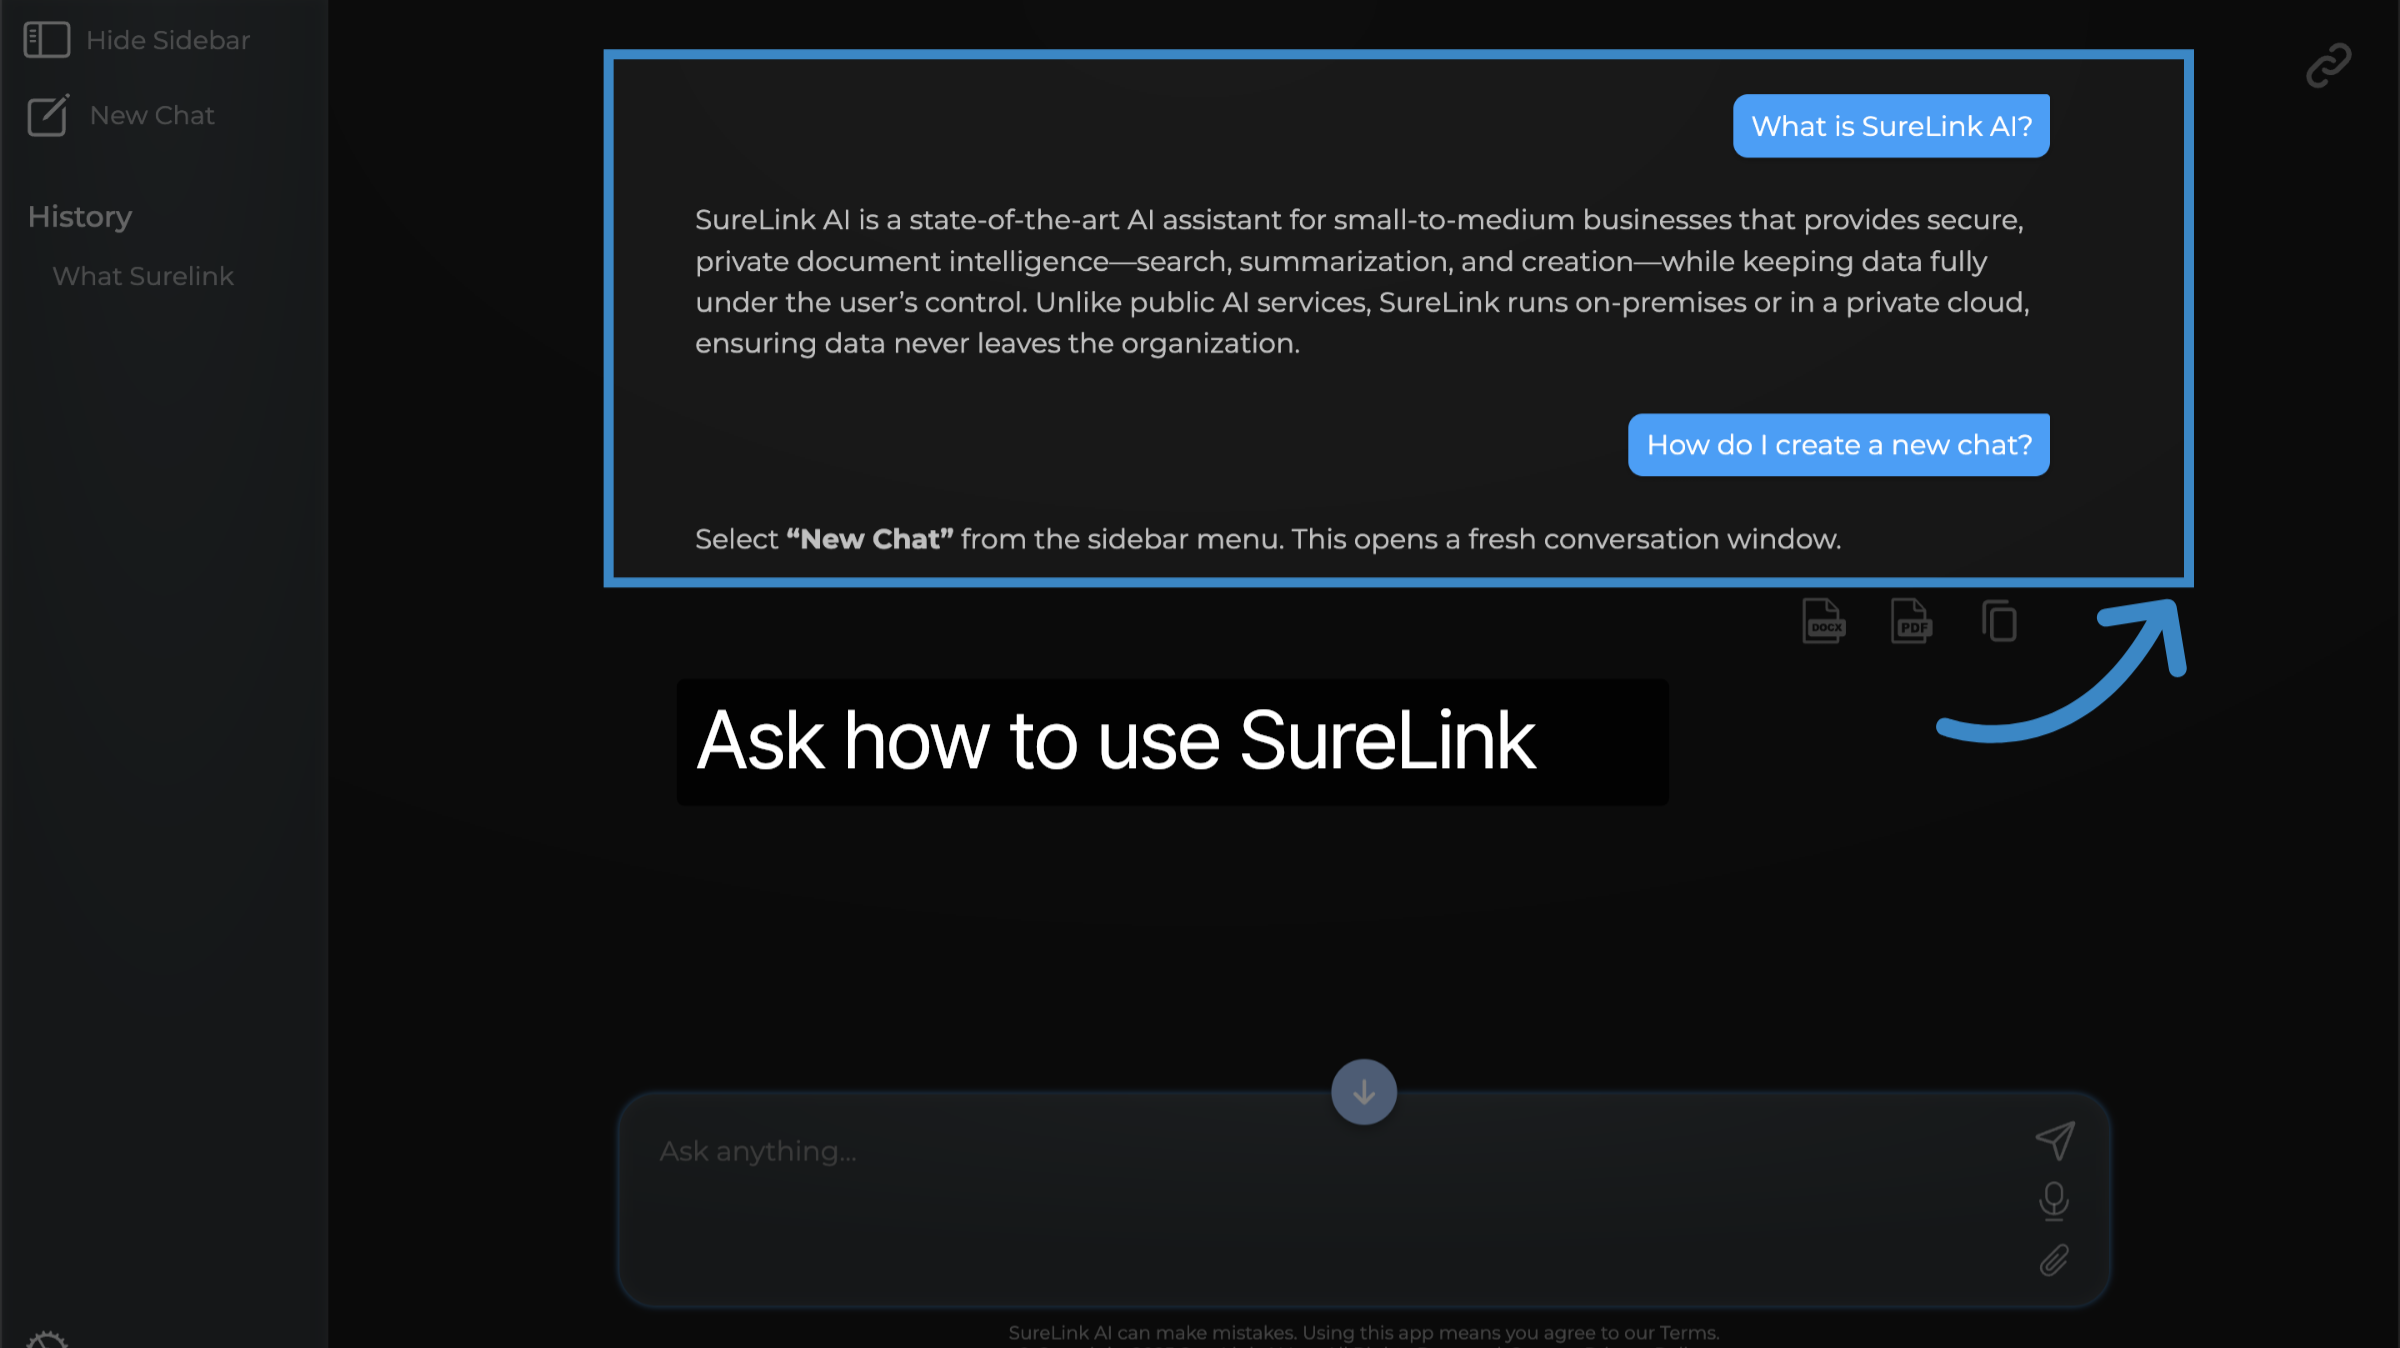
9. Ask how to use SureLink
You can ask any questions about how SureLink works. In this example, I first asked... What is SureLink AI? From this answer, I am able to get a better understanding of what SureLink AI was designed for. I am also able to ask questions about specific functionality. In this example, I then asked... How do I create a new chat? From this answer, I am able to get detailed direction about how to use functionality.
10. Click here
In addition to prompting, you can also access the Help Center by selecting Settings from the sidebar menu and then selecting the Help button.
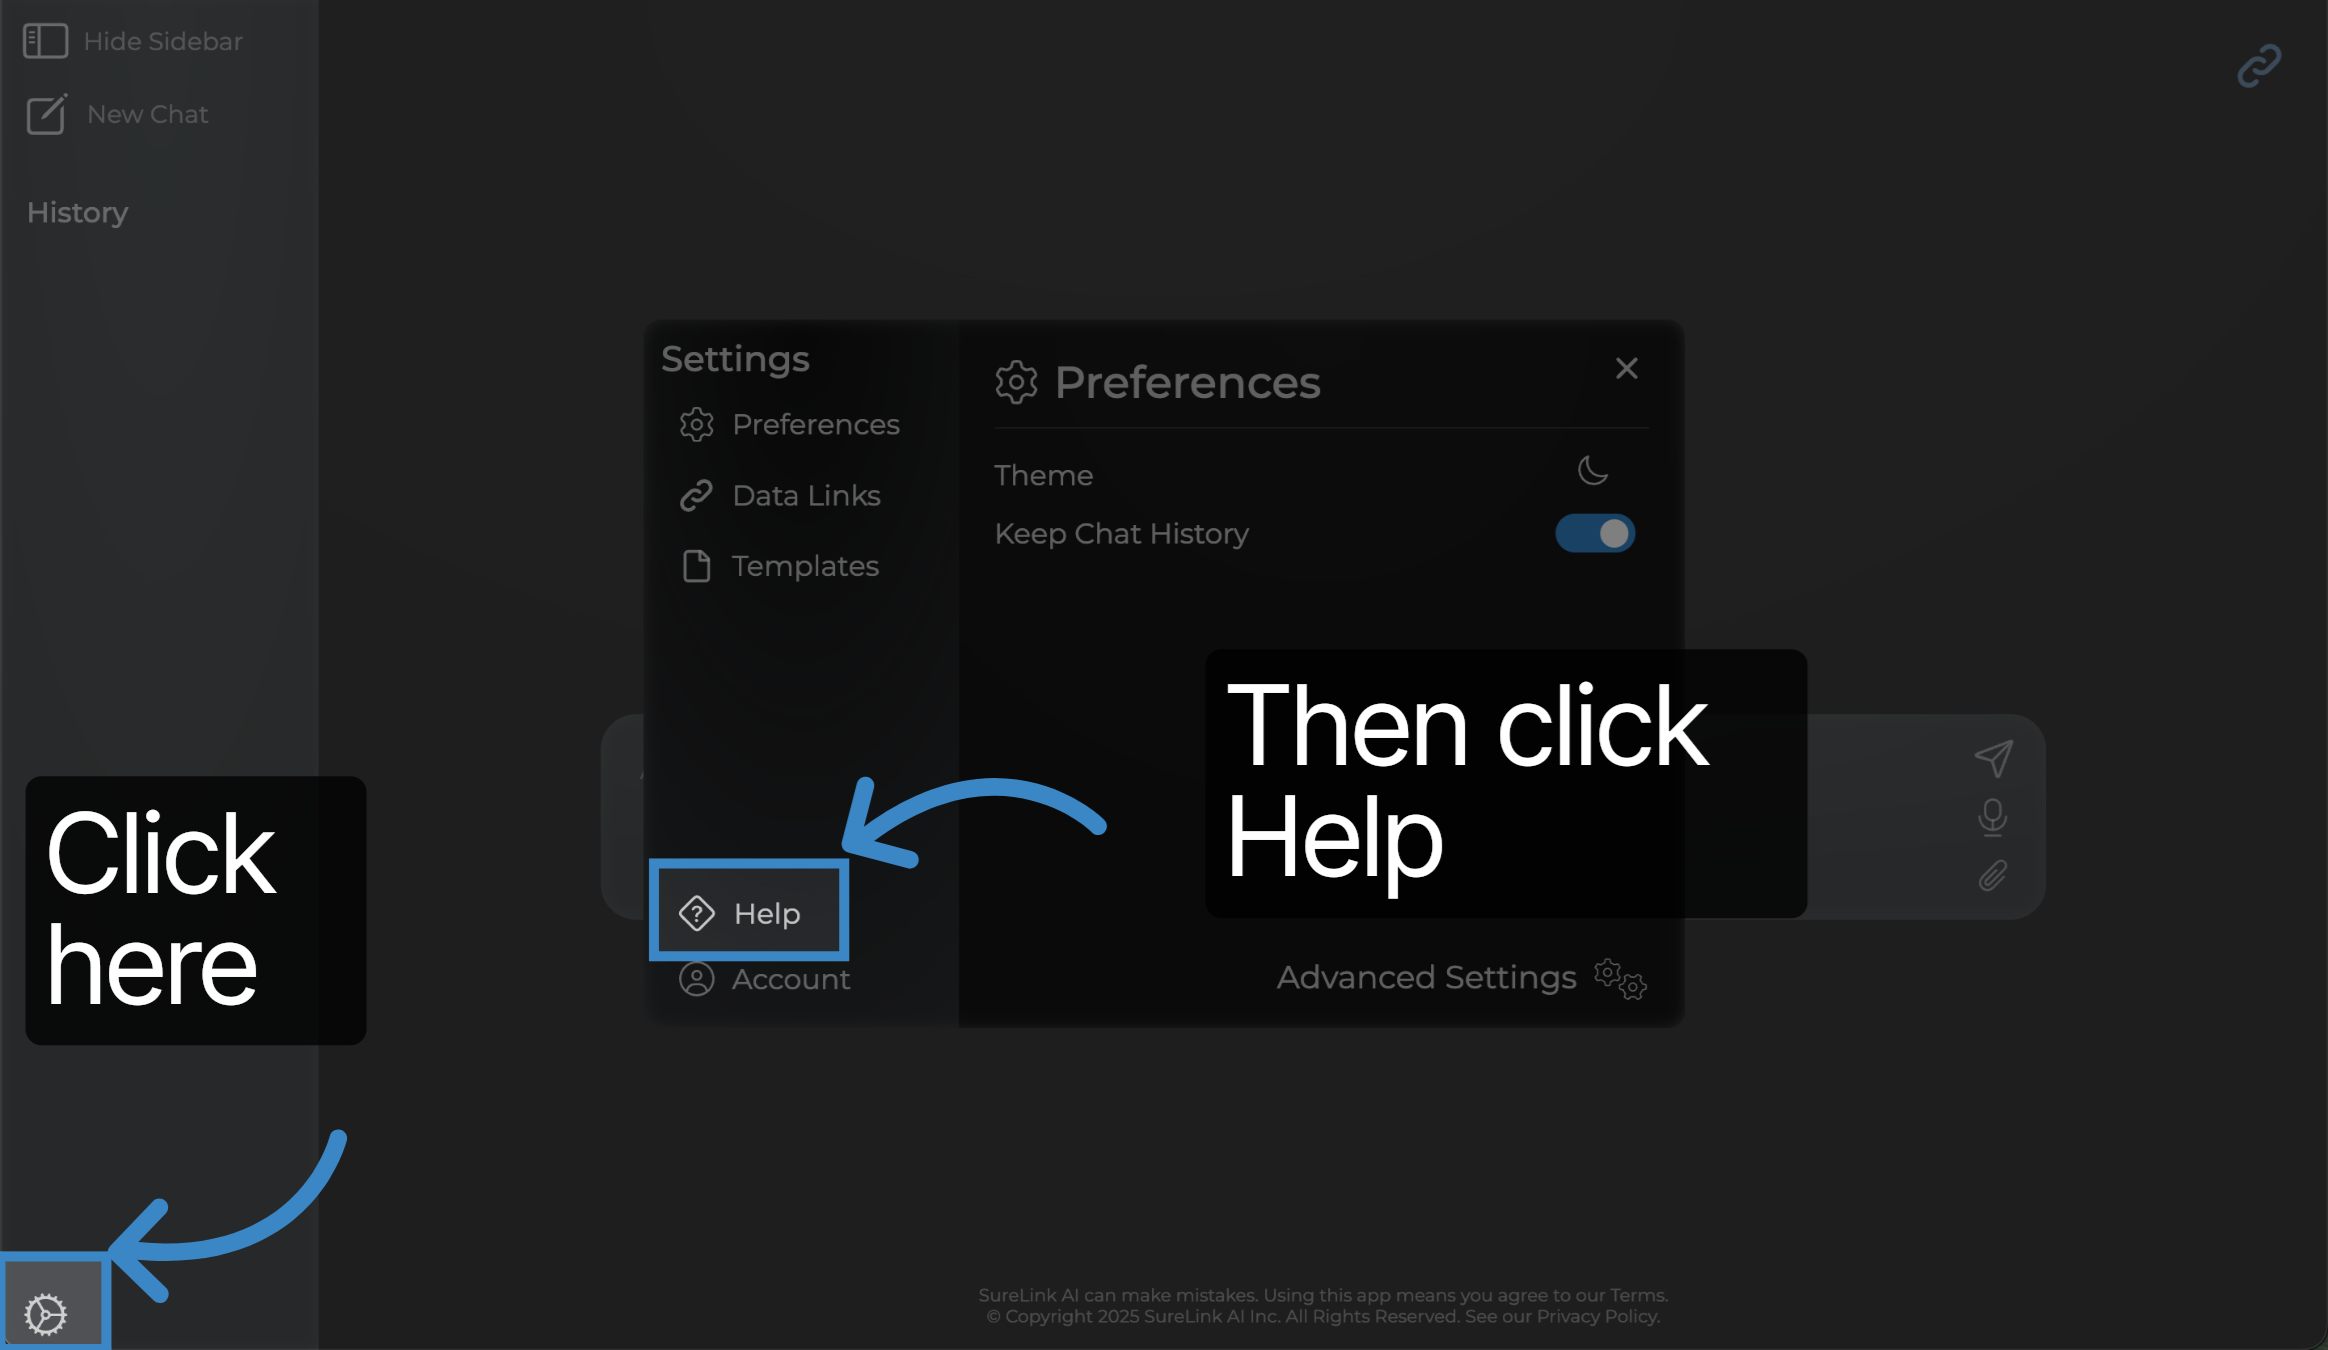
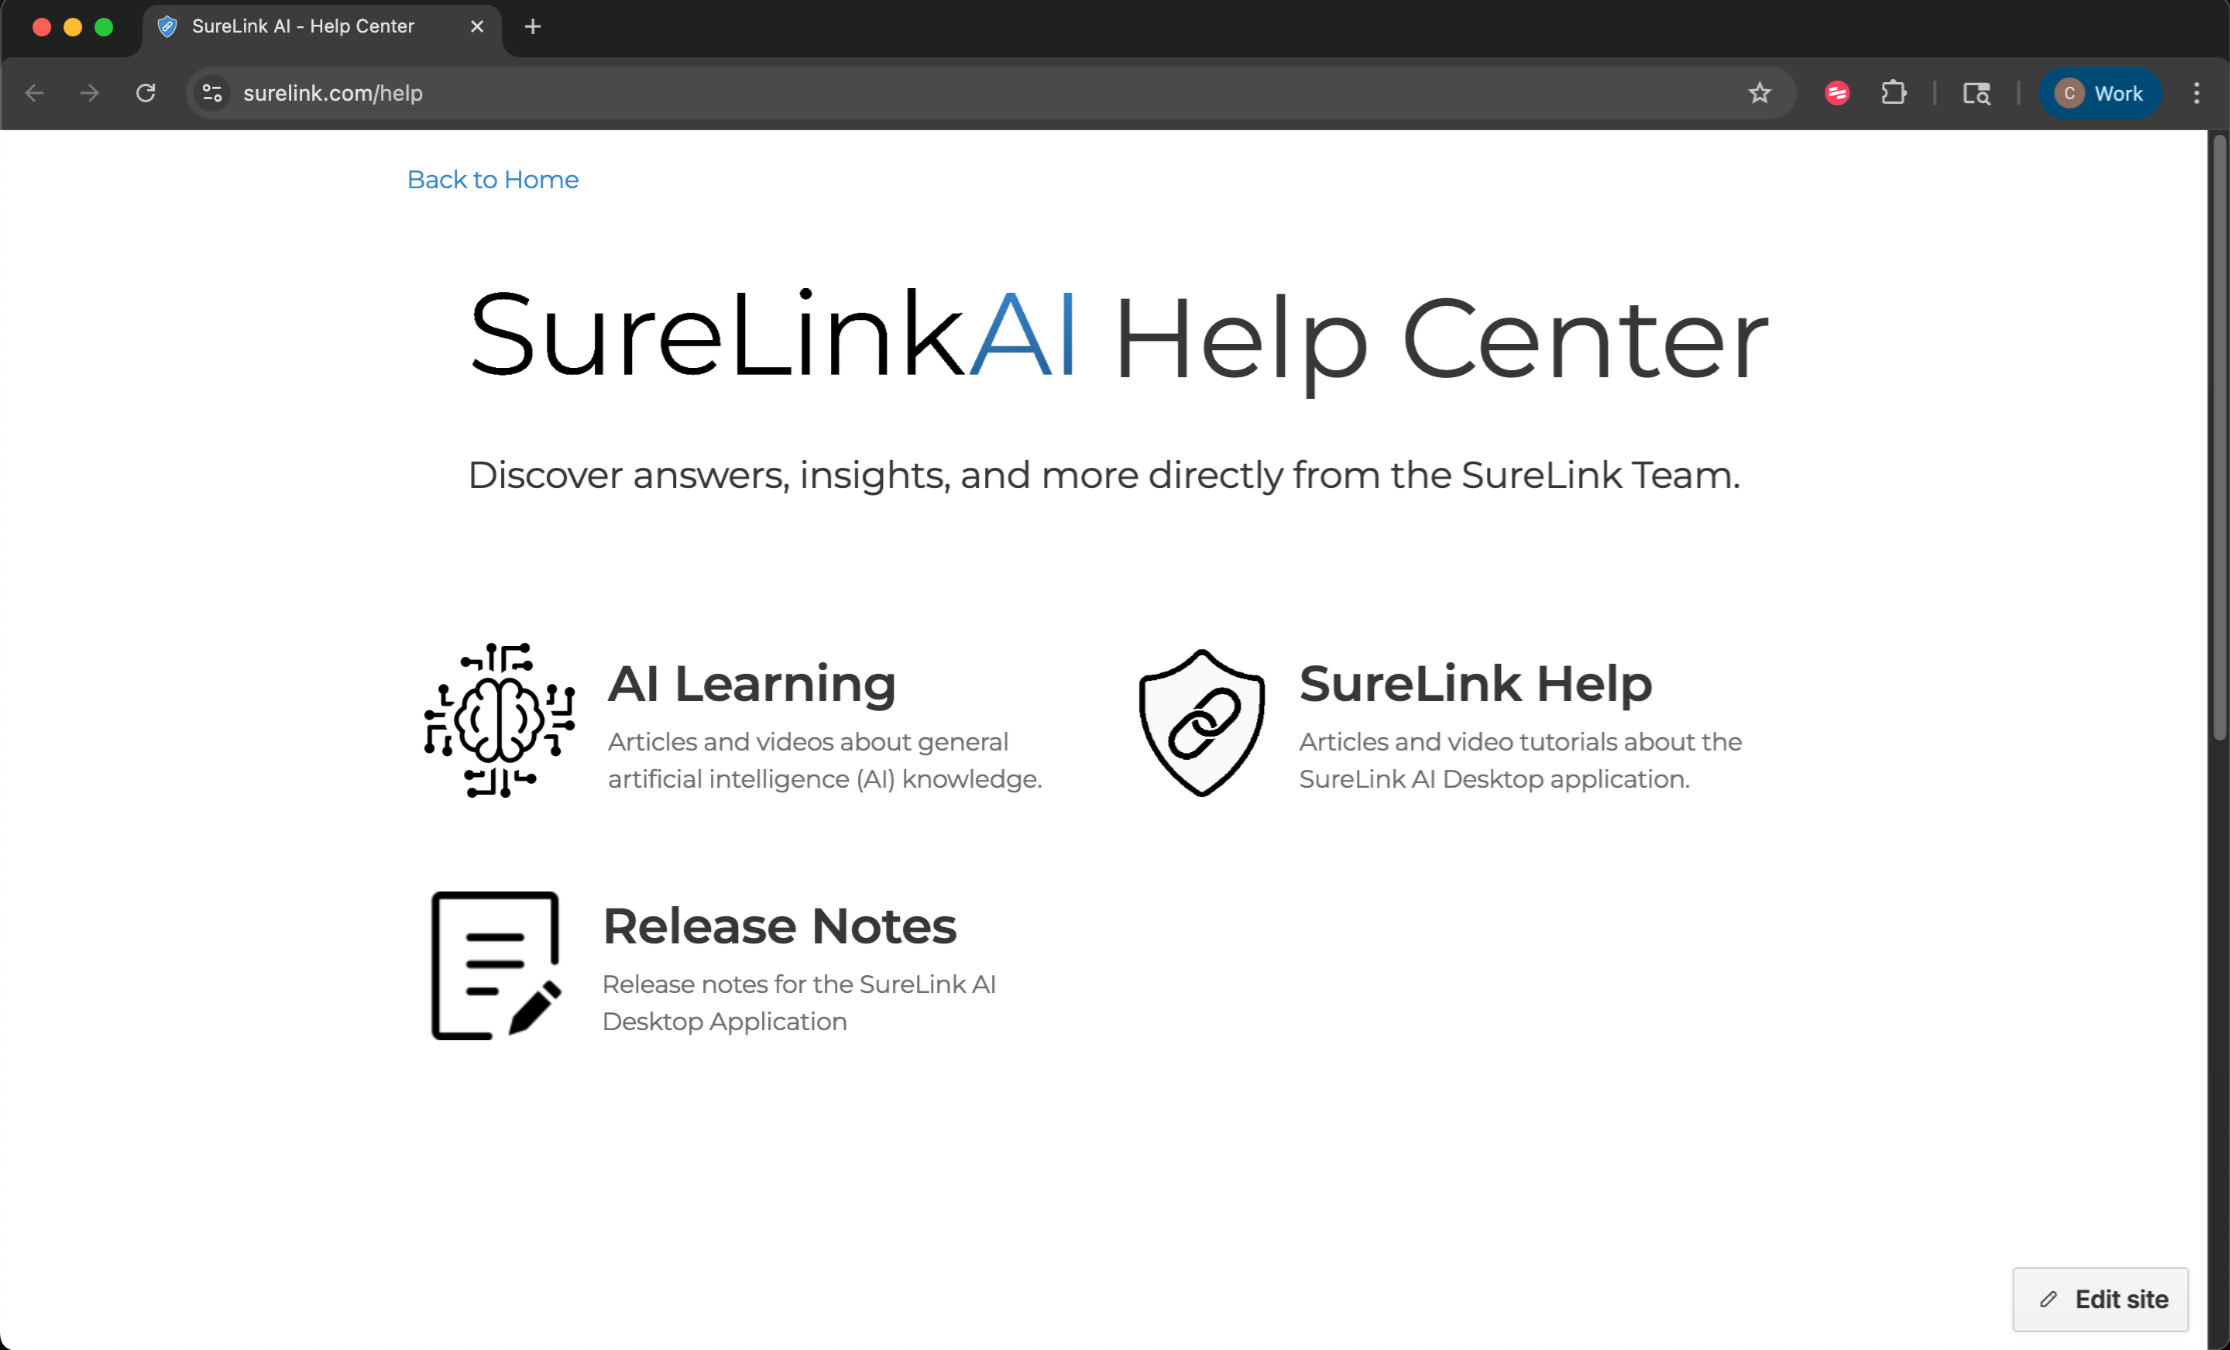
11. Help Center
The Help Center has three categories of resources. The first section is AI Learning material. This is general content to educate you on general AI topics such as Intro to AI, Effective Prompt Engineering, AI Ethics, and Privacy & Security. The second section is SureLink Help. This is content to help you understand how to better utilize SureLink AI as a tool. The third section is Release Notes. This content provides a detailed description of the features and patch updates that are updated each version.
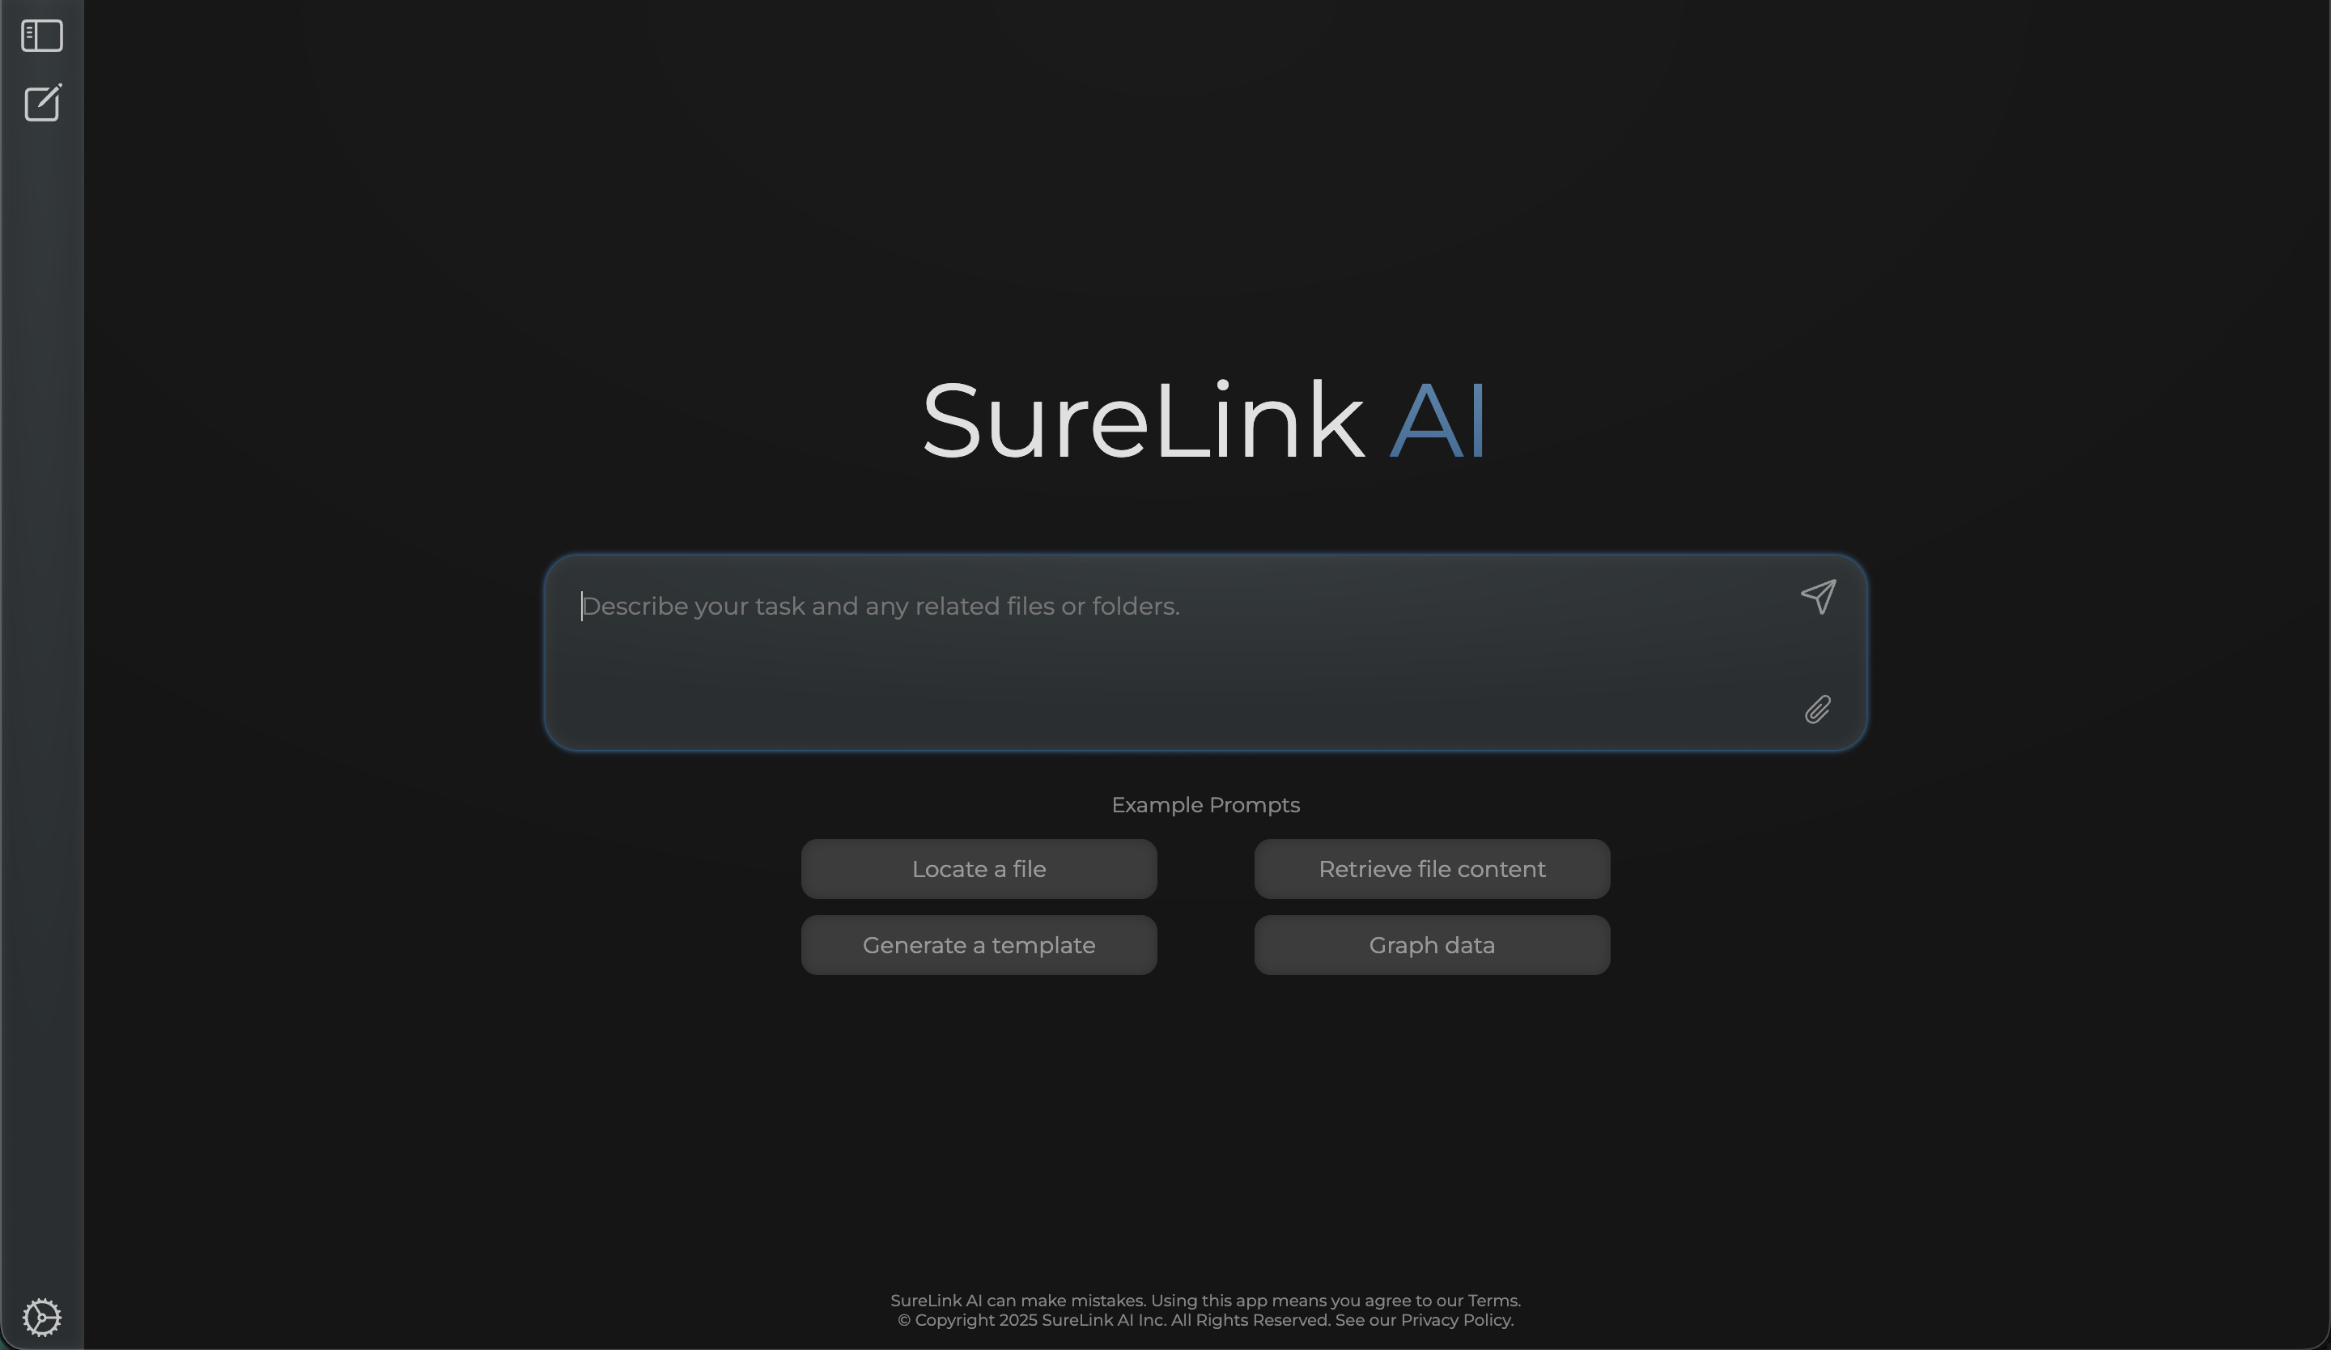
12. Settings
Now that we know about the Help Resources available, let's review some settings and preferences to make your experience more enjoyable.
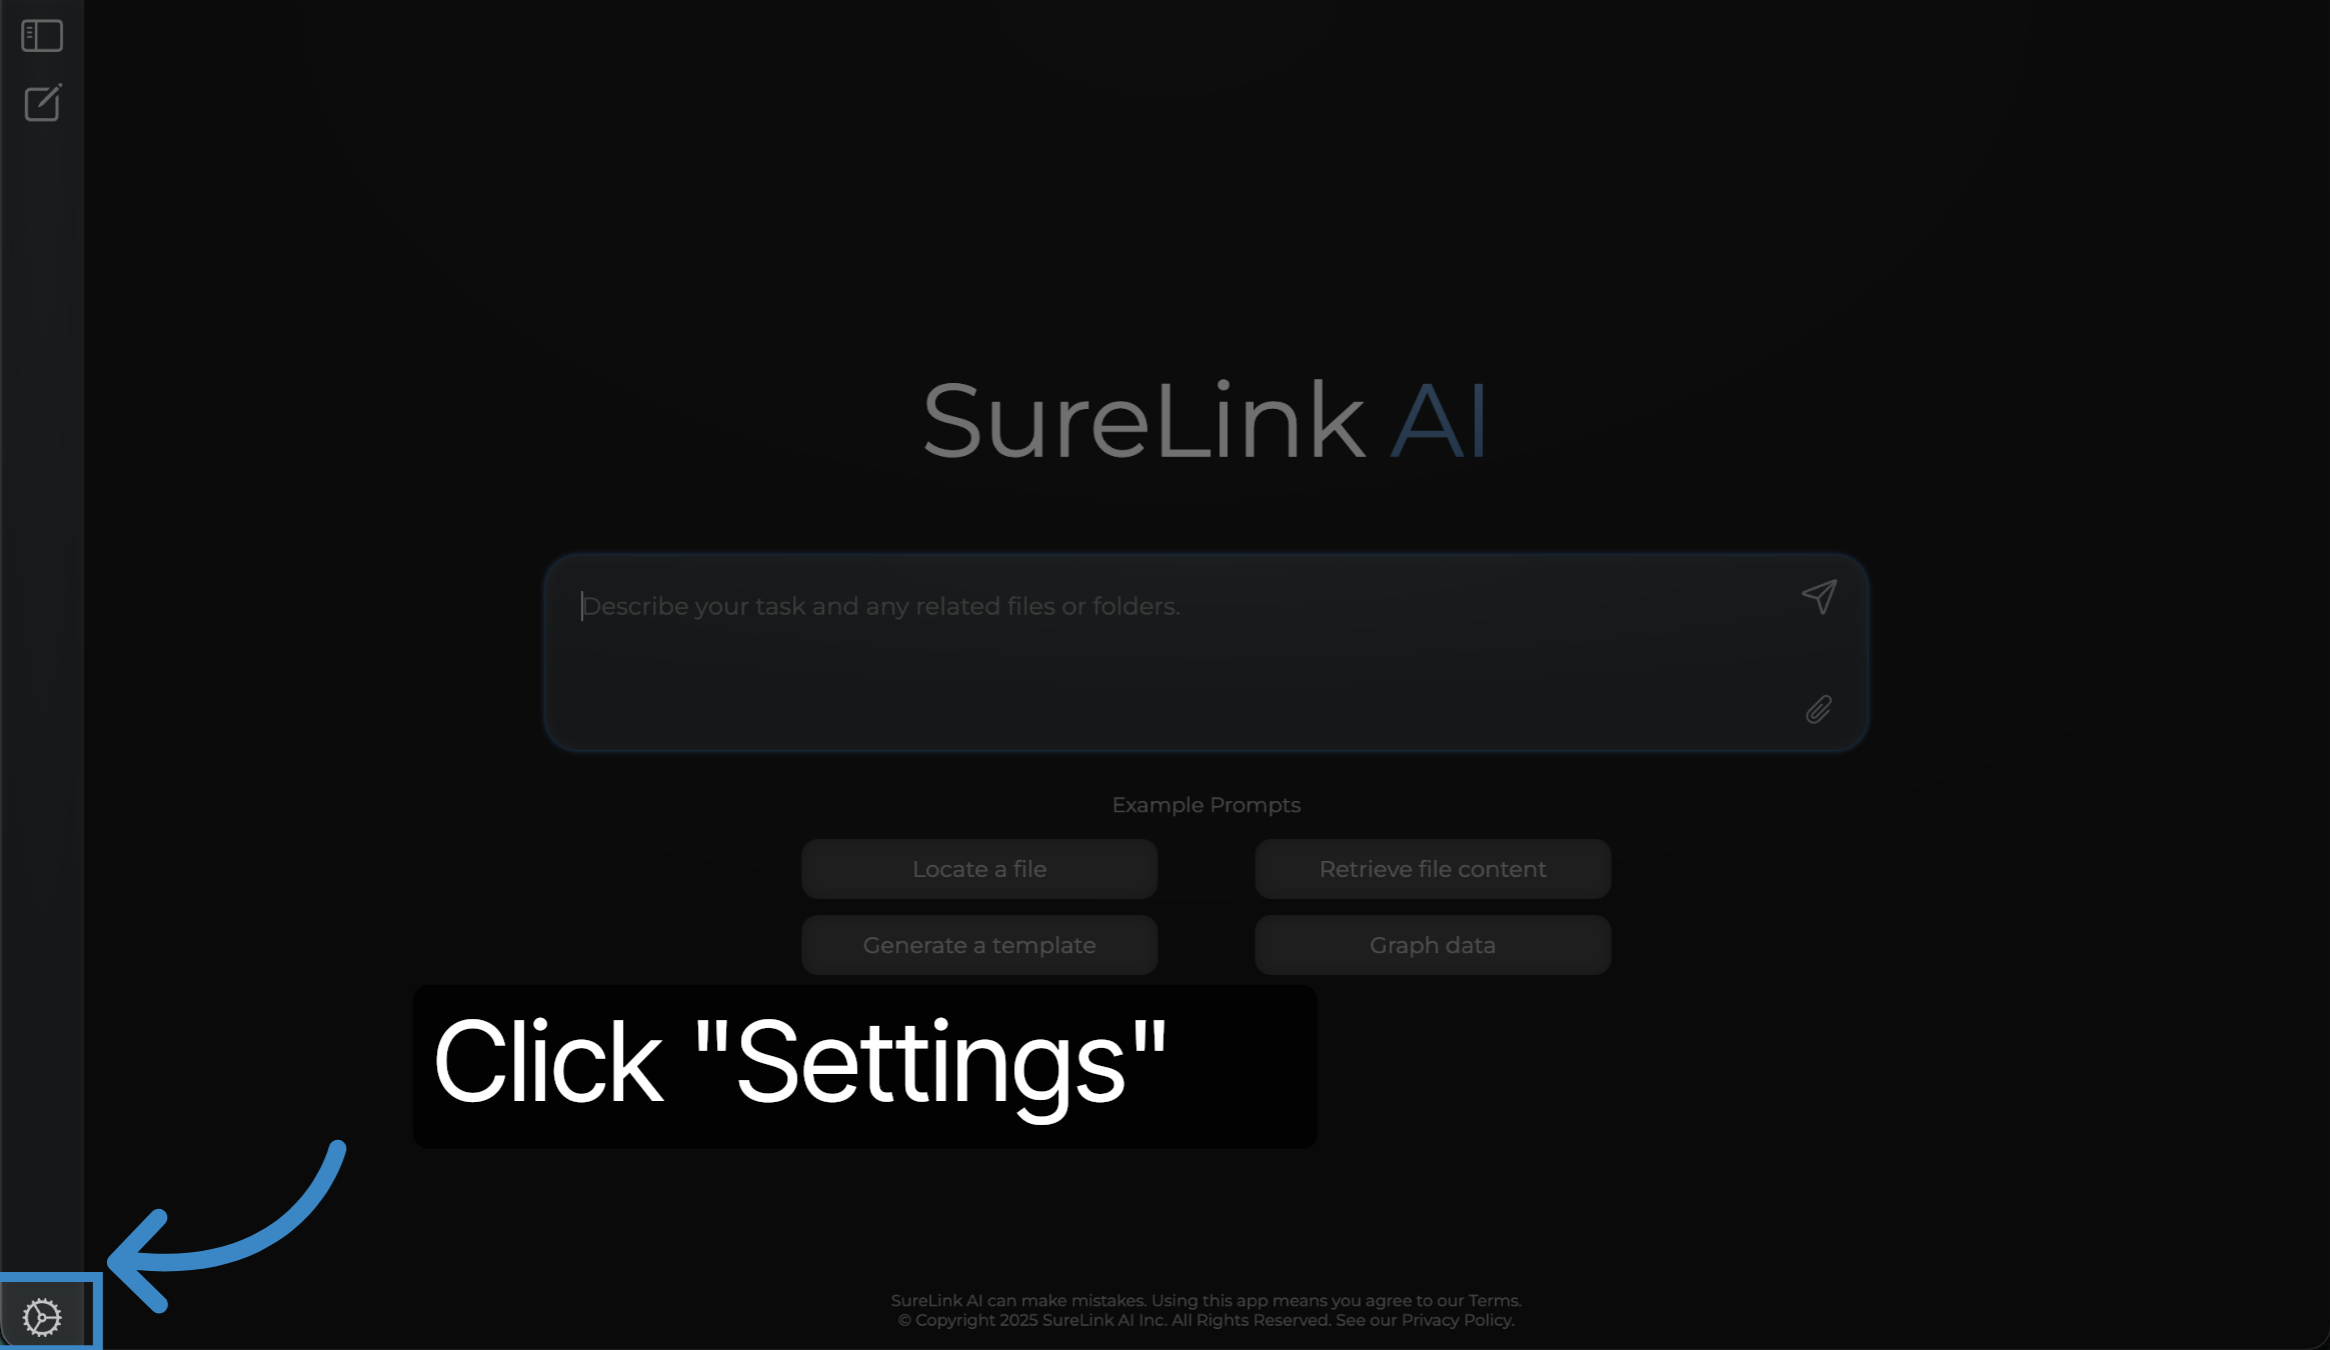
13. Click "Settings"
Open the SureLink AI sidebar menu and locate the 'Settings' button to begin customizing your experience.
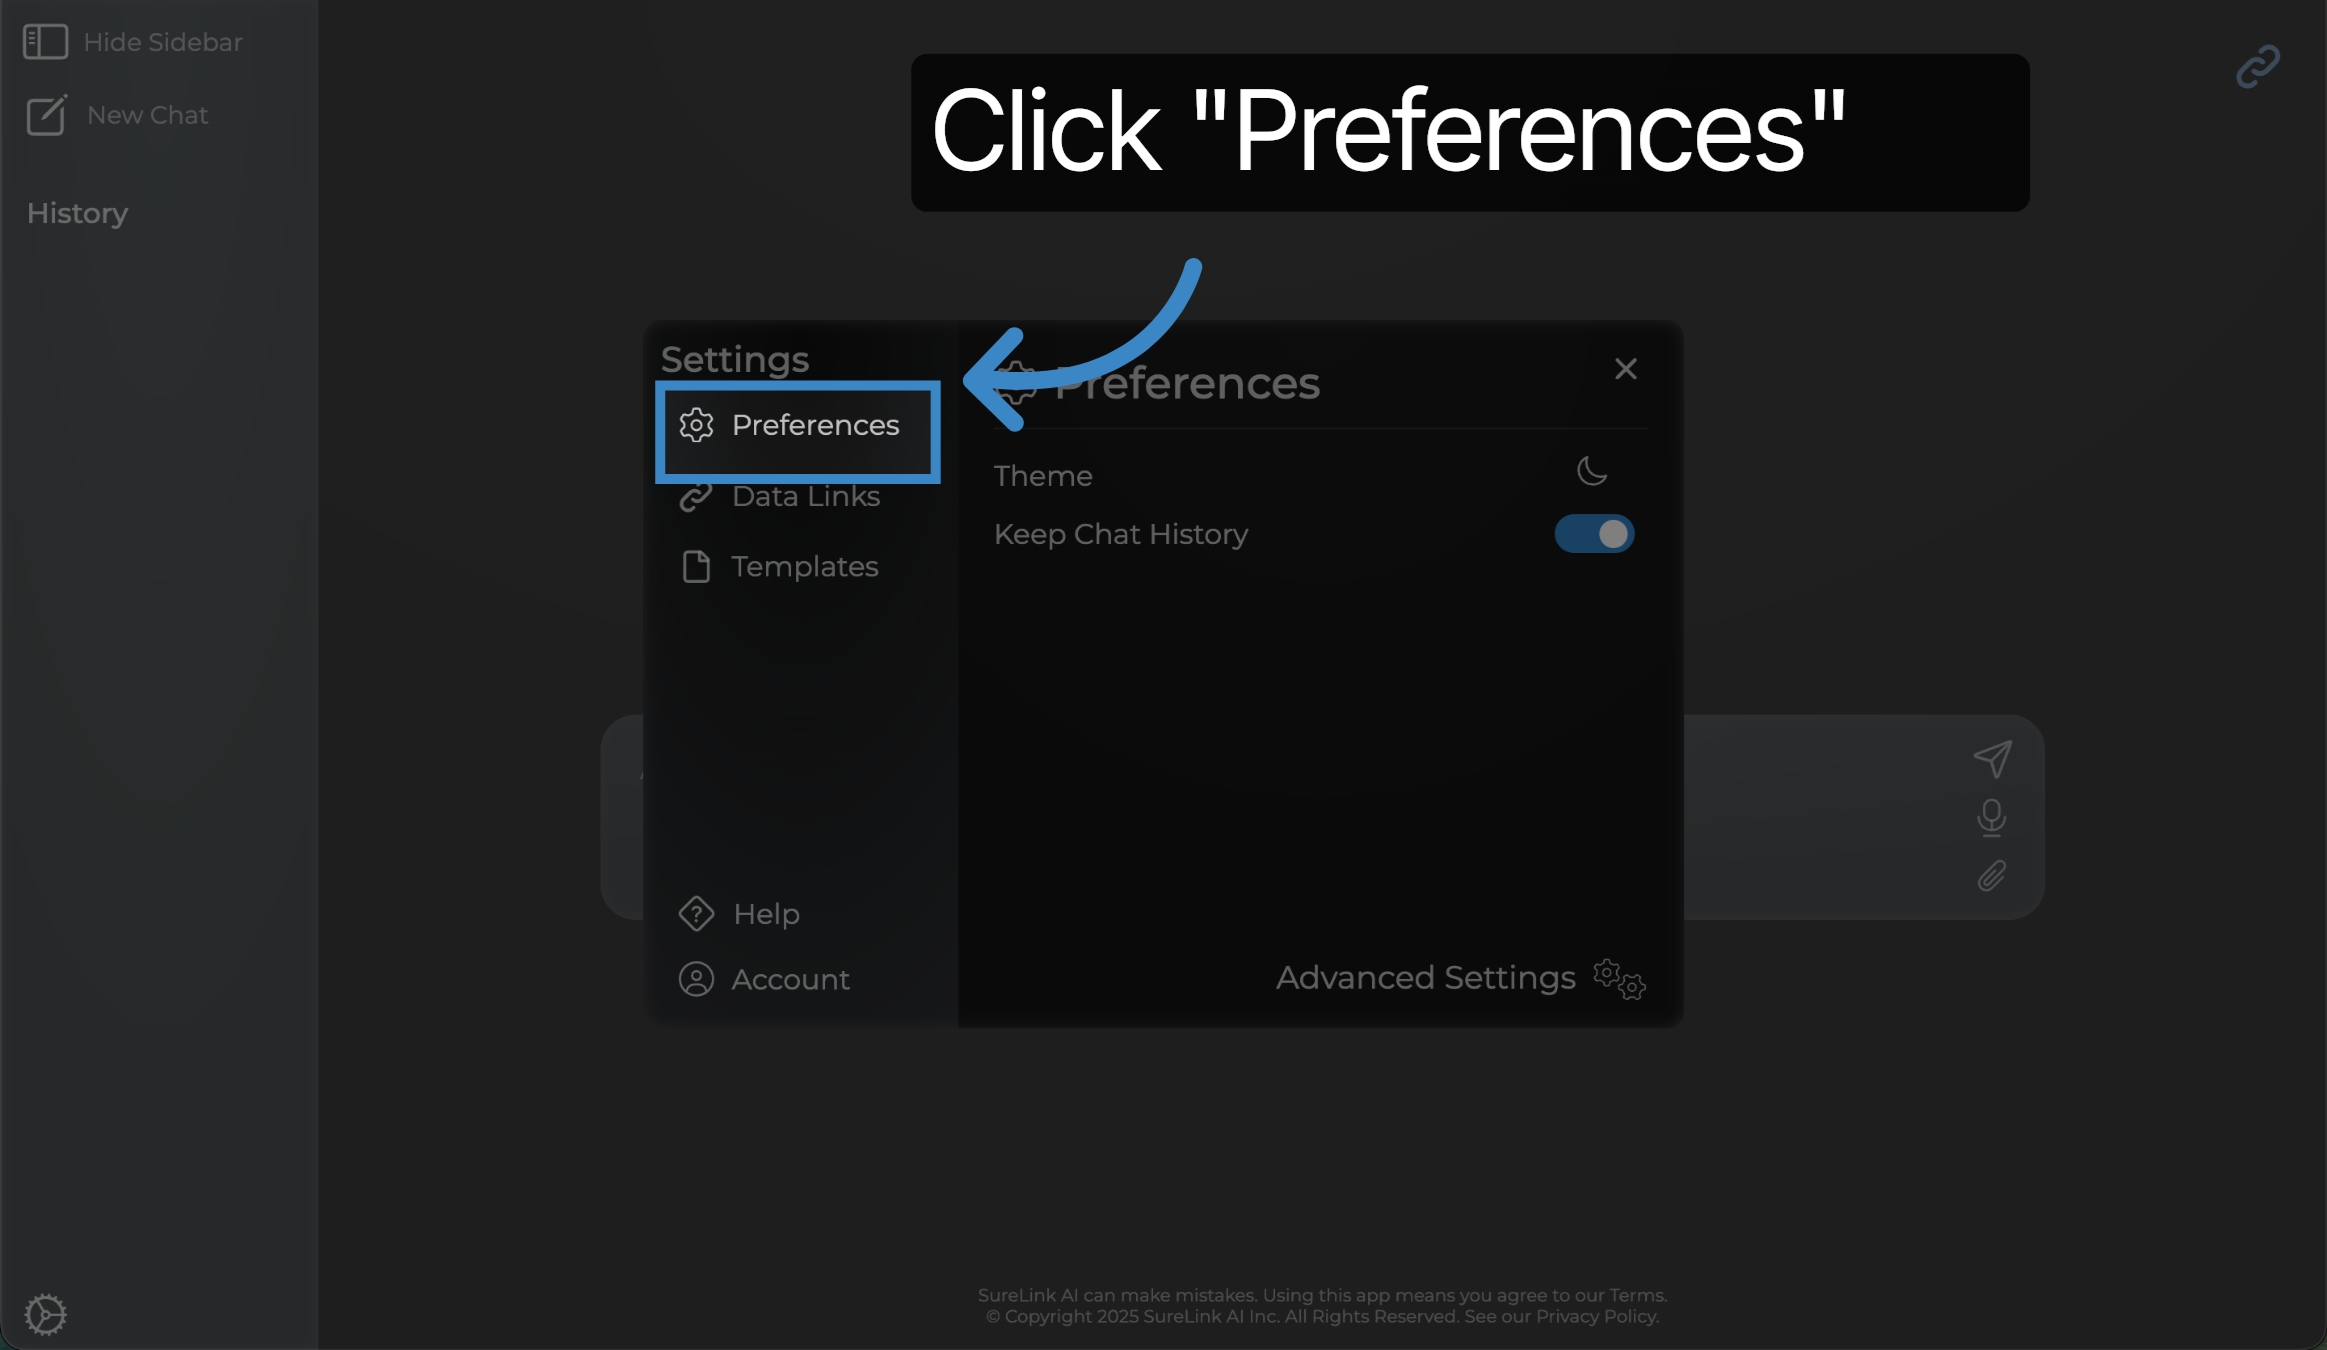
14. Click "Preferences"
Navigate to the 'Preferences' option within the 'Setting' menu to access configuration controls.
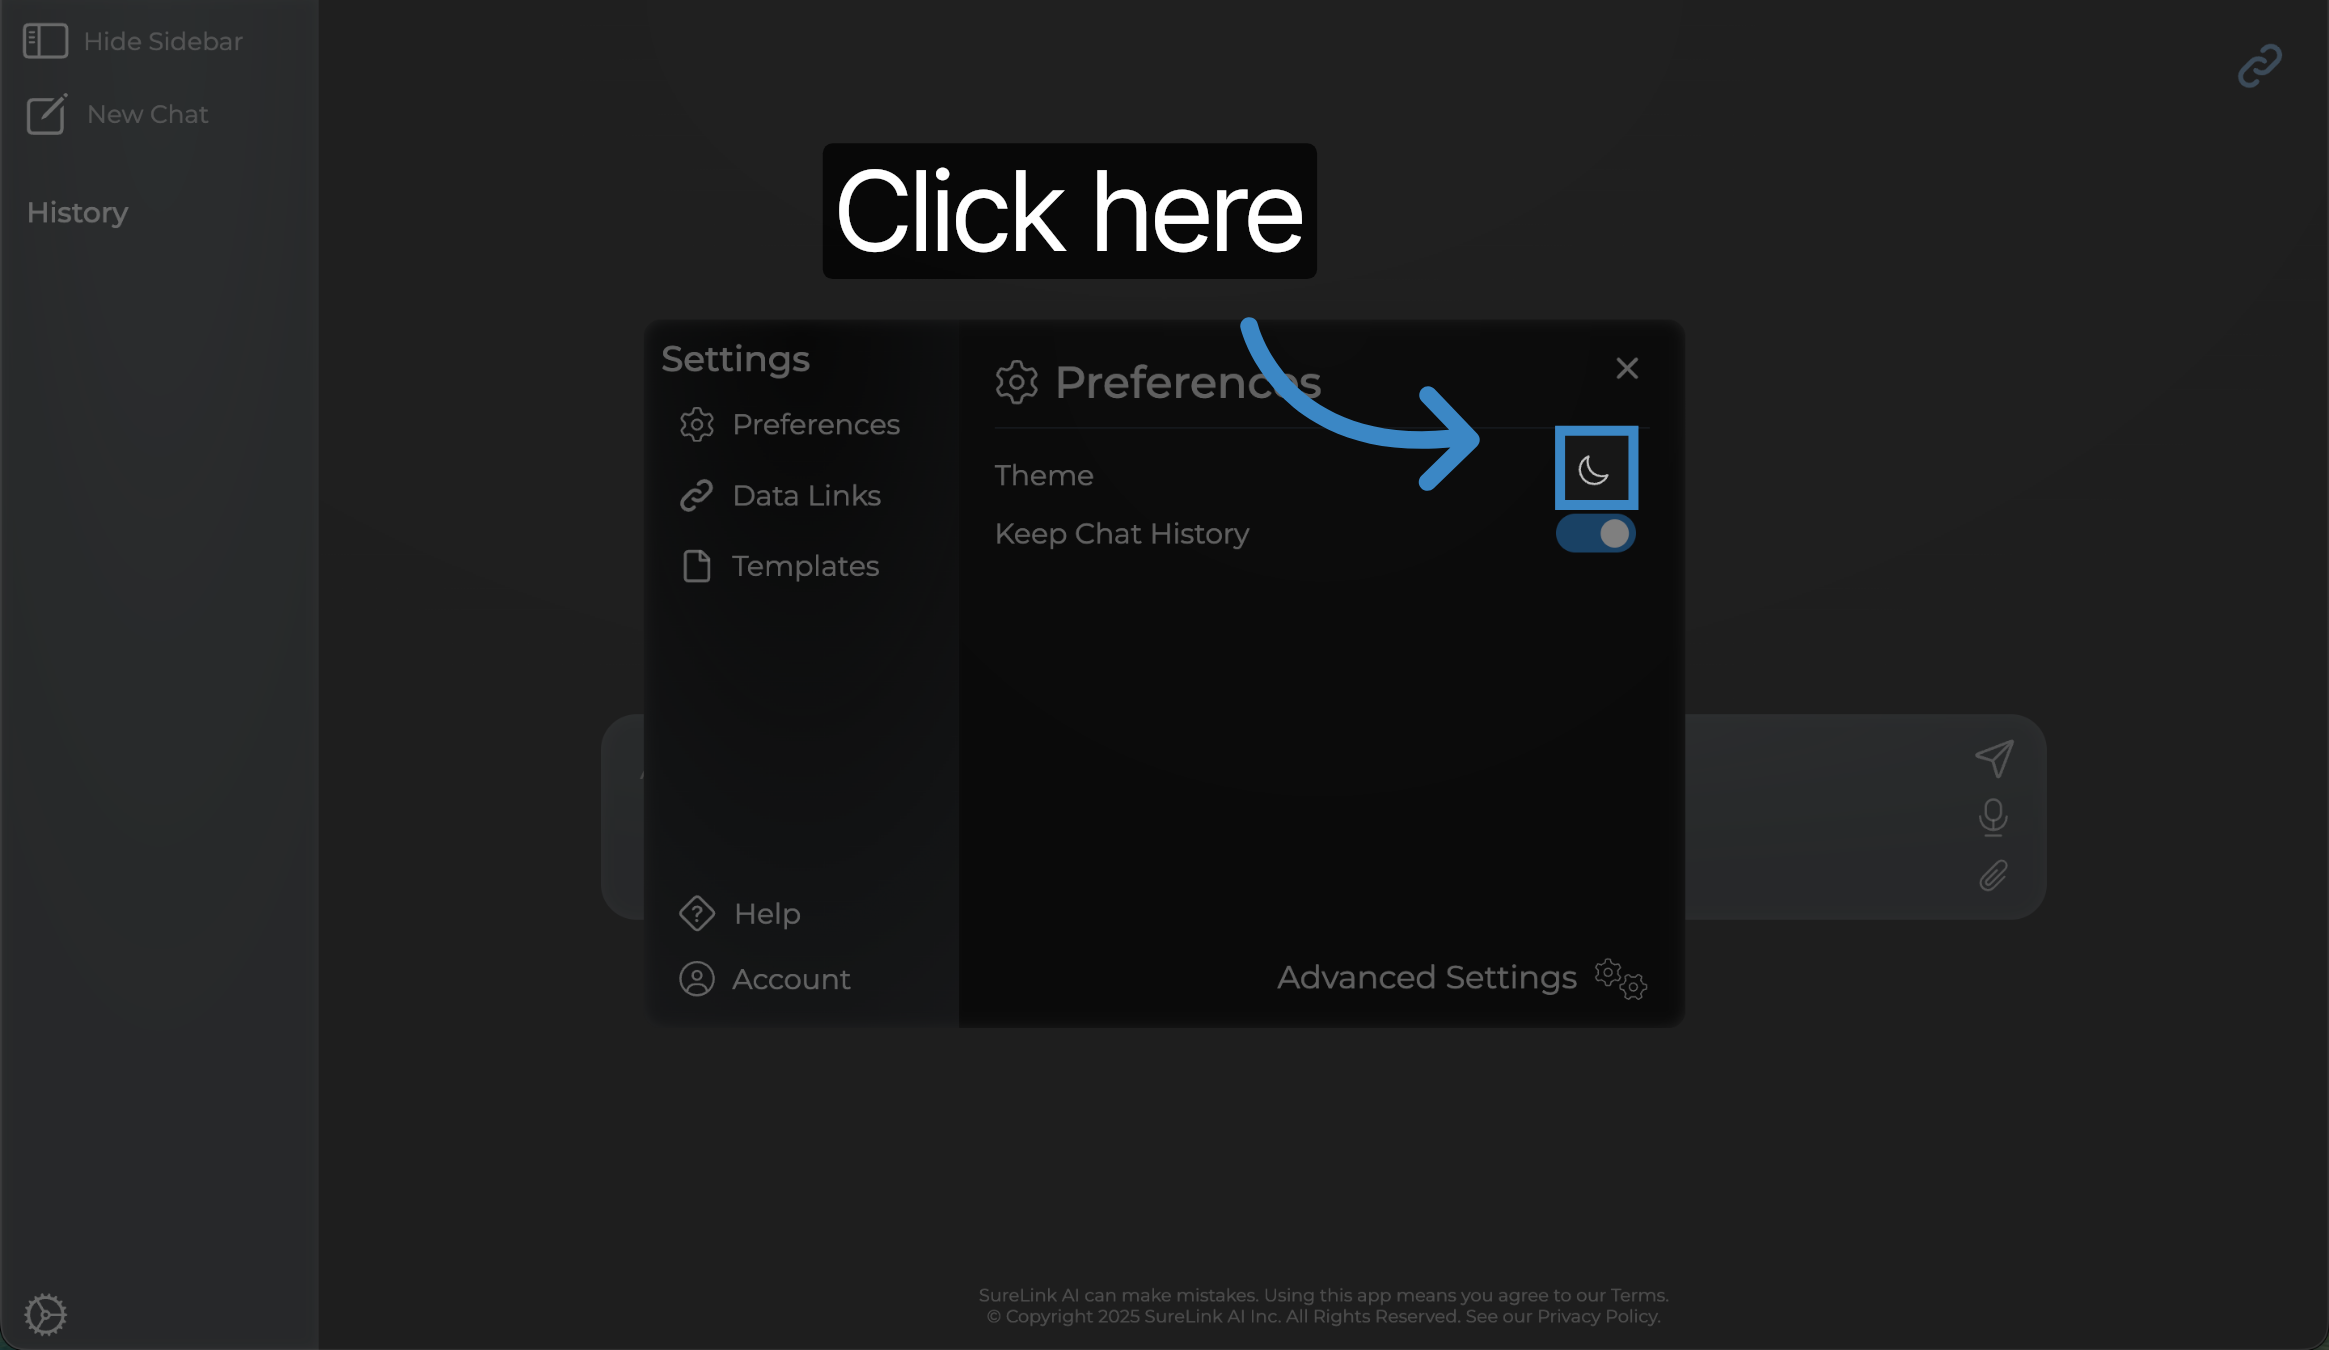
15. Click here
Use the Theme setting to control whether your application runs in Dark or Light mode. Select once to turn to light mode.
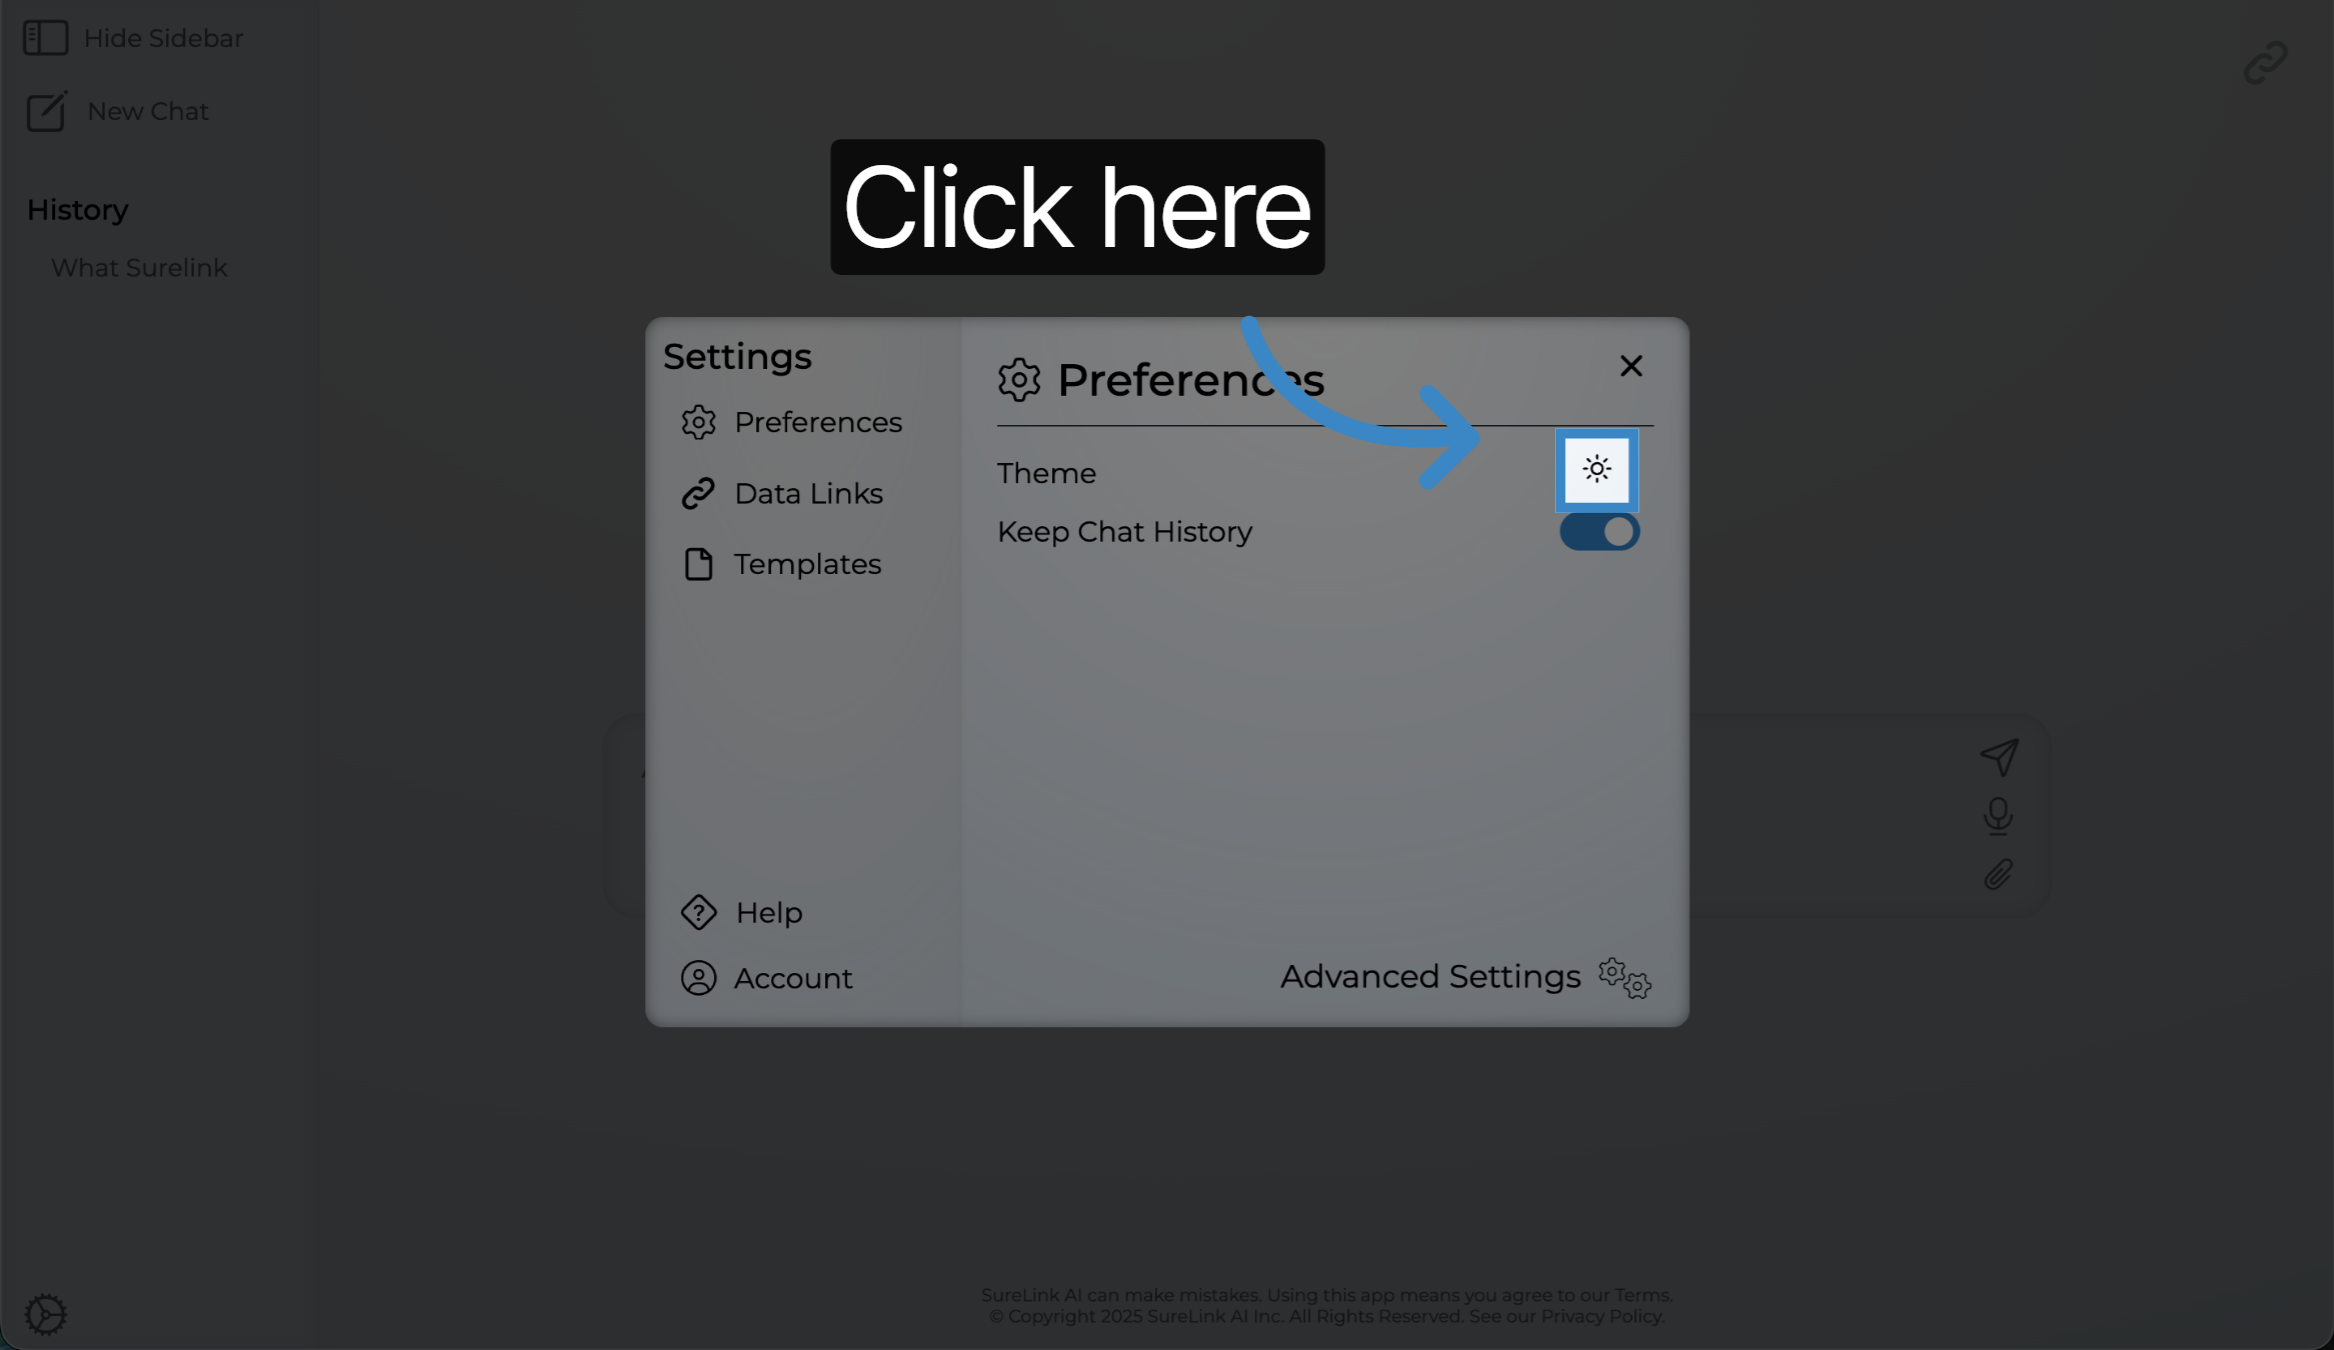
16. Click here
Click the Theme icon again to set it back to dark mode.
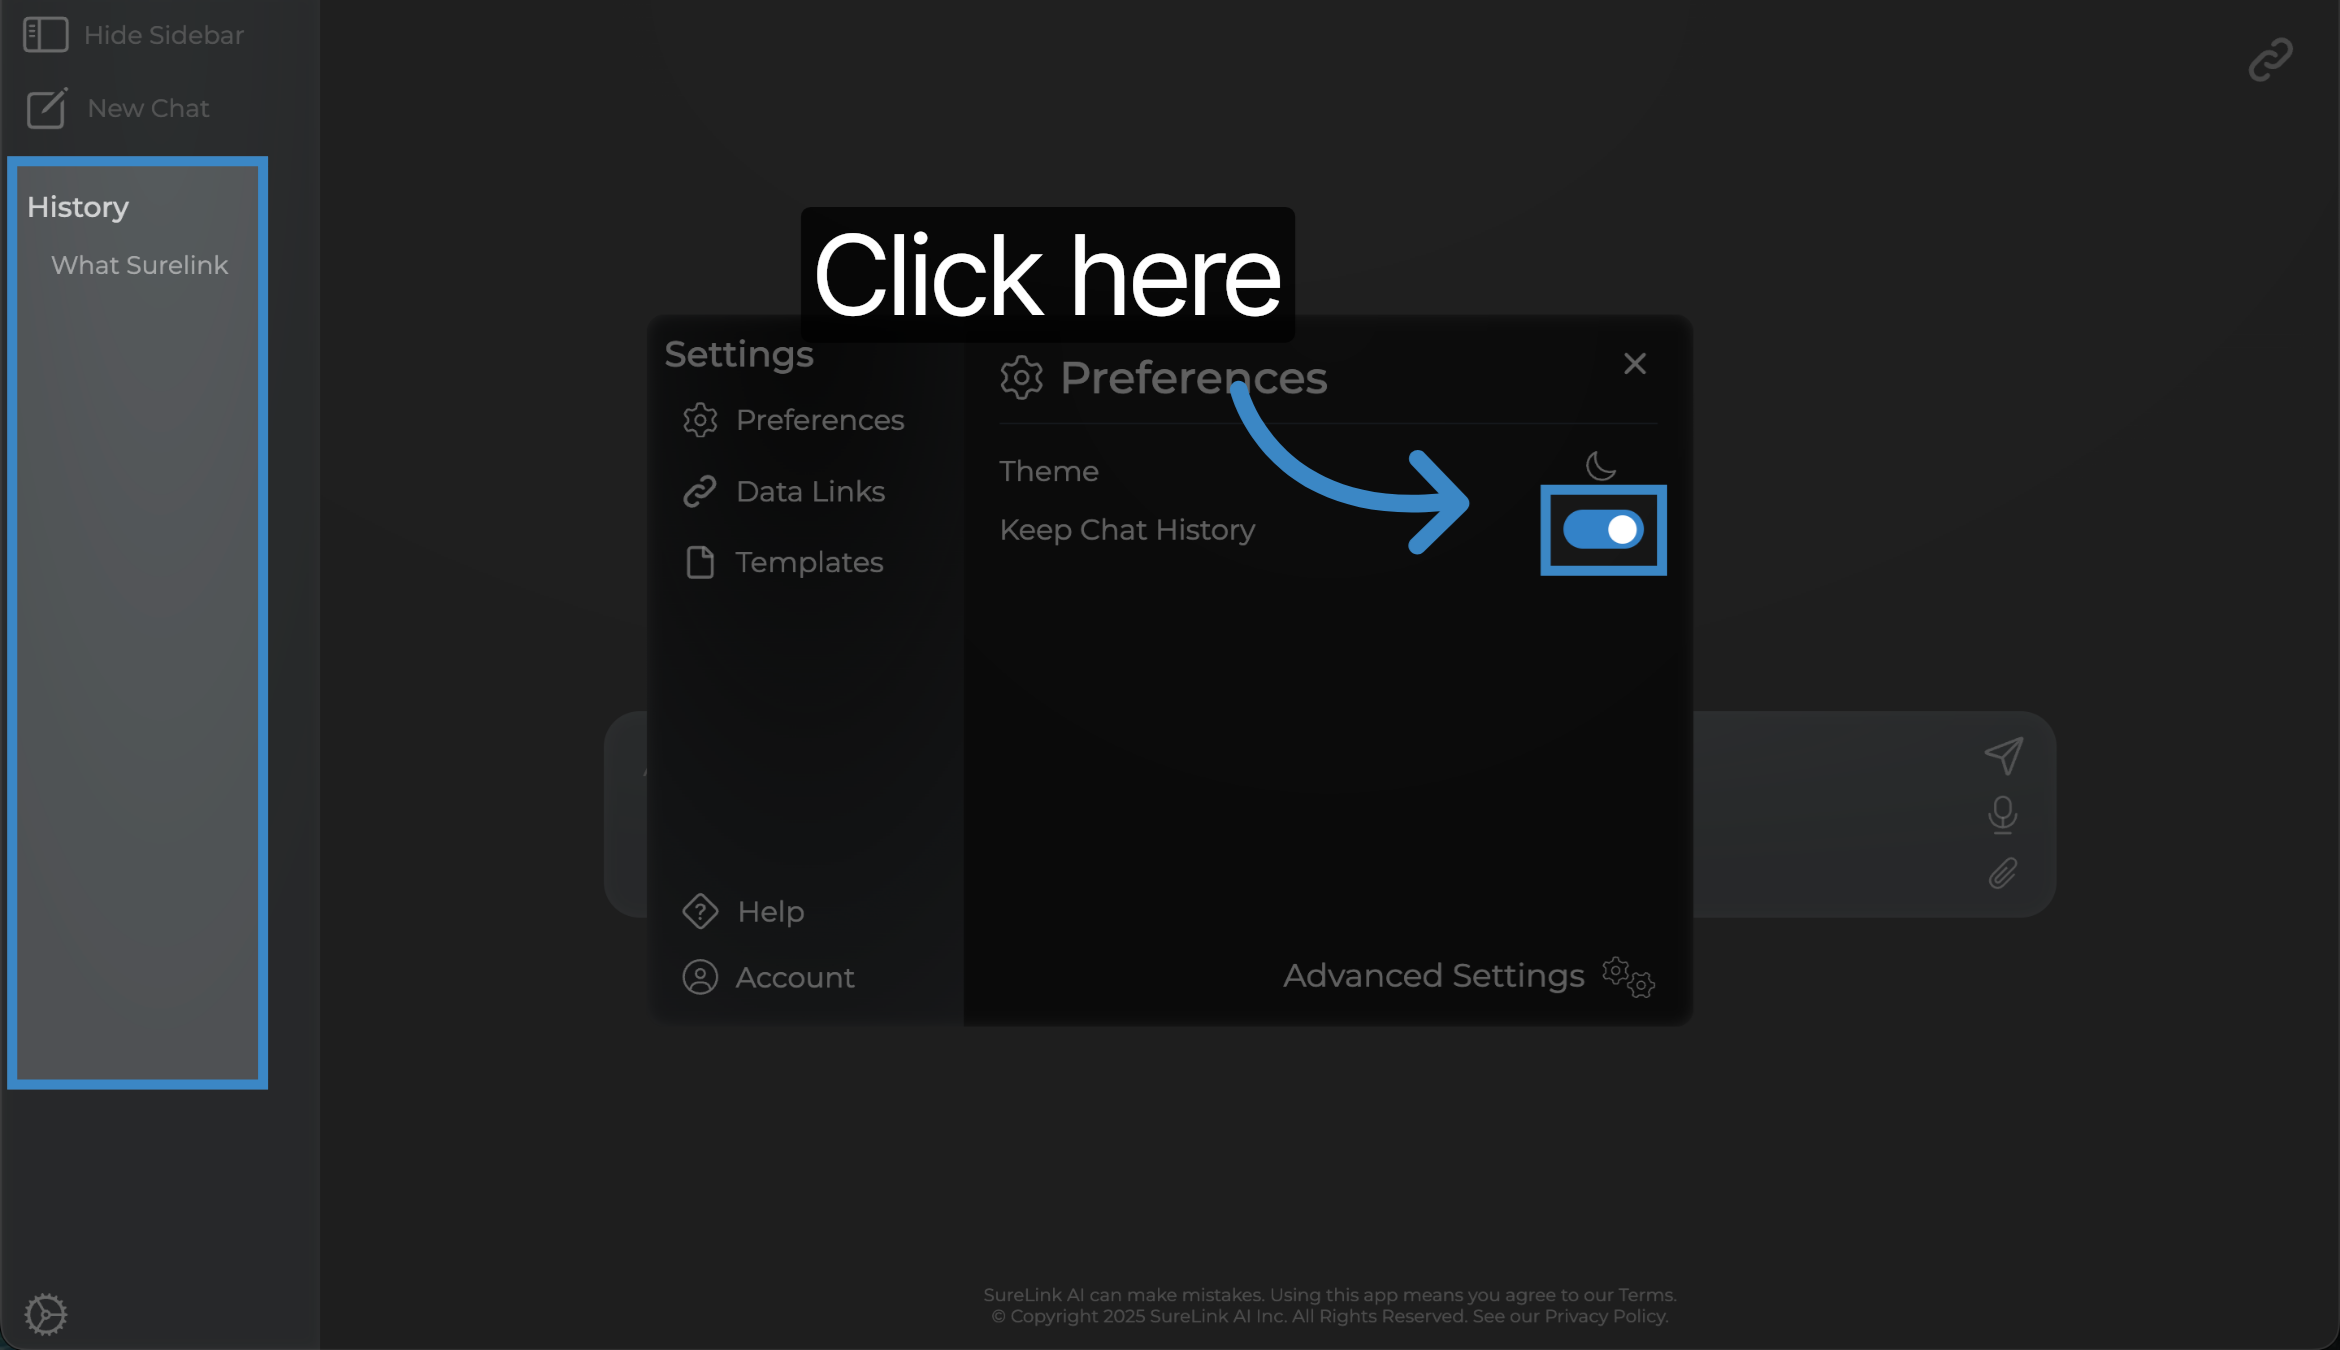
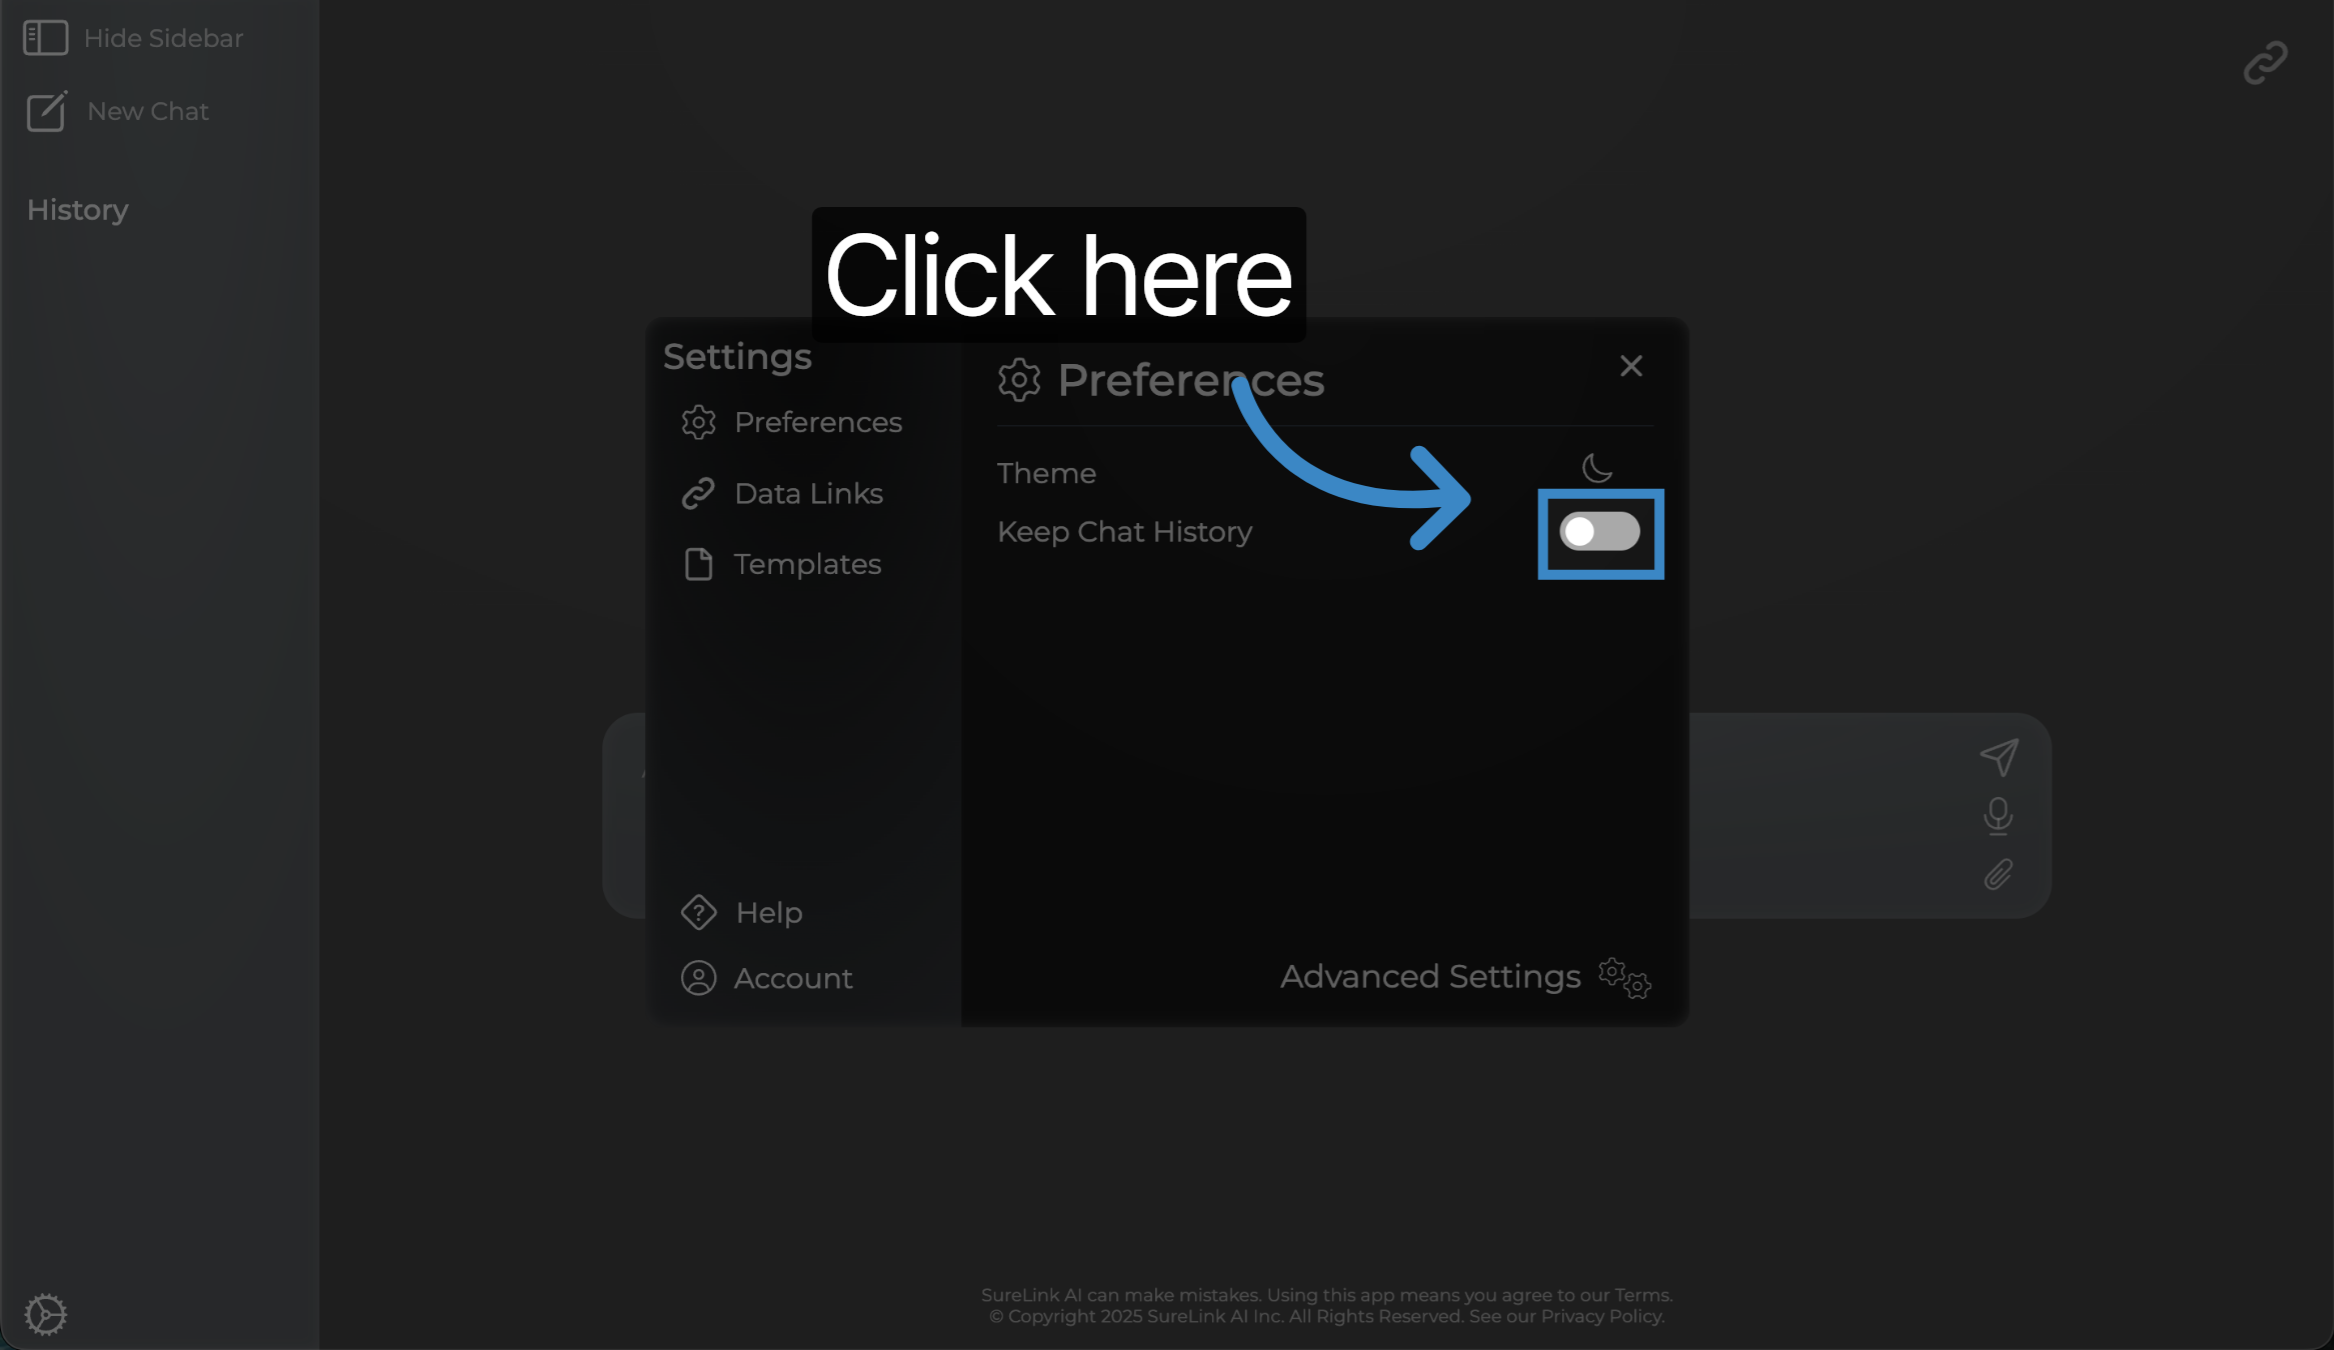
17. Click here
Click the Keep Chat History button on to retain your Chat History... Chat History is available within the history section of your sidebar menu.
18. Click here
Click the Keep Chat History toggle off to no longer retain your Chat History, moving forward. Turning this off will not remove any existing chat history that you have.
19. Prompting
Great! Now that our preferences have been set, let's start to ask SureLink AI some questions through prompting. We will start by looking for a file.
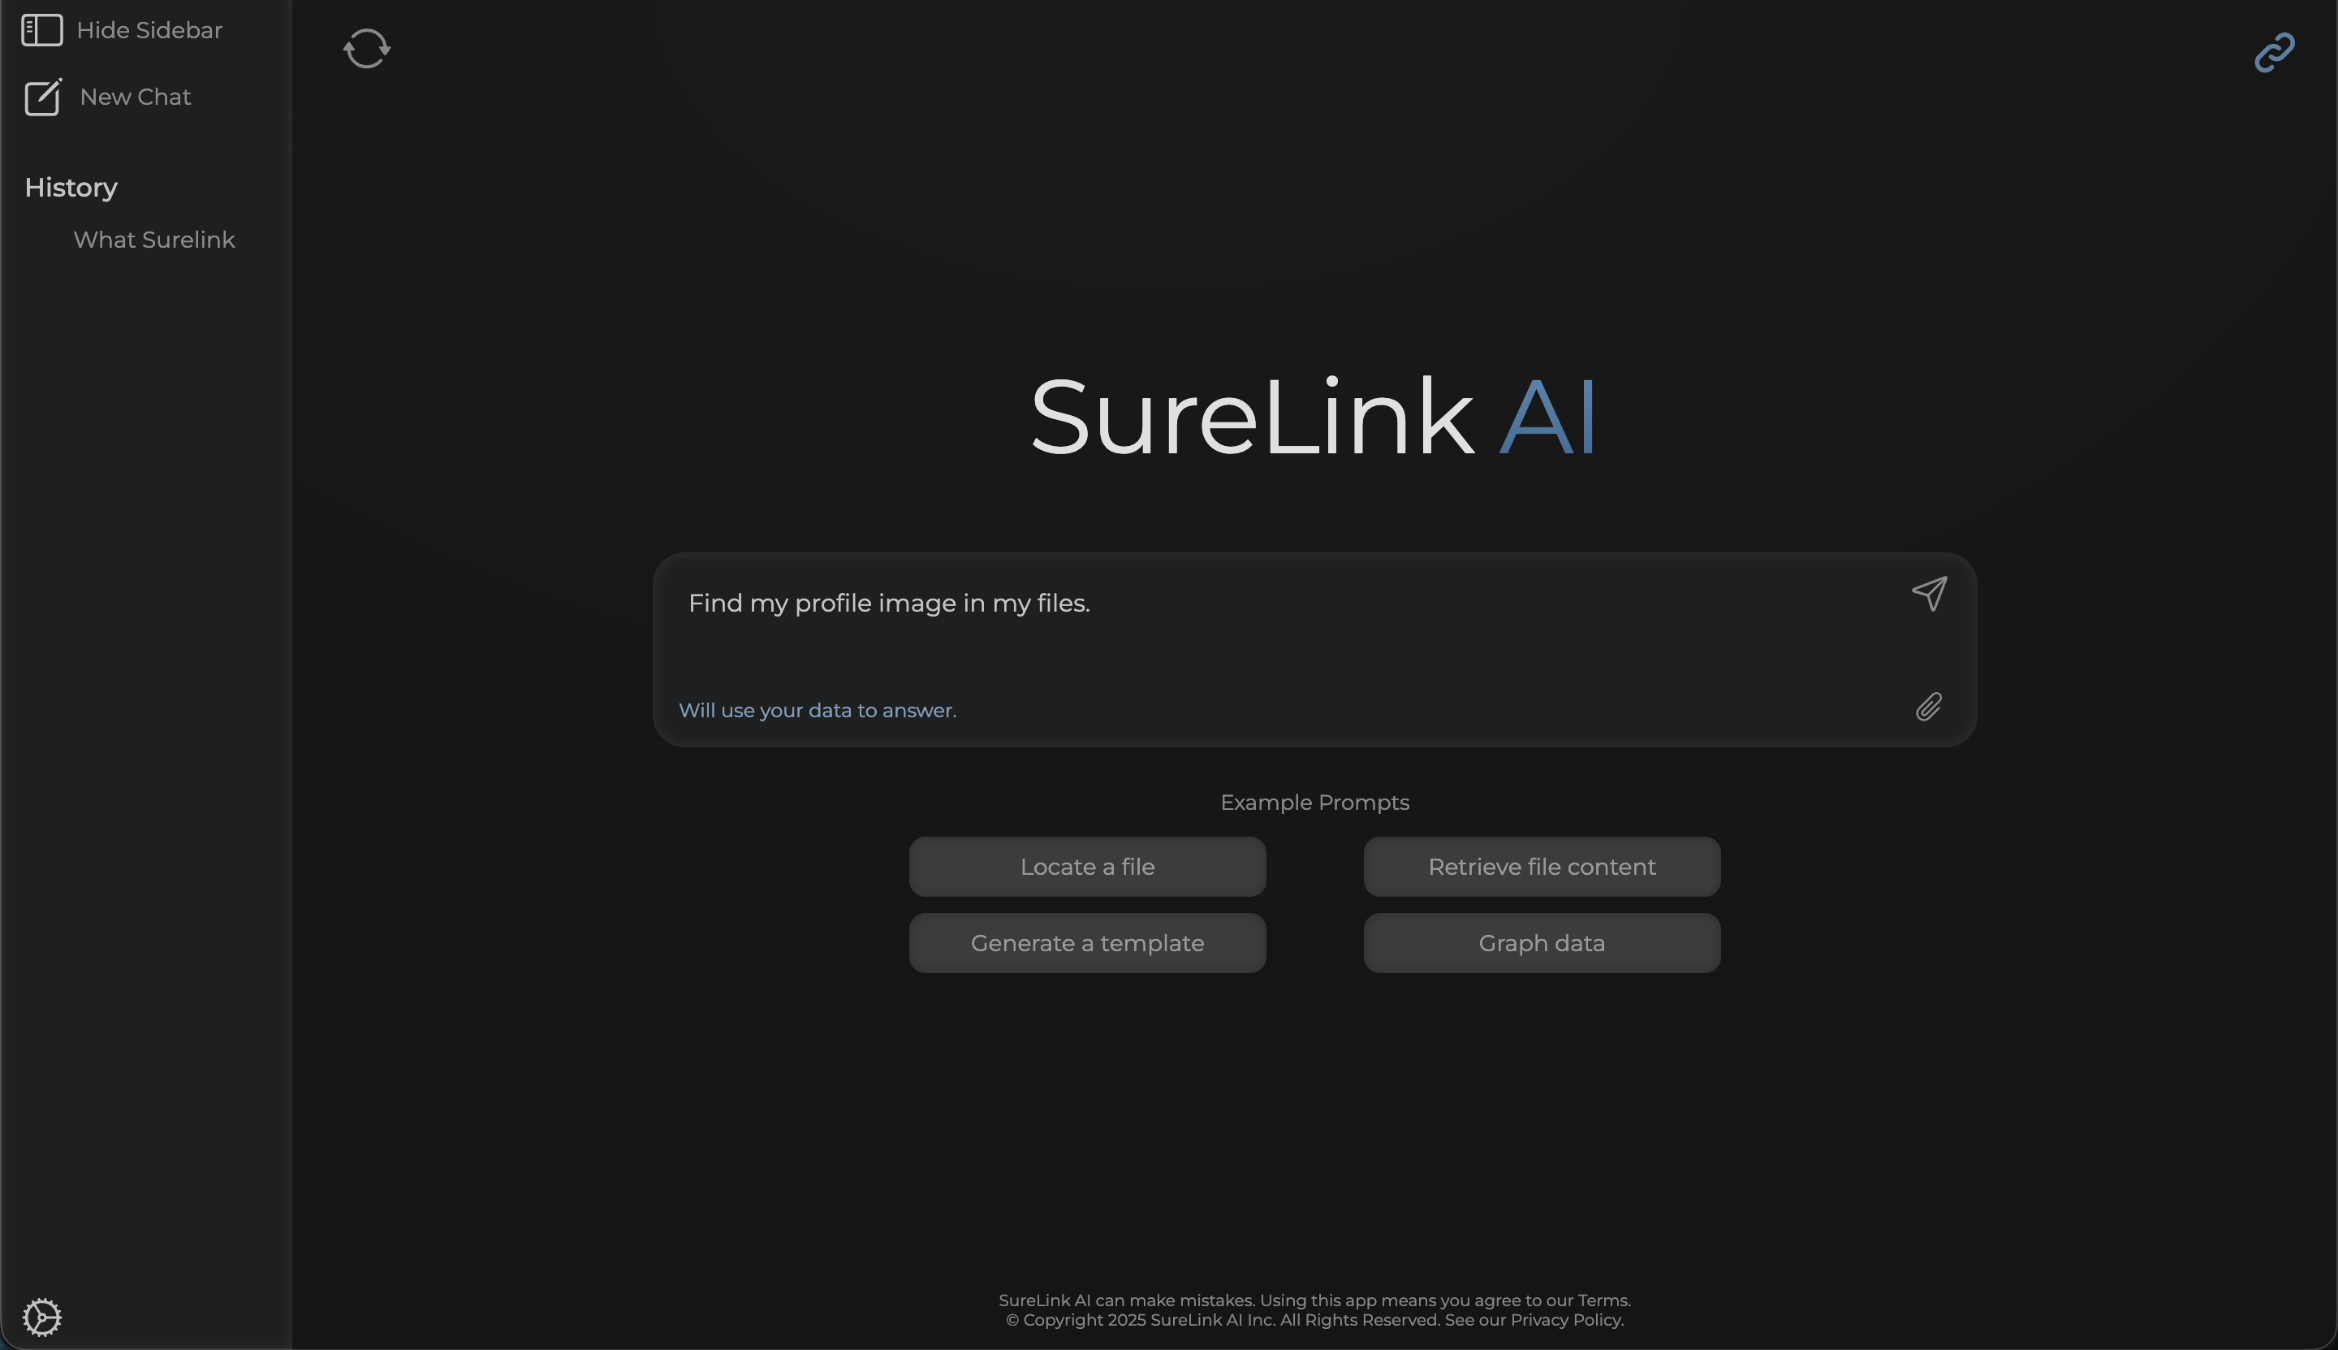
20. Find my files
In this example, I ask the system to find my profile image in my files. I am not sure where this image is so I need SureLink's help to quickly locate it so I can upload it to a social media platform.
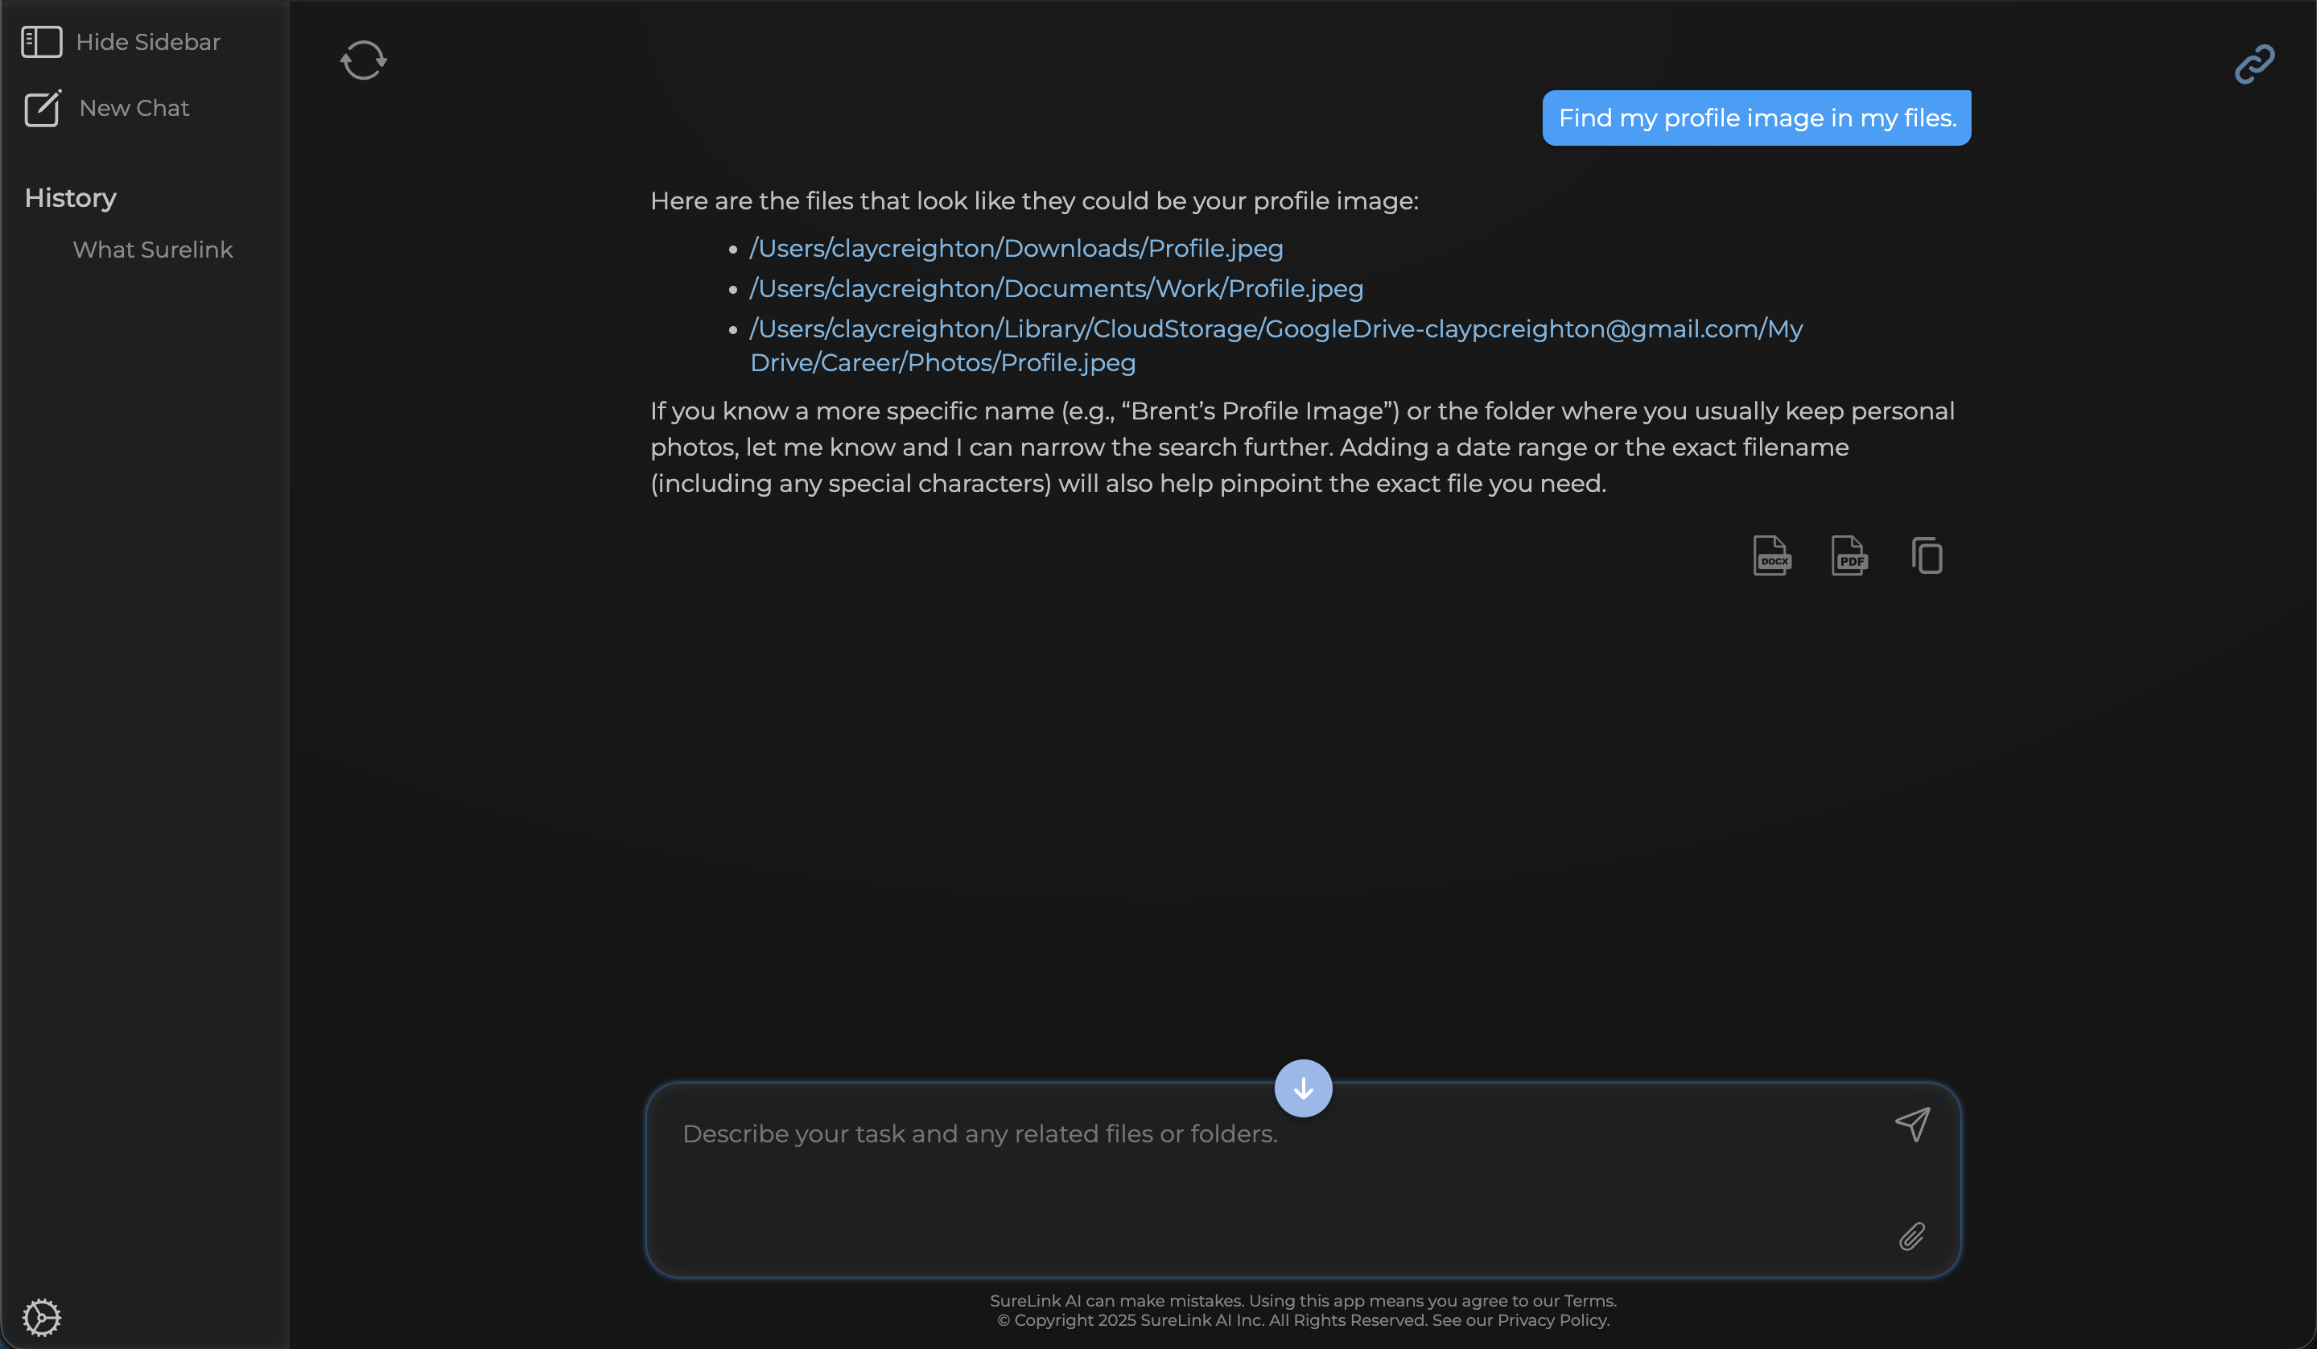
21. File Located
You can see that SureLink AI was able to find several links related to profile pictures. The first link was the image I was looking for which is great! I can then select the link to open the image or I can type in things like, Open the first link.' If the response is not what you are looking for, SureLink also provides instructions on how to get more detailed results. In this example, it suggests that I can point it to look at specific file names or folders. Since I got the image I needed, let's move onto another example prompt.
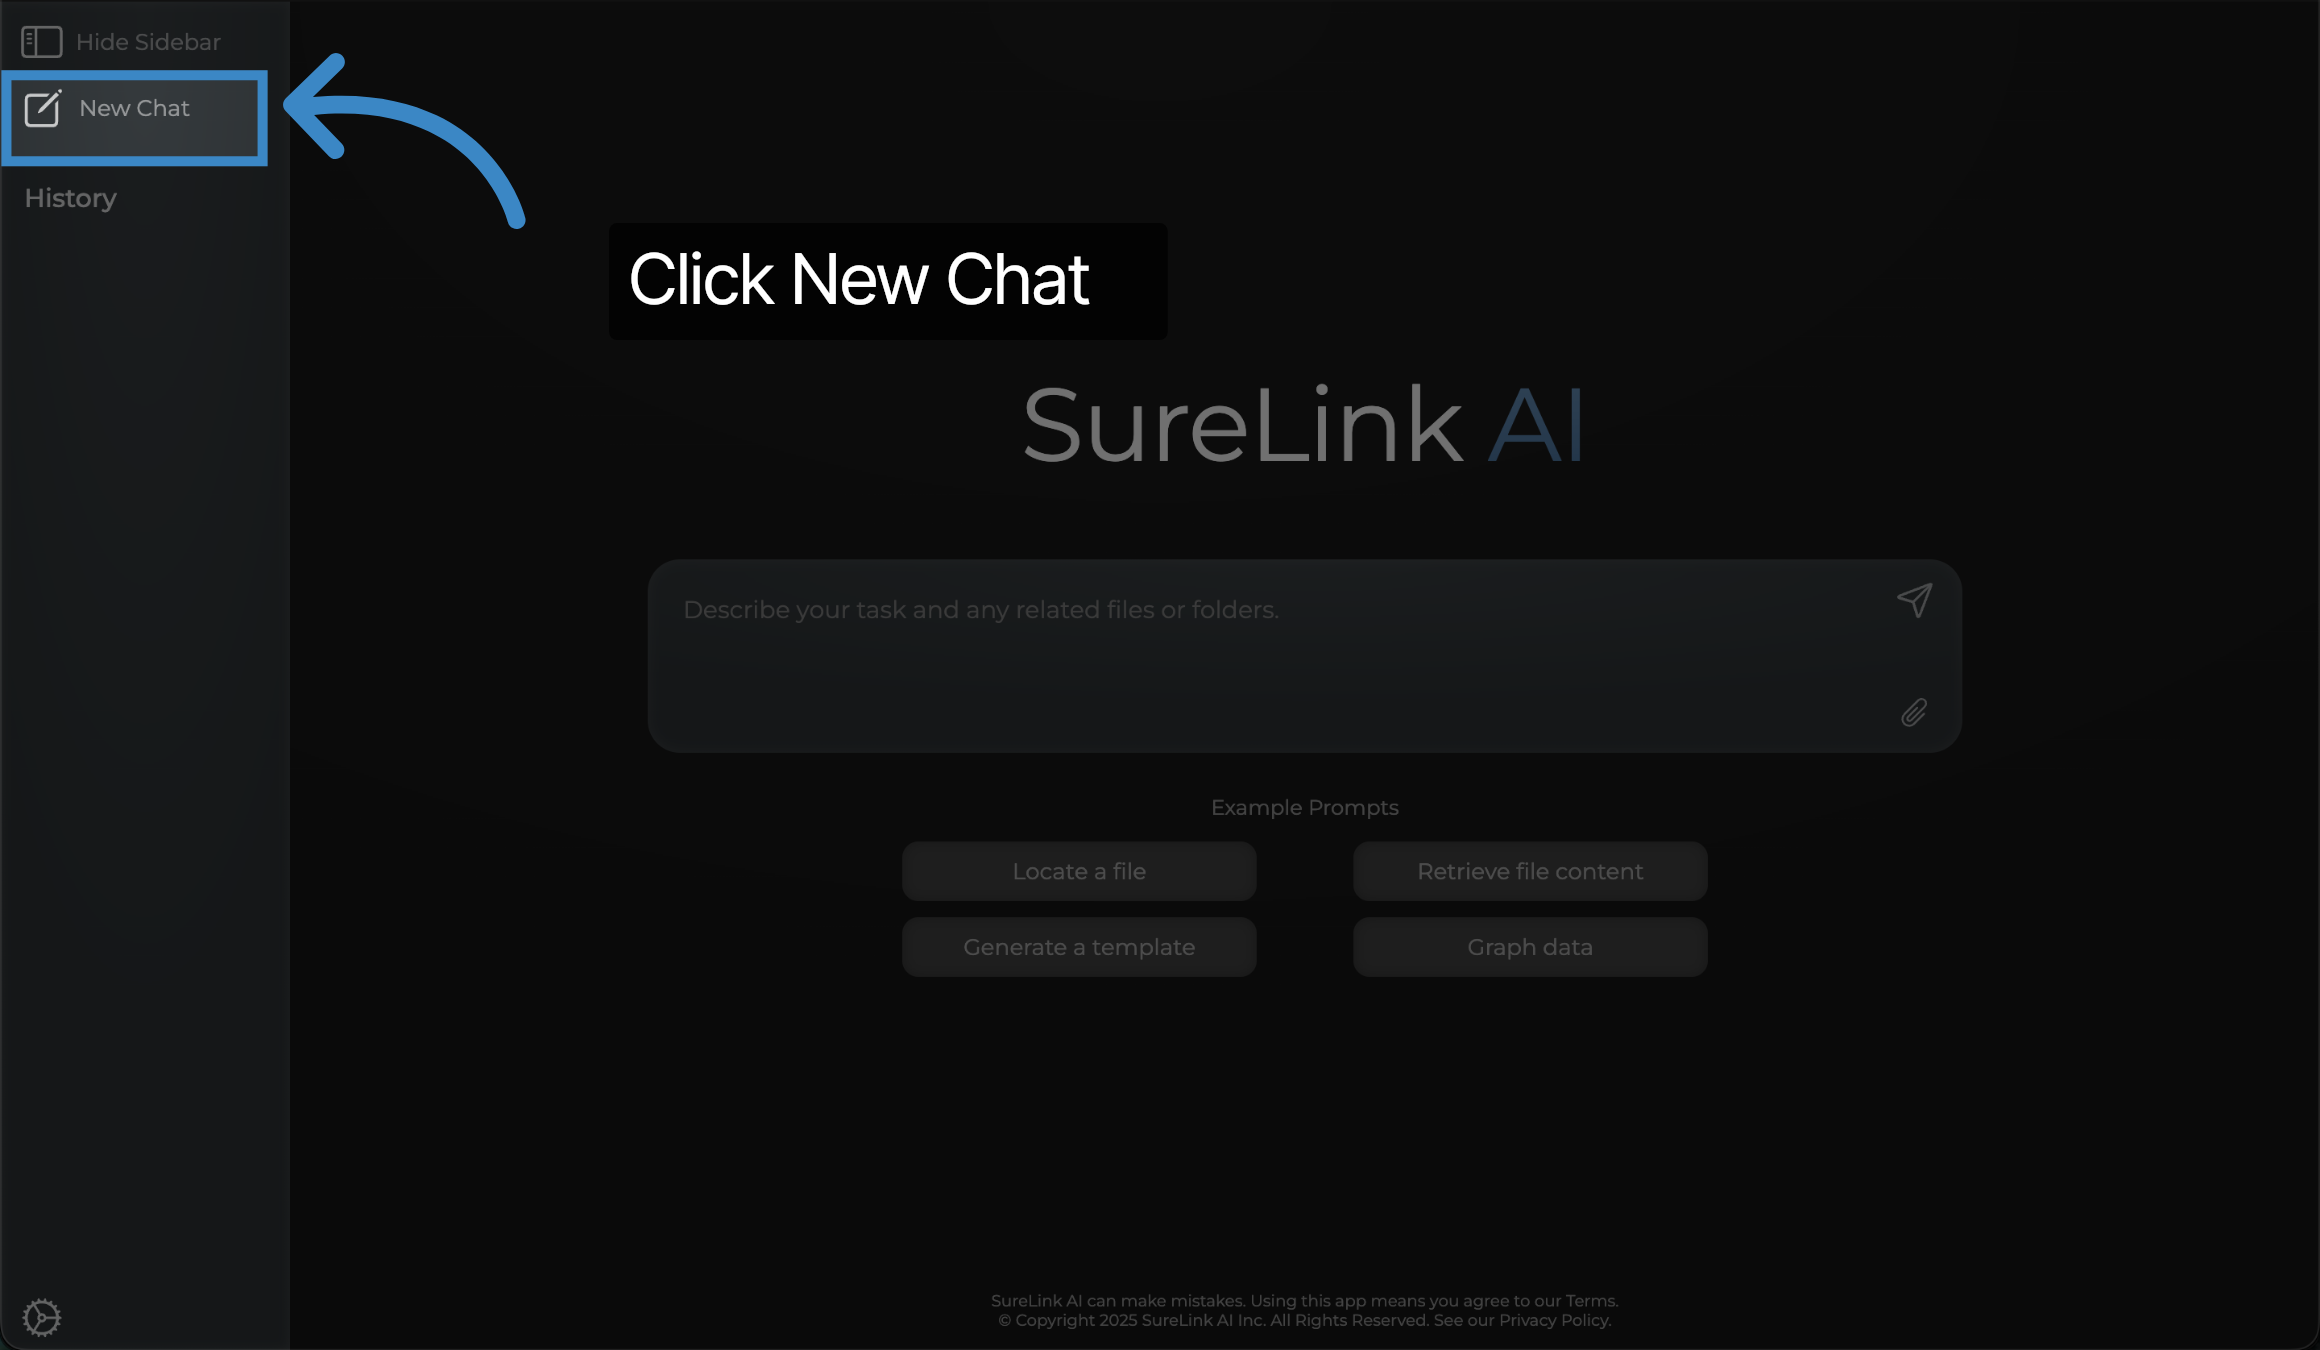
22. Click New Chat
Be sure to Click New Chat anytime that you switch topics. This will ensure the AI gives you the most accurate answers.
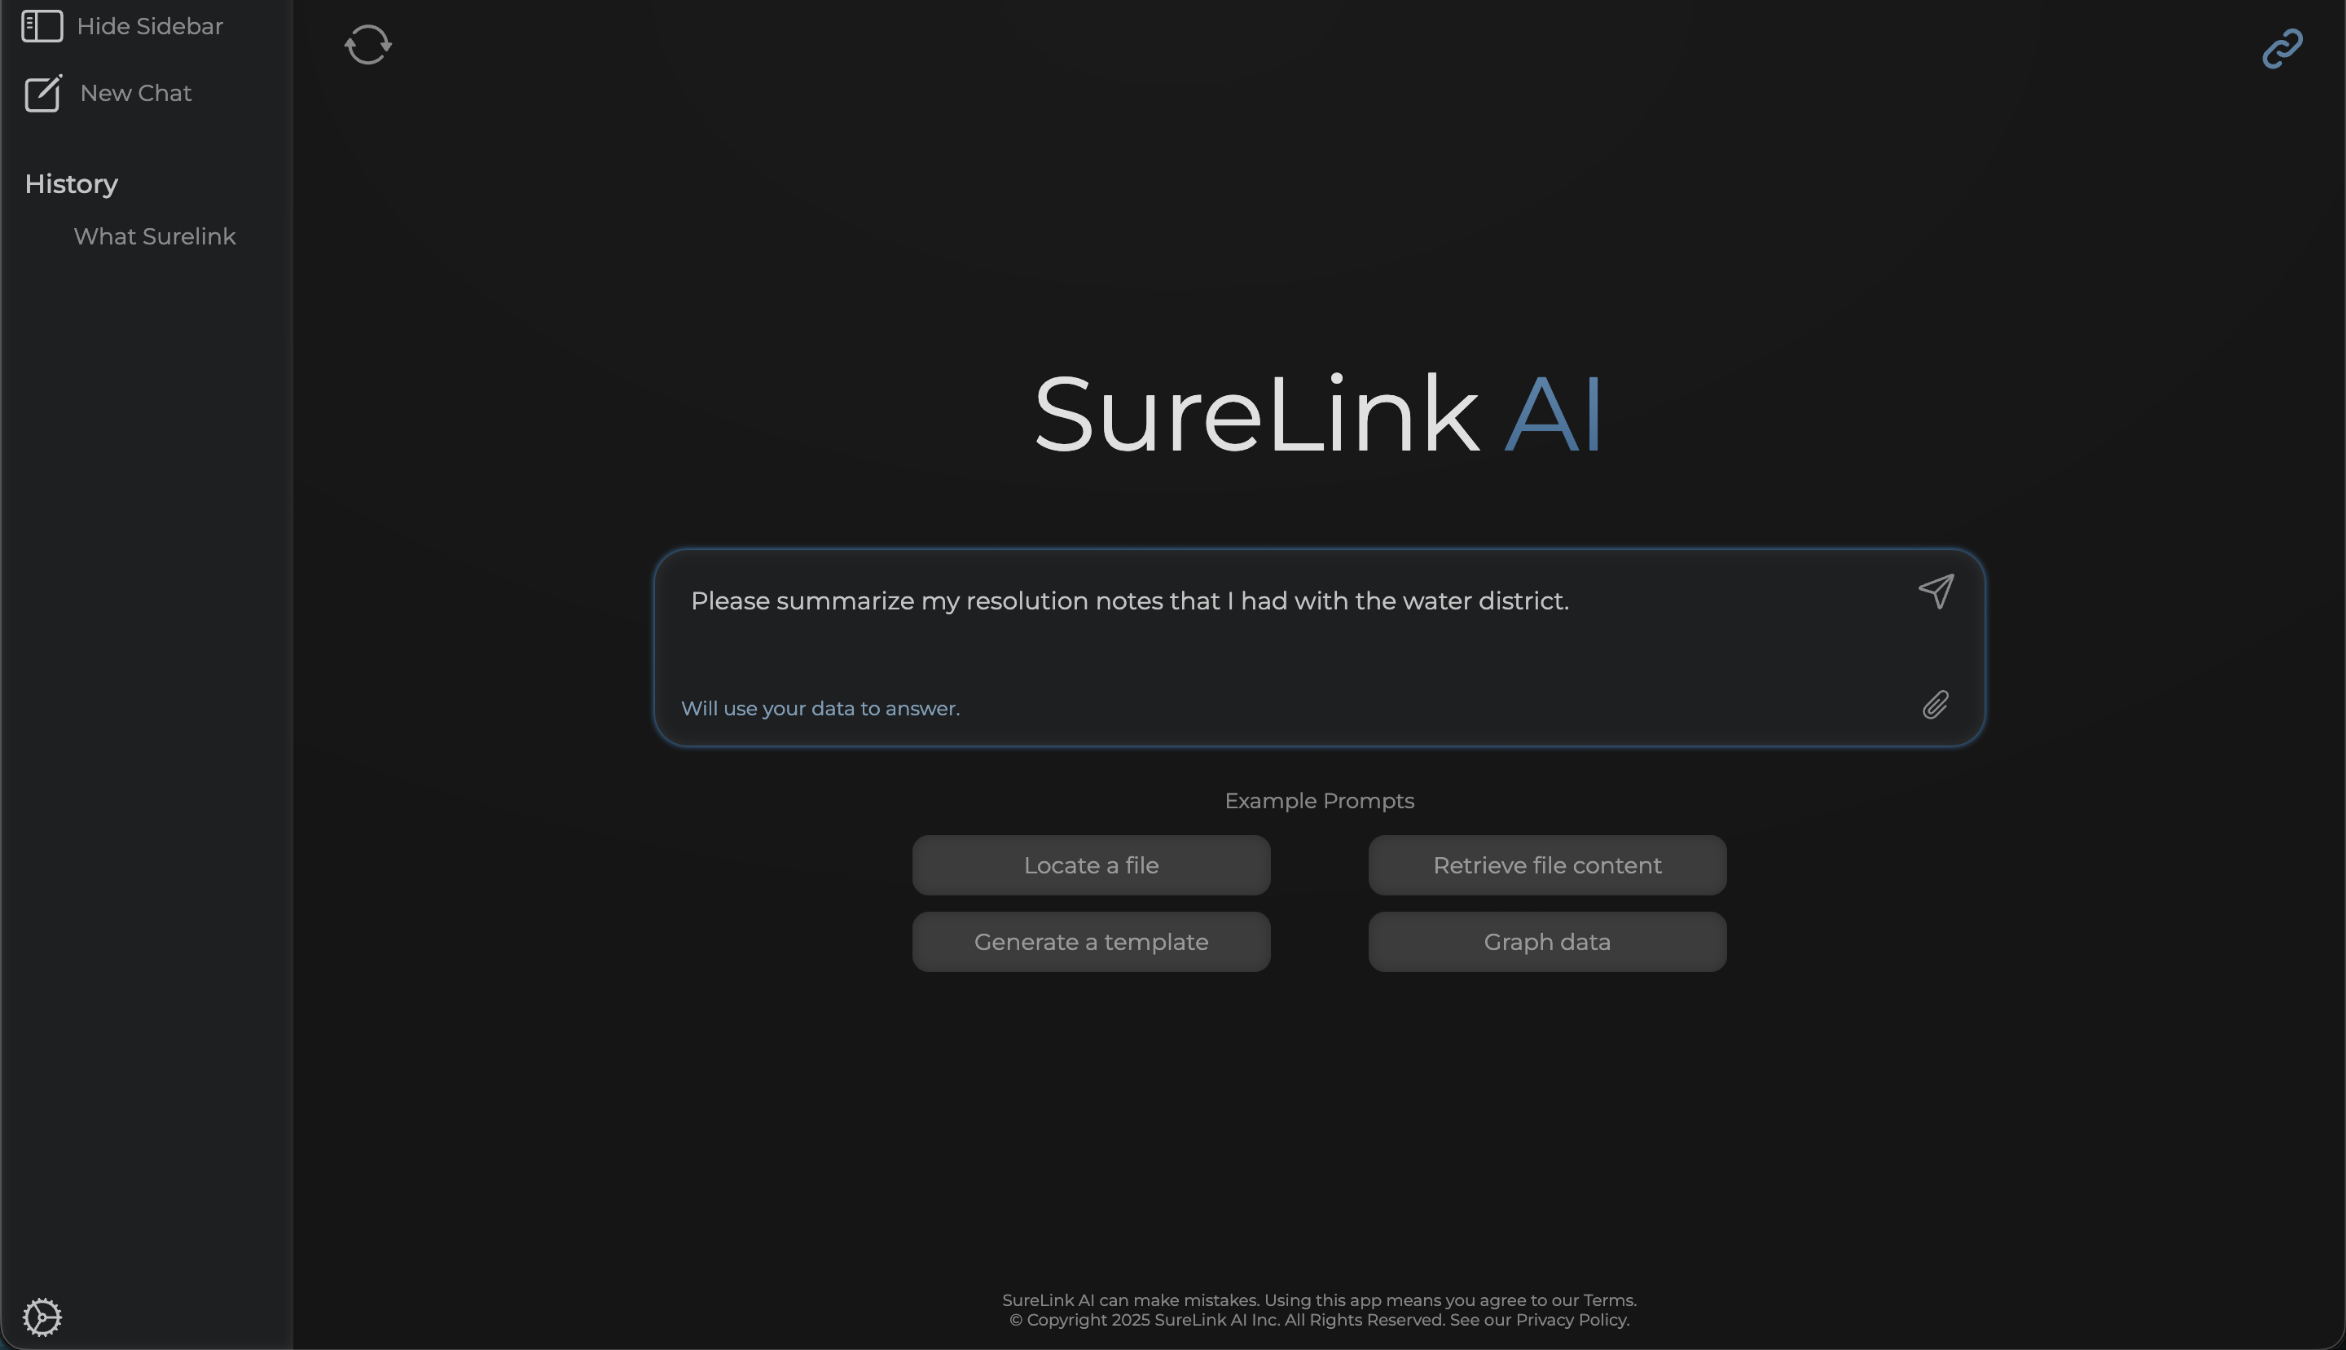
23. Retrieve File Content
For our next example, we want the system to not only find a file, but we will ask it to summarize content within the file. Let's ask it to summarize my resolution notes that I had with a water district and see what happens.
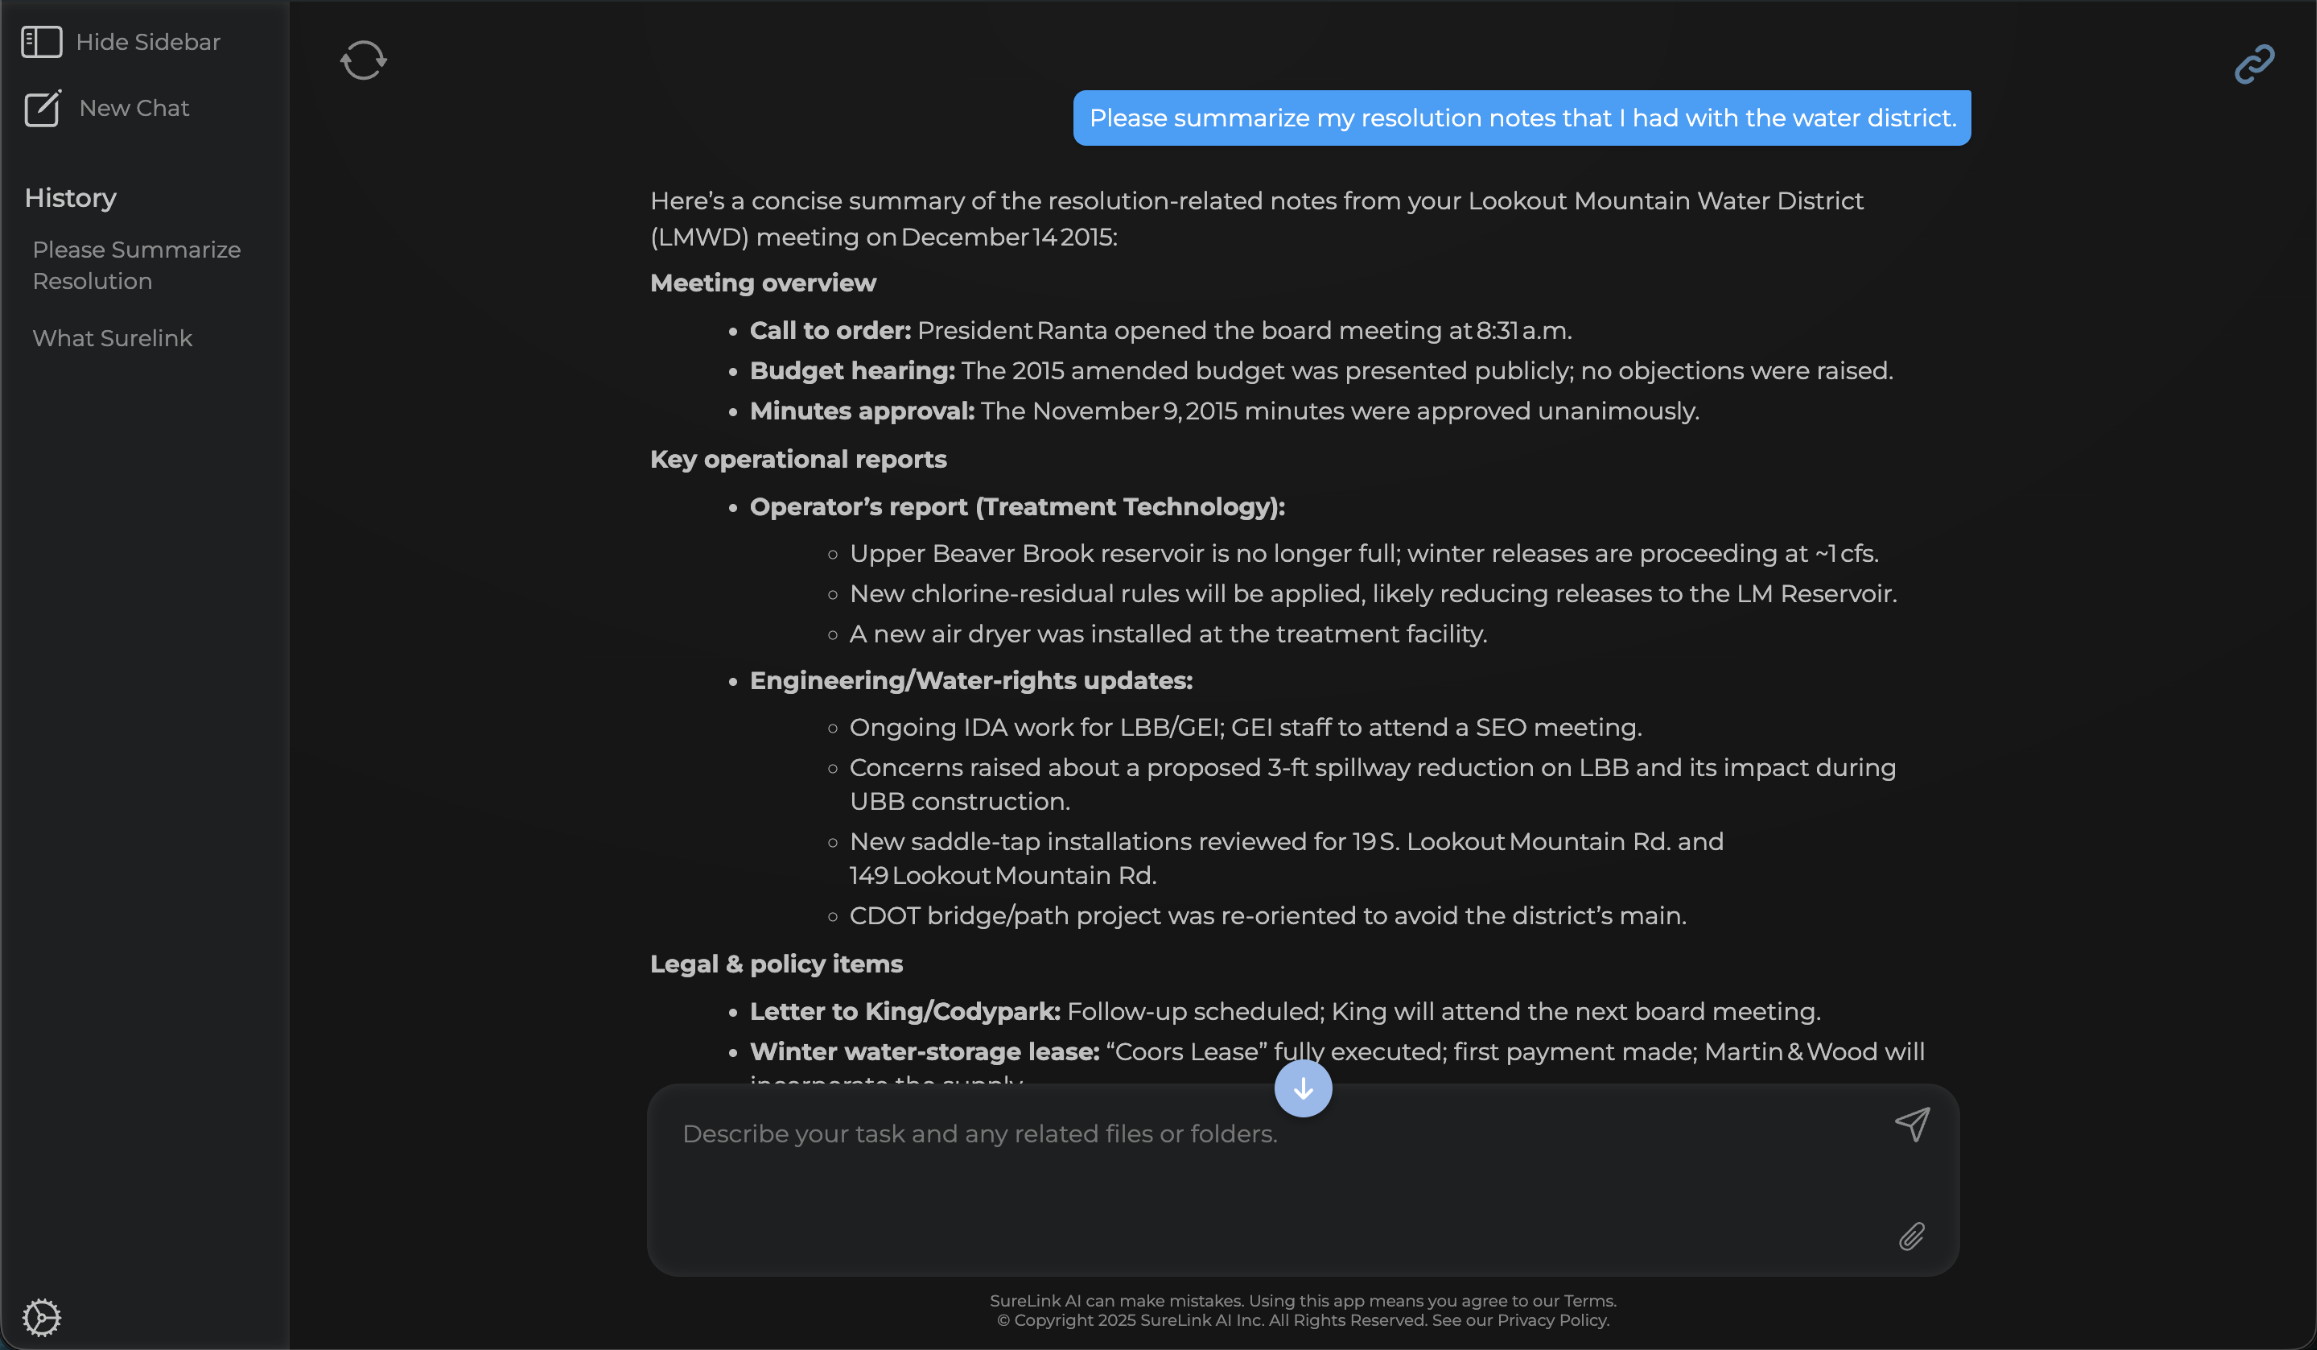
24. File Content Located
Perfect! It was able to locate the content and provide a useful summary of the resolution notes. You can see that it highlights key topics such as meeting overview, key operational reports, and Legal & policy items.
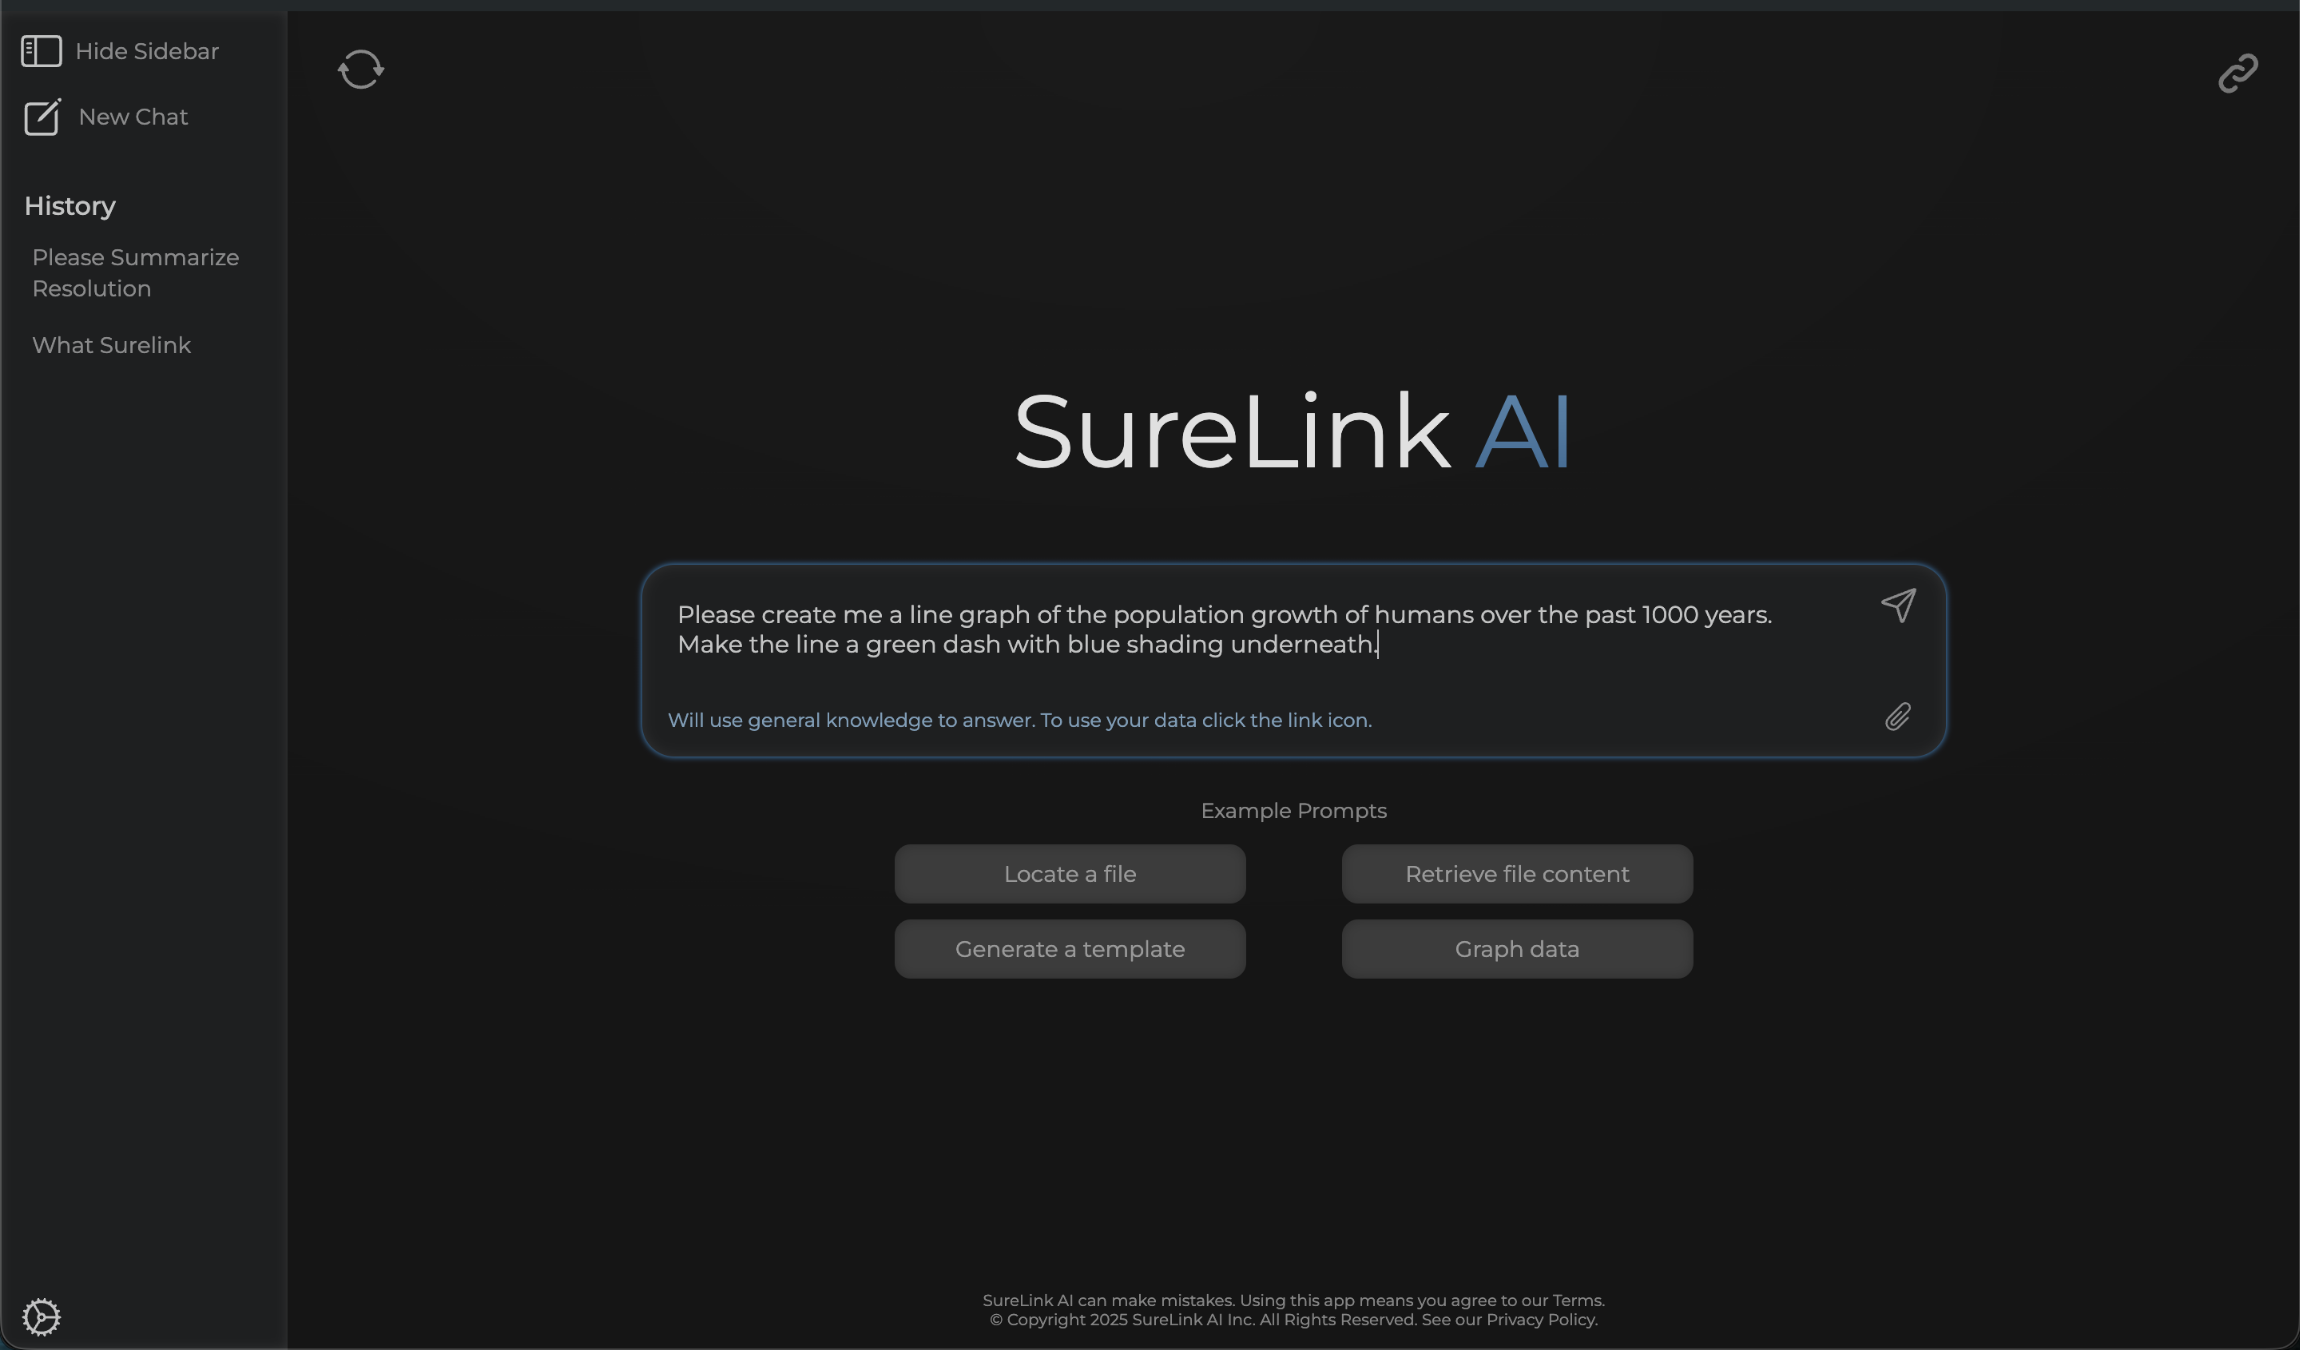
25. Graphing Prompt
Next up, let's try to create a graph using SureLink. In this example, I will turn off my linked data, which is located in the top right. I do not need my linked data because this is a general inquiry that does not require my data. I will ask the system to create me a line graph of the human population growth over the past 1000 years. I also added some specific instructions for how the graph should look. Let's see what happens!
26. Graphing Data
Ok great, it created the graph and followed my instructions! I can now copy and paste this graph into my powerpoint to get ready for my upcoming presentation.

27. Templates
Now that you are an expert in prompting, let's review how to generate new documents from SureLink using templates.
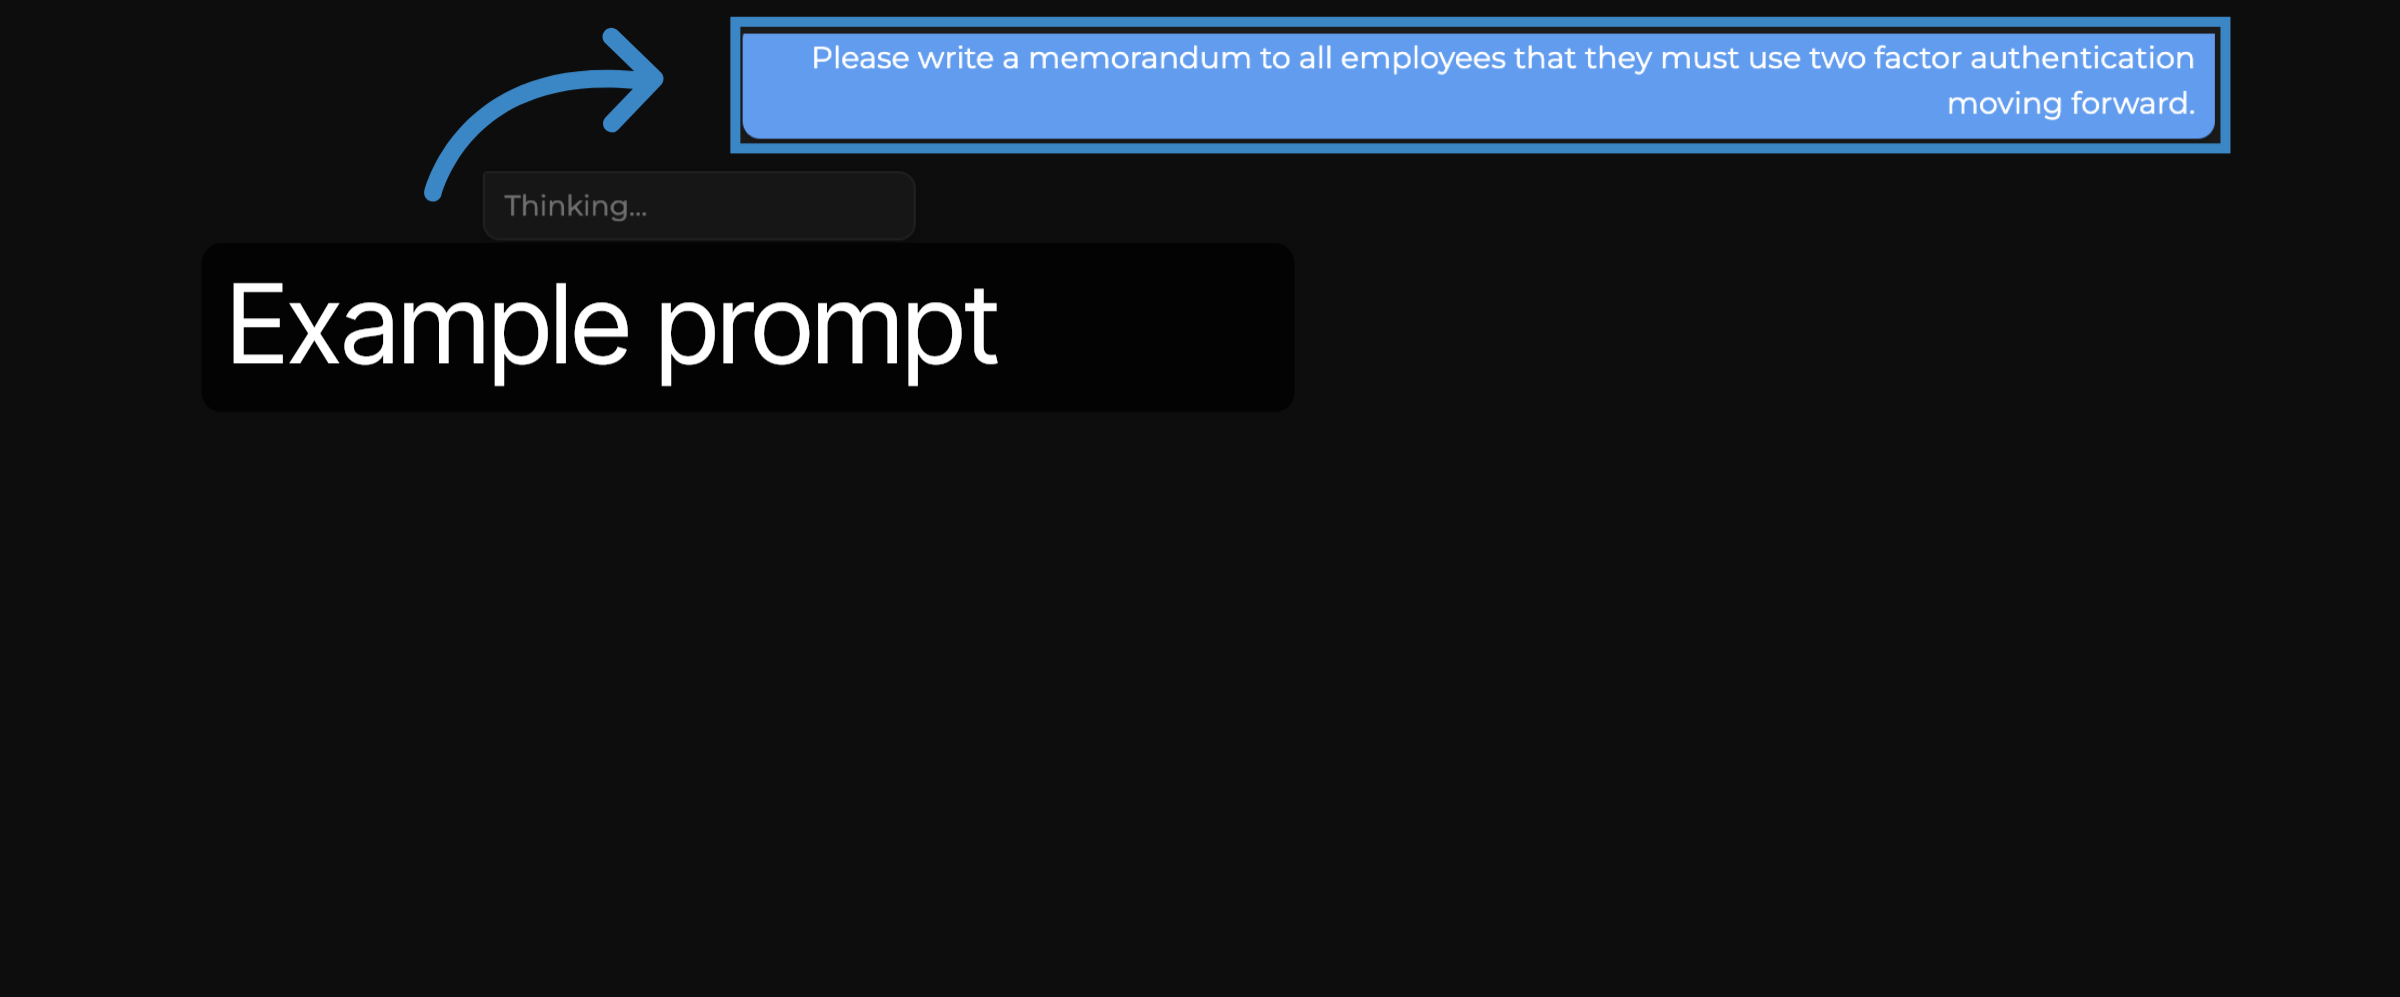
28. Example Prompt
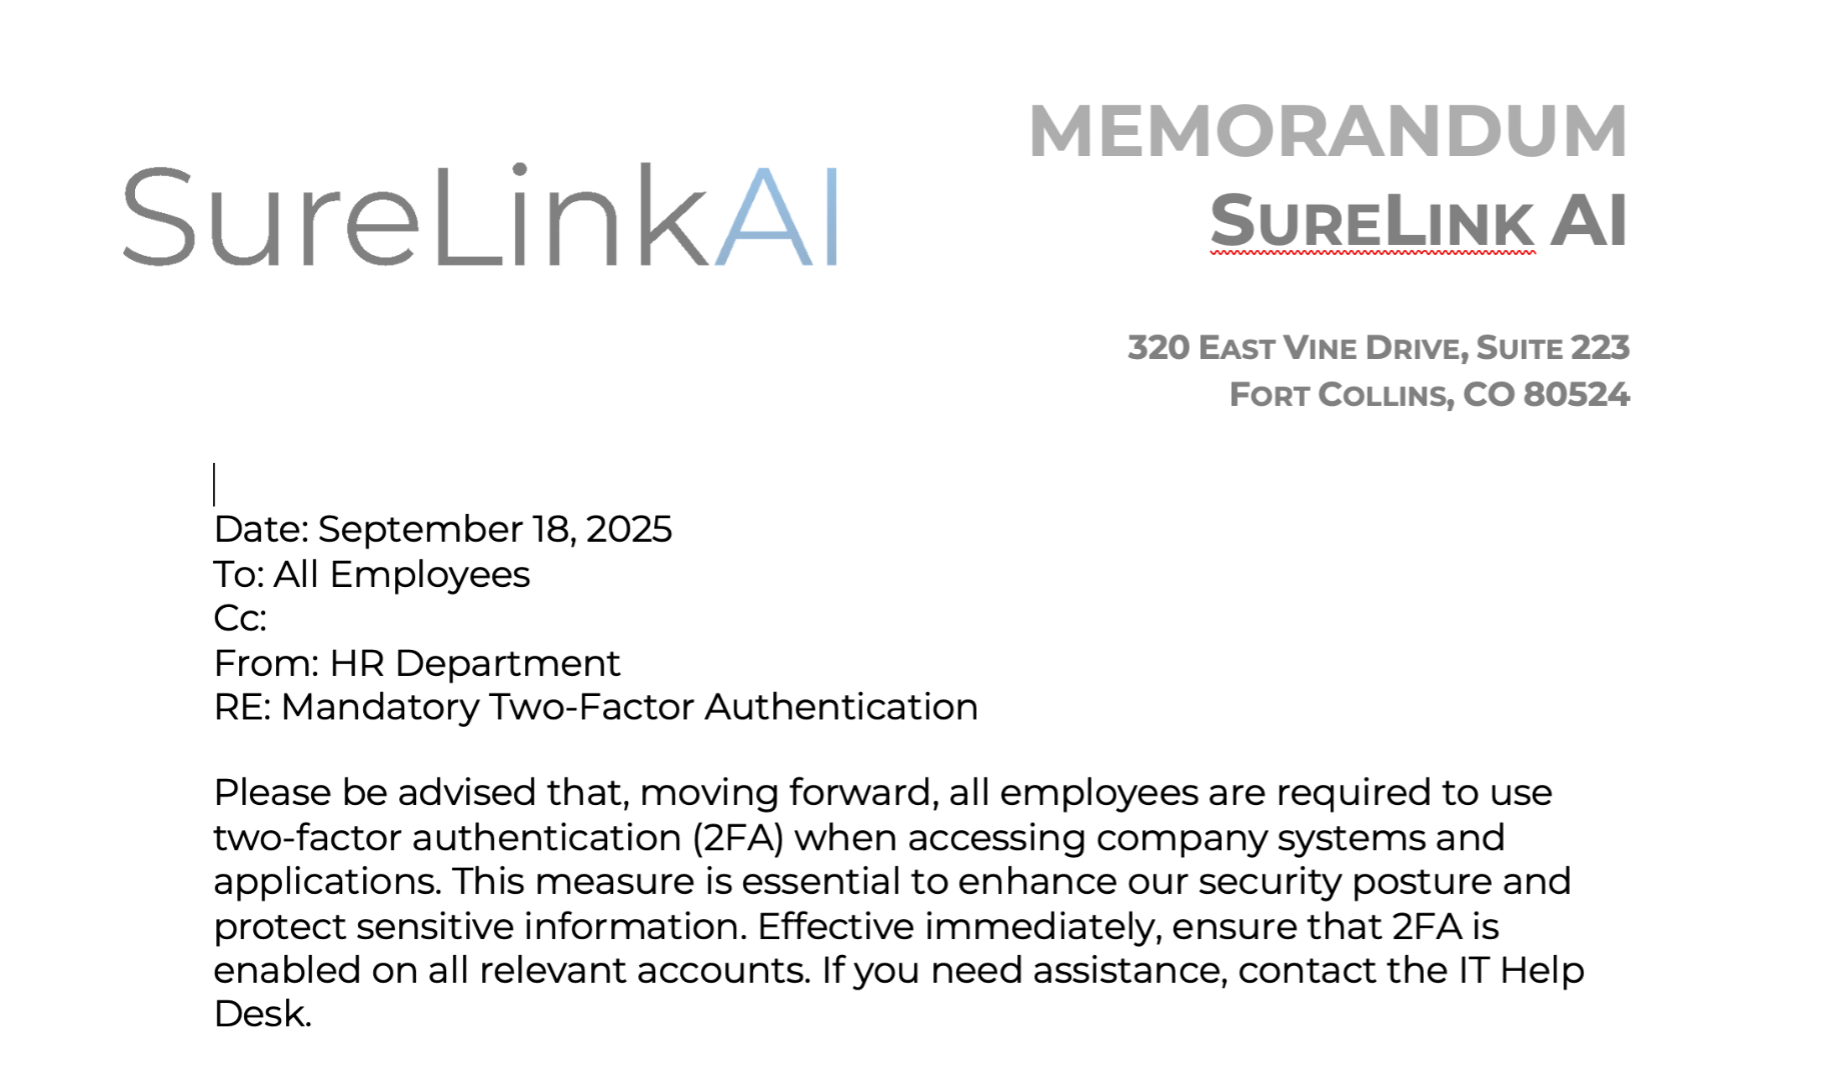
29. Template Document
This concludes the SureLink AI overview video.
We hope this gives you a good foundation for how to utilize the tool.
Thank you from the SureLink AI team.